This article describes how to manually align multiple scan data sets together in Cintoo, or to align scans and BIM model together if they are not in the same coordinate system.
Permissions: users with role including Upload or Delete Reality Data permission can use Manual Alignment Tools.
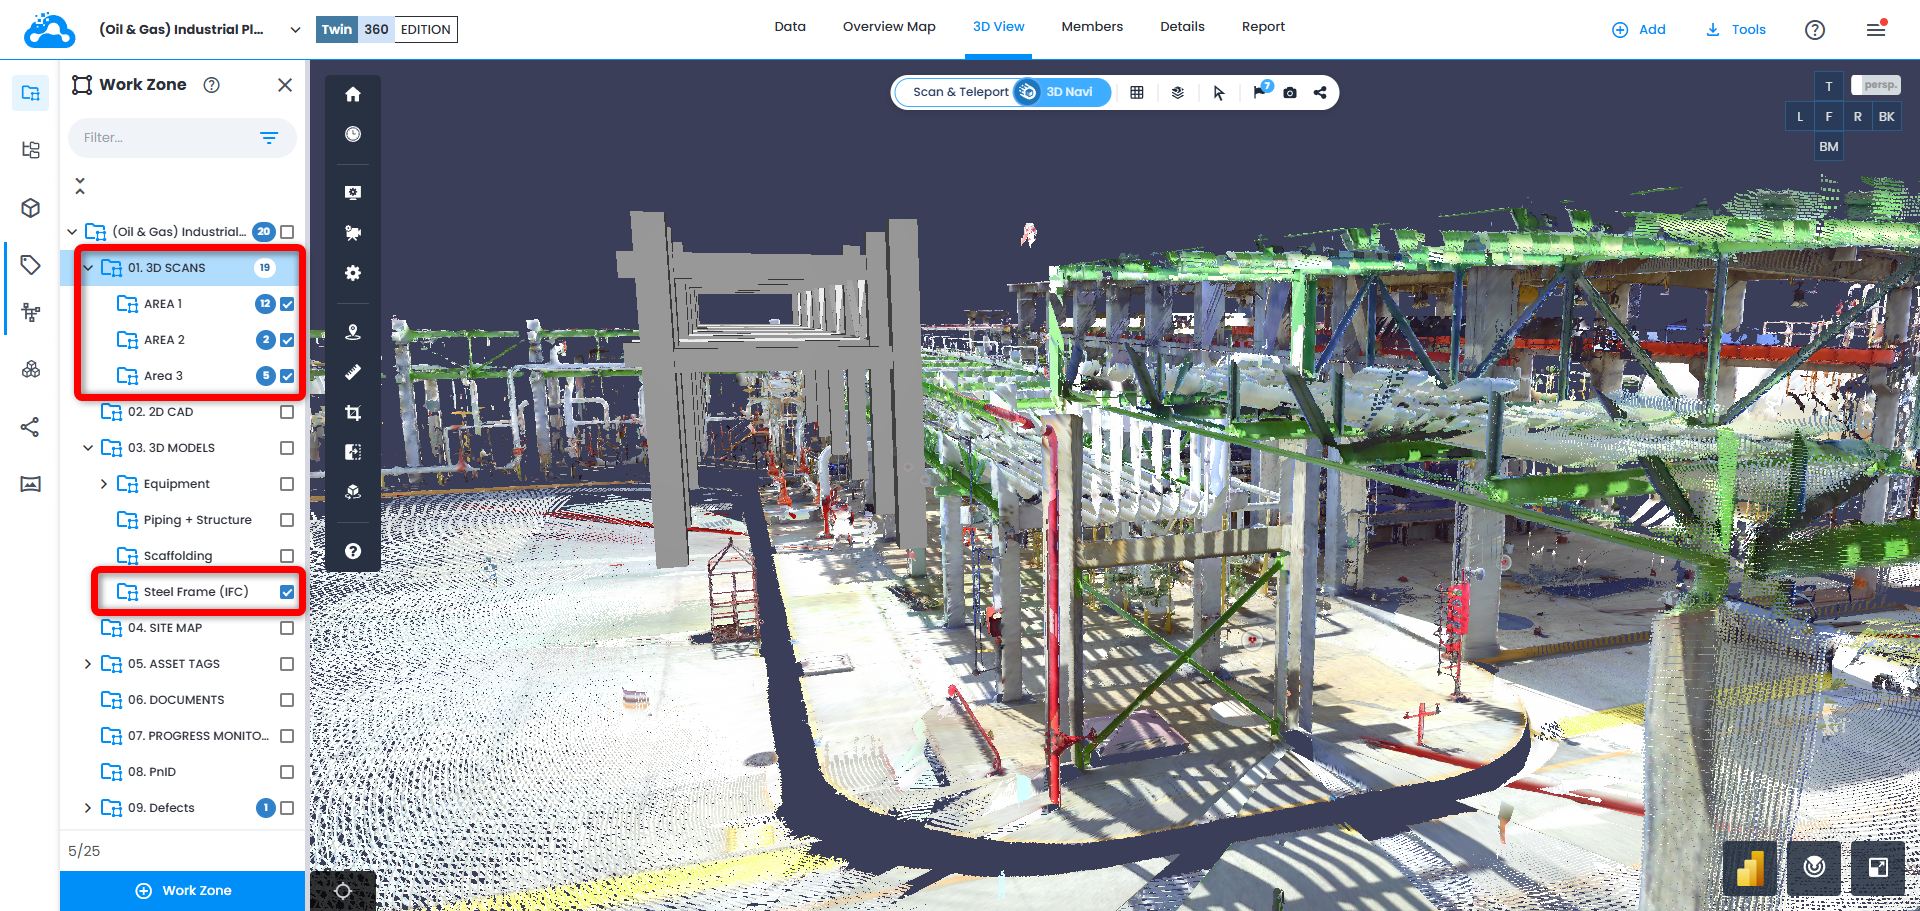
To align multiple scan data sets together, each set of scans must be organized into their own individual, separate work zones (see step 9 in these instructions).
1. In 3D View, make sure the work zones containing 3D data to be aligned are toggled on and 3D data is visible in the view.
2. Click Manual Alignment Tools icon in the left toolbar to open Alignment tool.
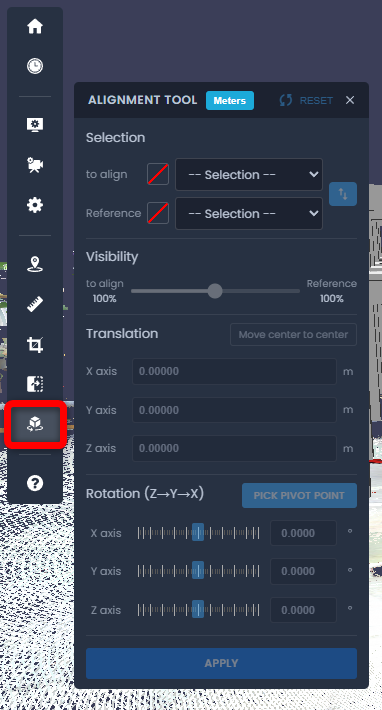
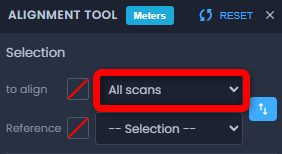
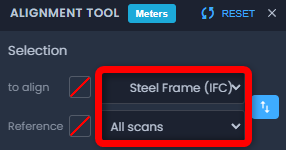
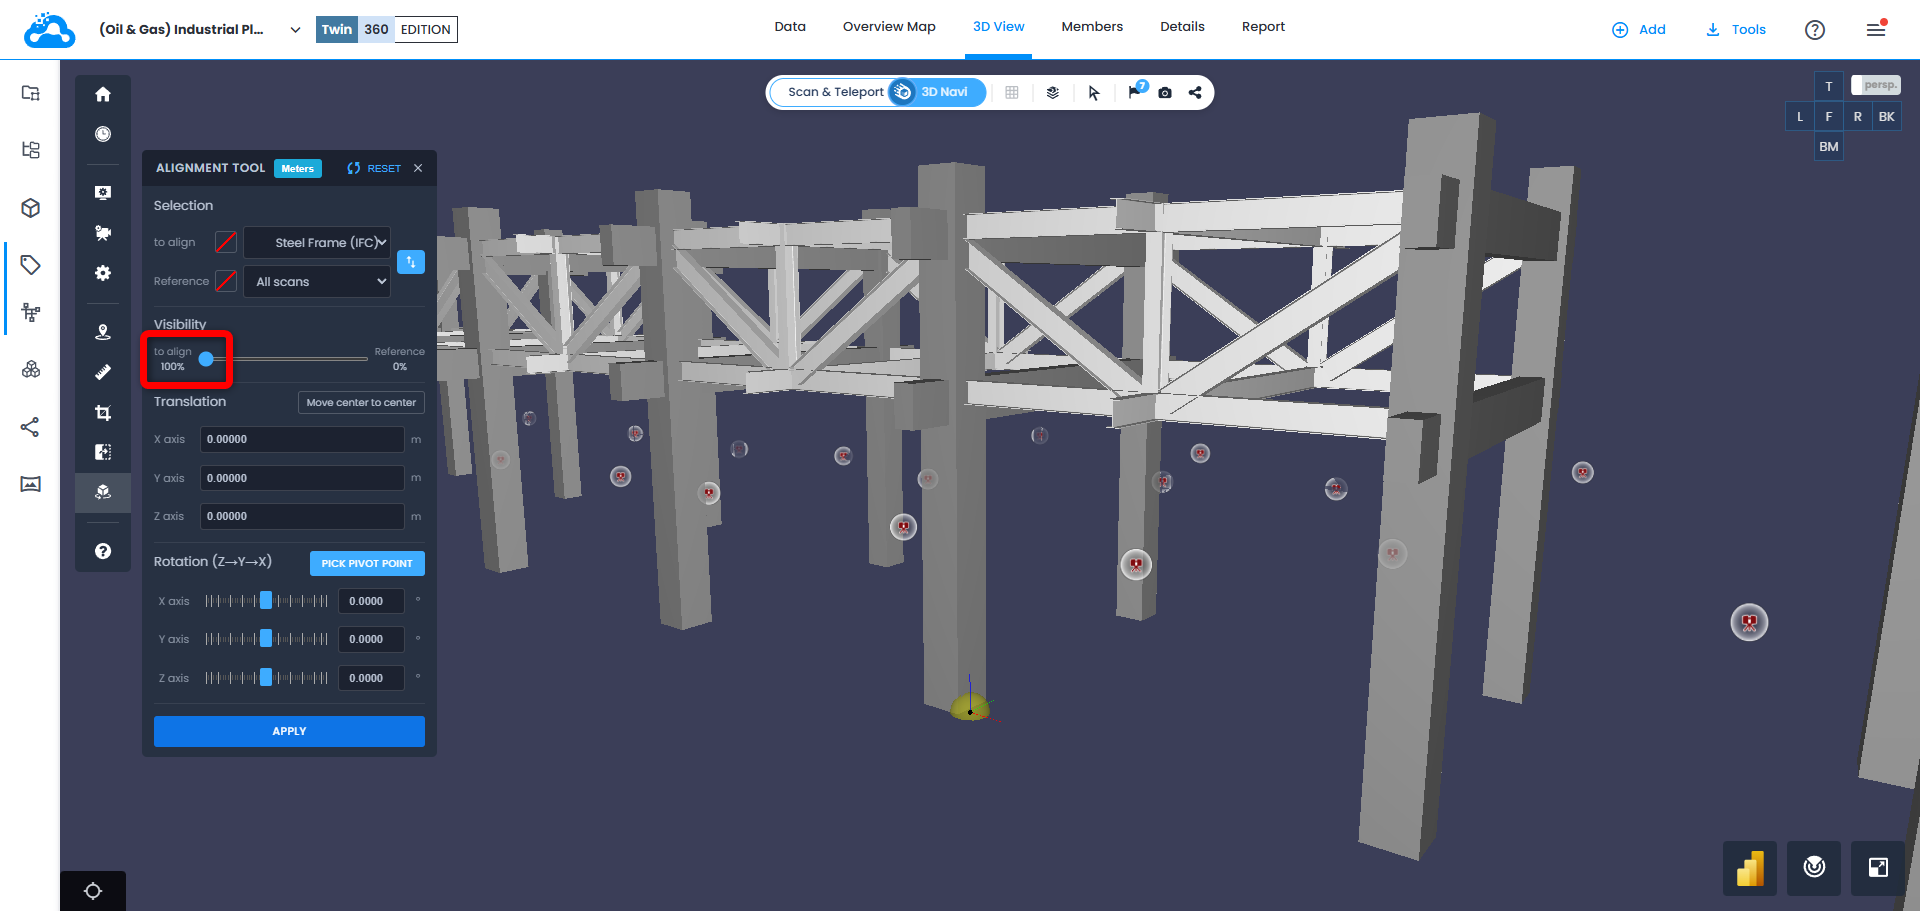
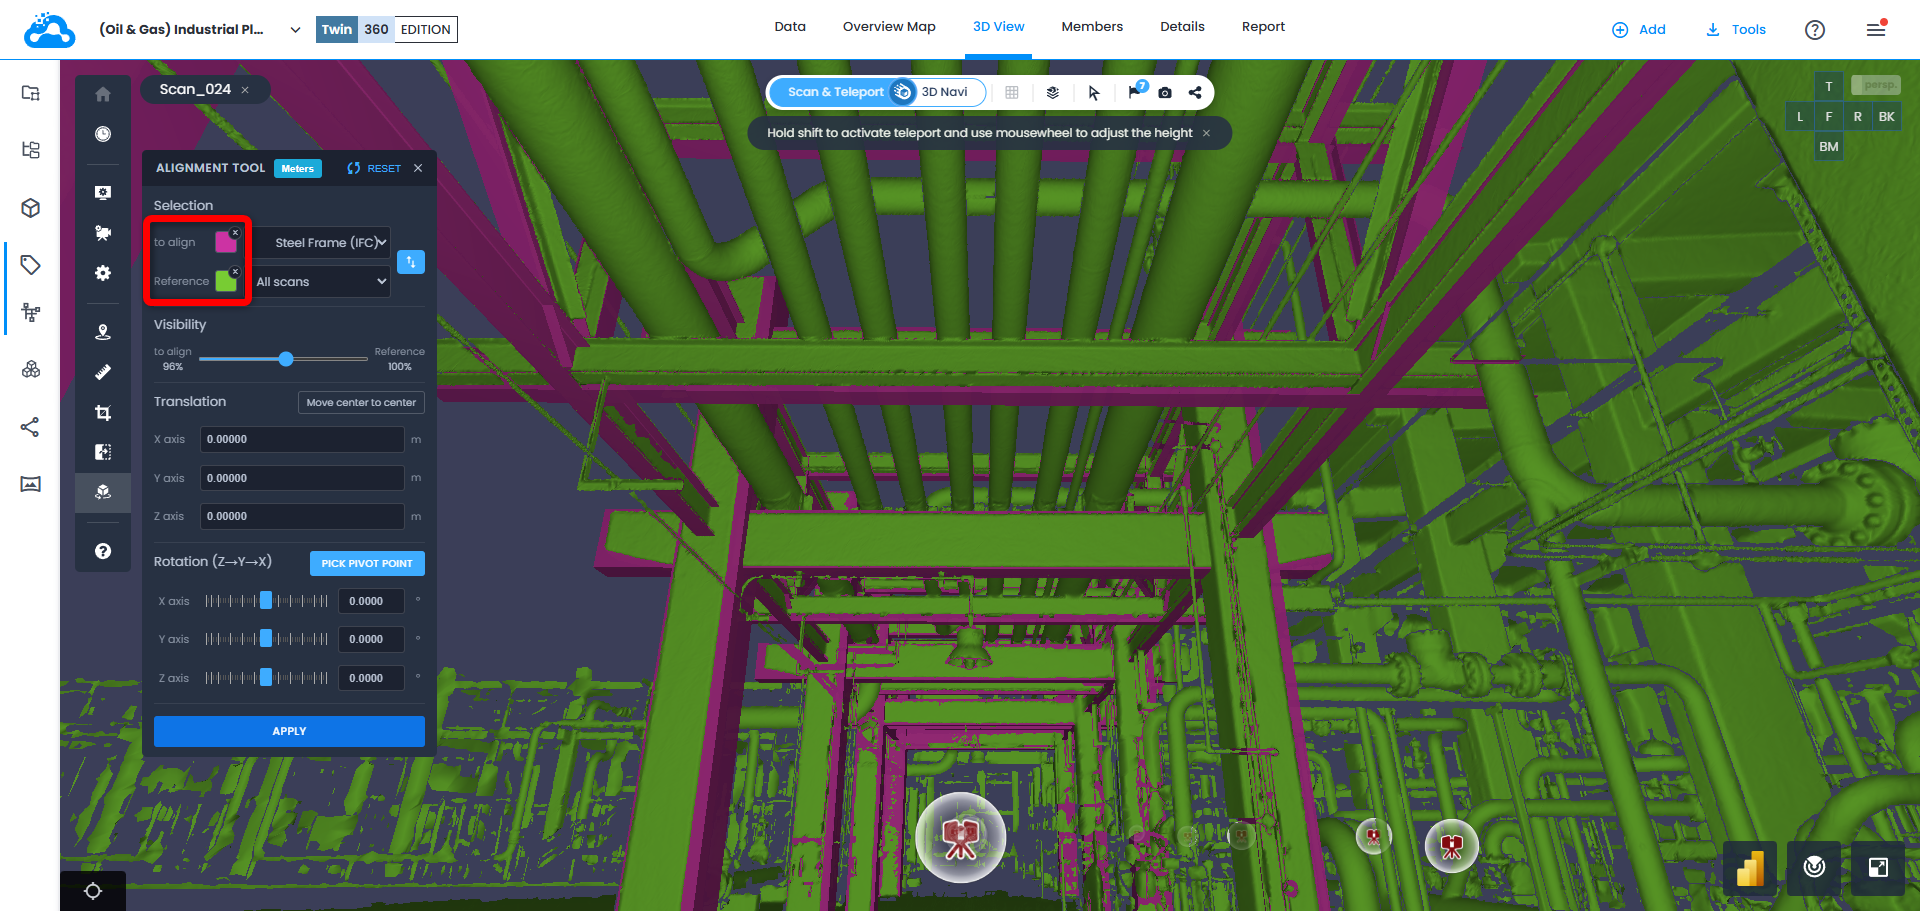
3. In To align field, select the dataset which the alignment transforms will be applied to.
- All scans applies the alignment modifications to all visible scan files in 3D View.
- All models applies the alignment modifications to all visible model files in 3D View.
- Selecting a specific work zone applies alignment modifications only to the files contained within the selected work zone.
4. In Reference field, select dataset to use as a reference. Any alignment transformations made will not affect the data assigned in Reference field.
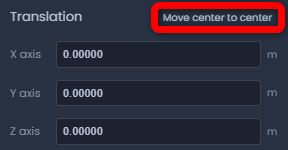
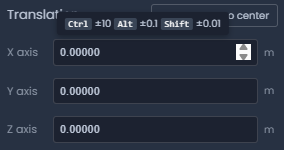
5. To move dataset assigned in To align field, modify X-Axis, Y-Axis, and Z-Axis values in Translation section.
Move center to center option translates dataset assigned in To align field composing geometrical central points of two datasets.
Type numeric values into text fields, or hover the mouse cursor above each text field and use the mouse scroll wheel to increase or decrease the values:
- Holding the CTRL key and scrolling the mouse wheel up/down adjusts in increments of +/- 10
- Holding the ALT key and scrolling the mouse wheel up/down adjusts in increments of +/- 0.1
- Holding the SHIFT key and scrolling the mouse wheel up/down adjusts in increments of +/- 0.01
6. To rotate the data assigned in To align field, click Pick Pivot Point, select a location on the data to use as rotation pivot point, and adjust X-axis, Y-Axis, and Z-Axis sliders, or type in numeric values in the text field.
- Hover the mouse cursor above each text field and use the mouse scroll wheel to increase or decrease the values.
- Re-select the pivot point at any time and select various scan positions to view the rotation adjustment.
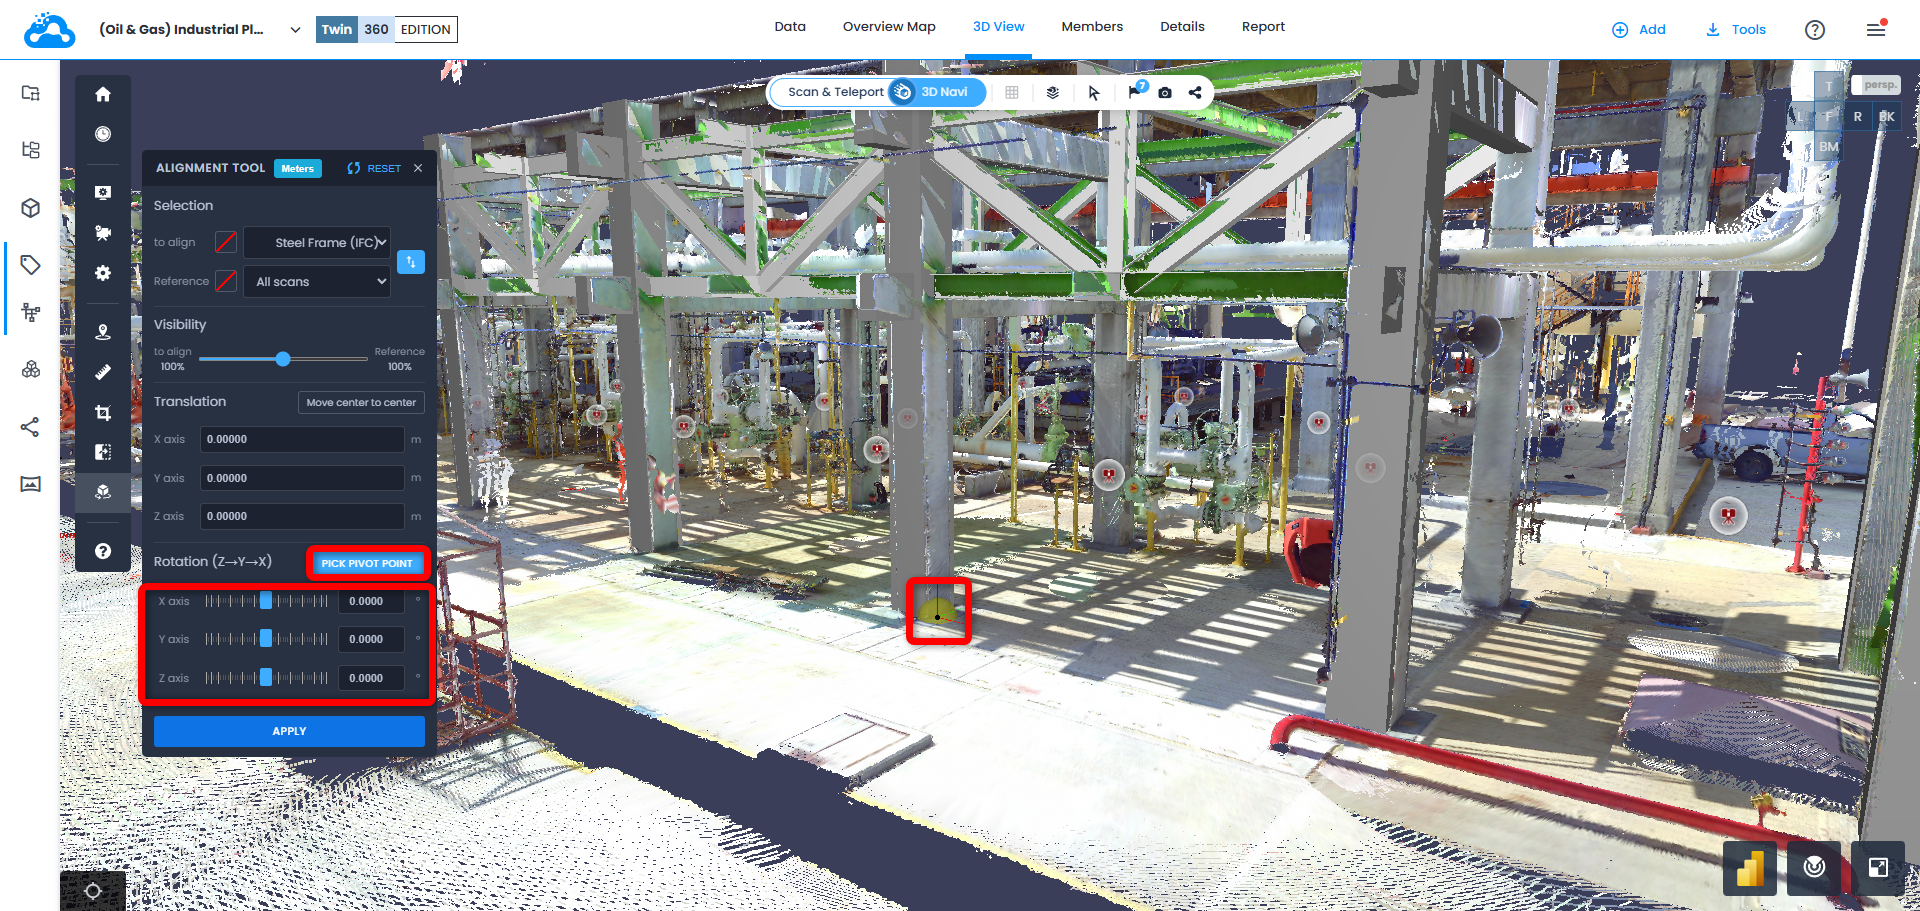
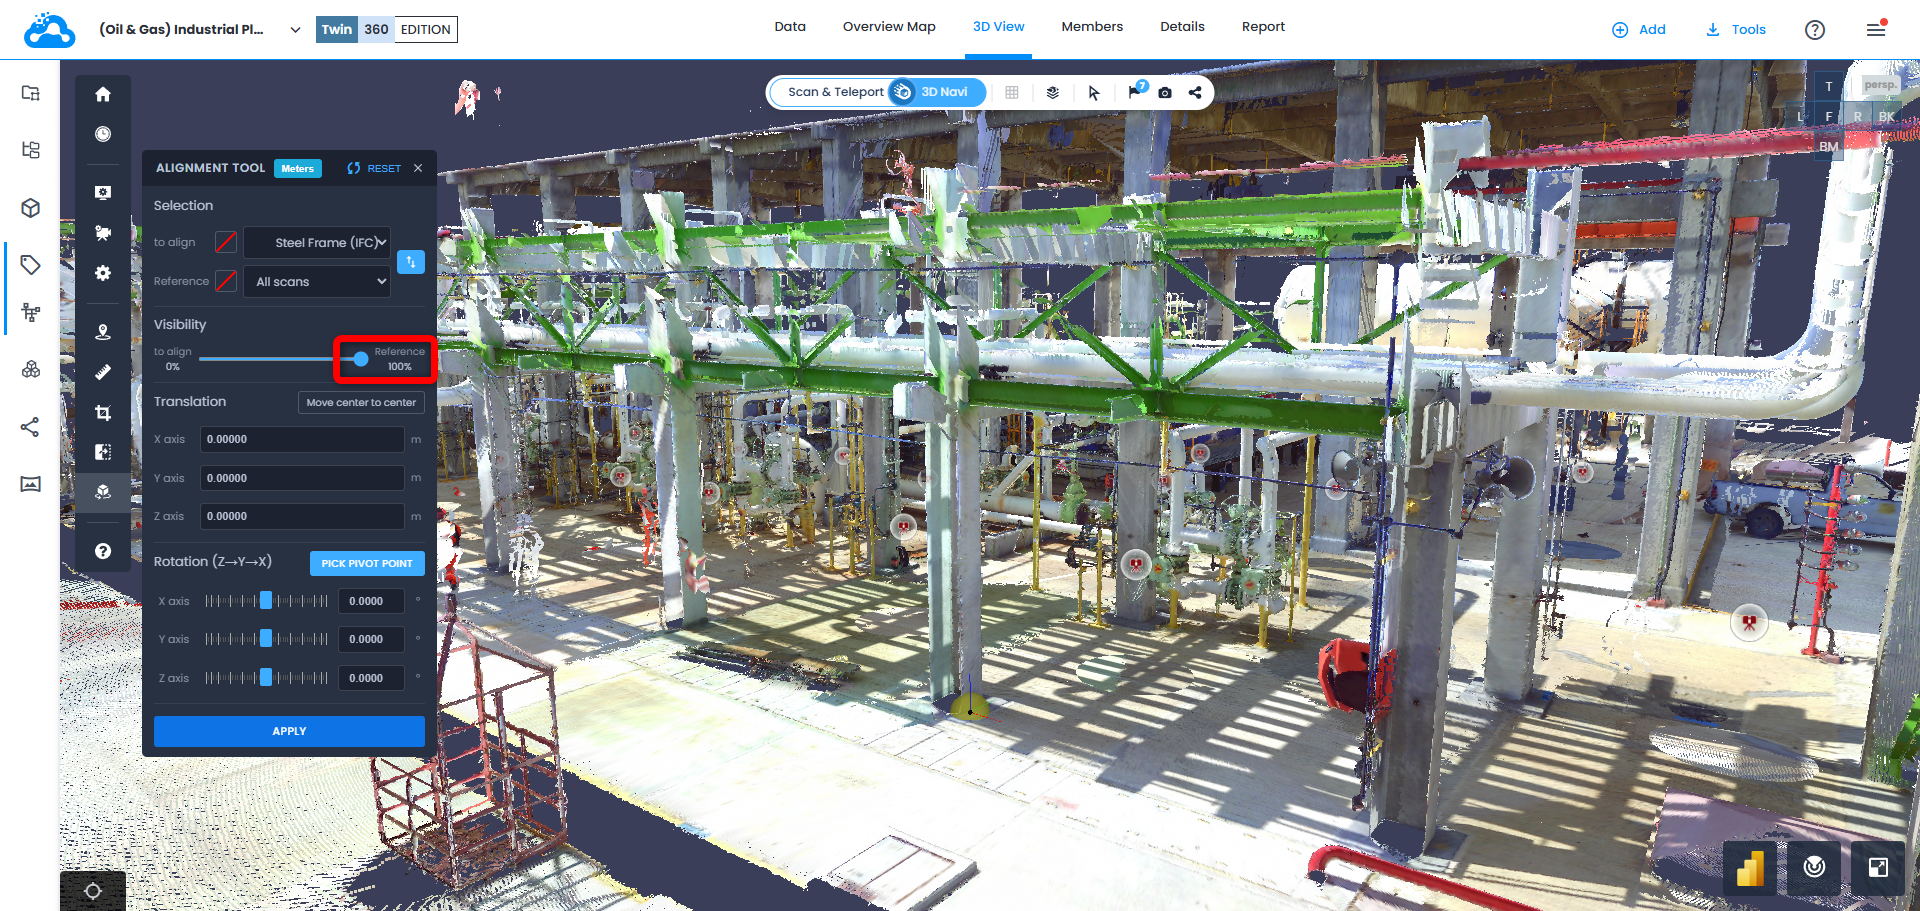
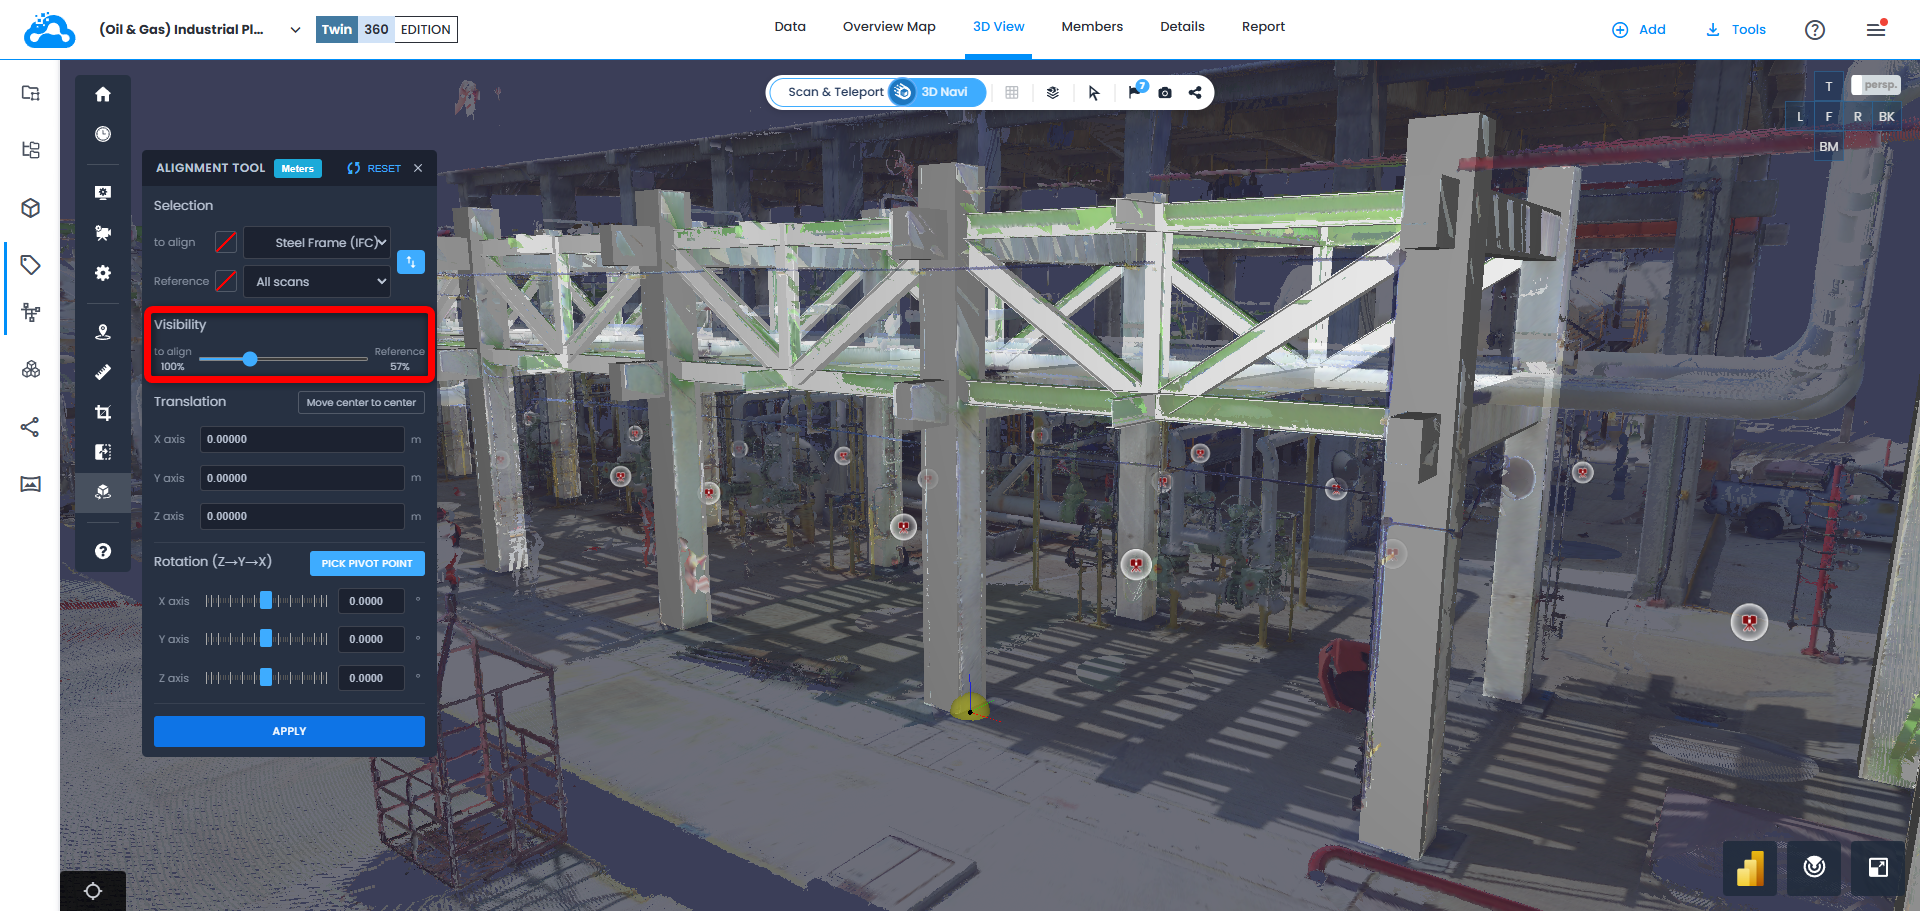
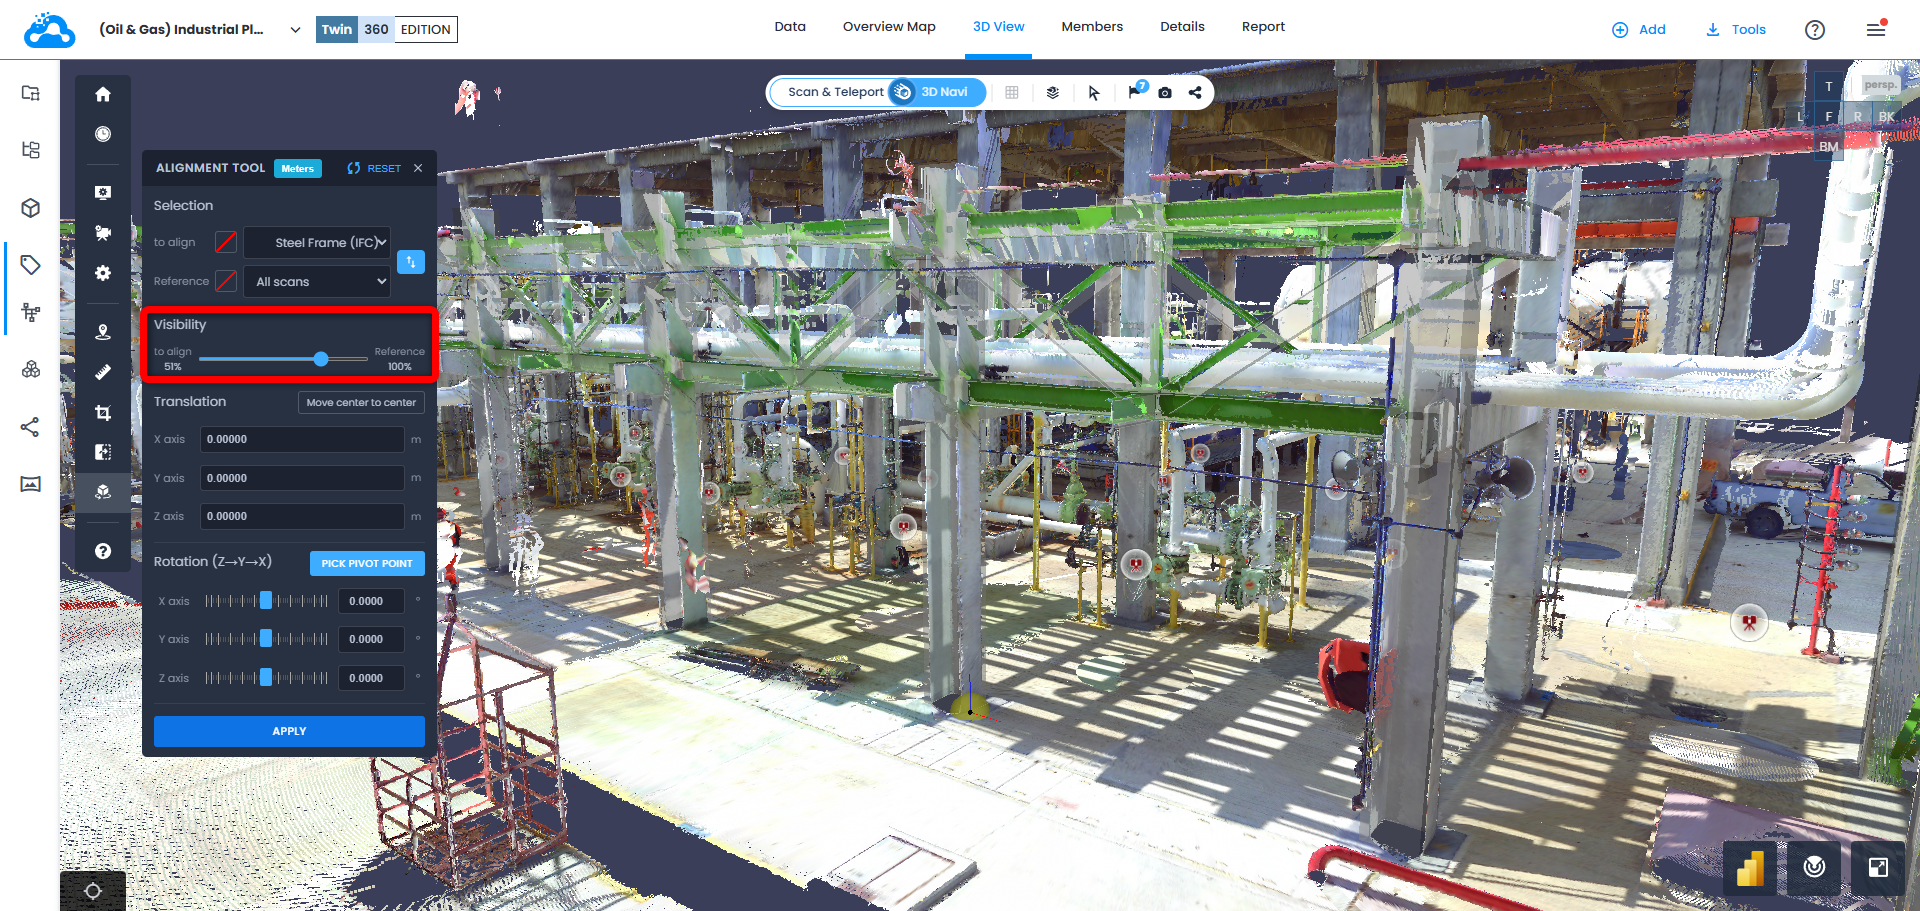
7. Use Visibility slider to adjust the opacity/transparency of each data set and visually check the alignment.
- During the alignment process, navigation in the scene can be in 3D Navi mode or in Scan&Teleport Mode (3D RGB or 3D Surface display mode) to get a more accurate visualization.
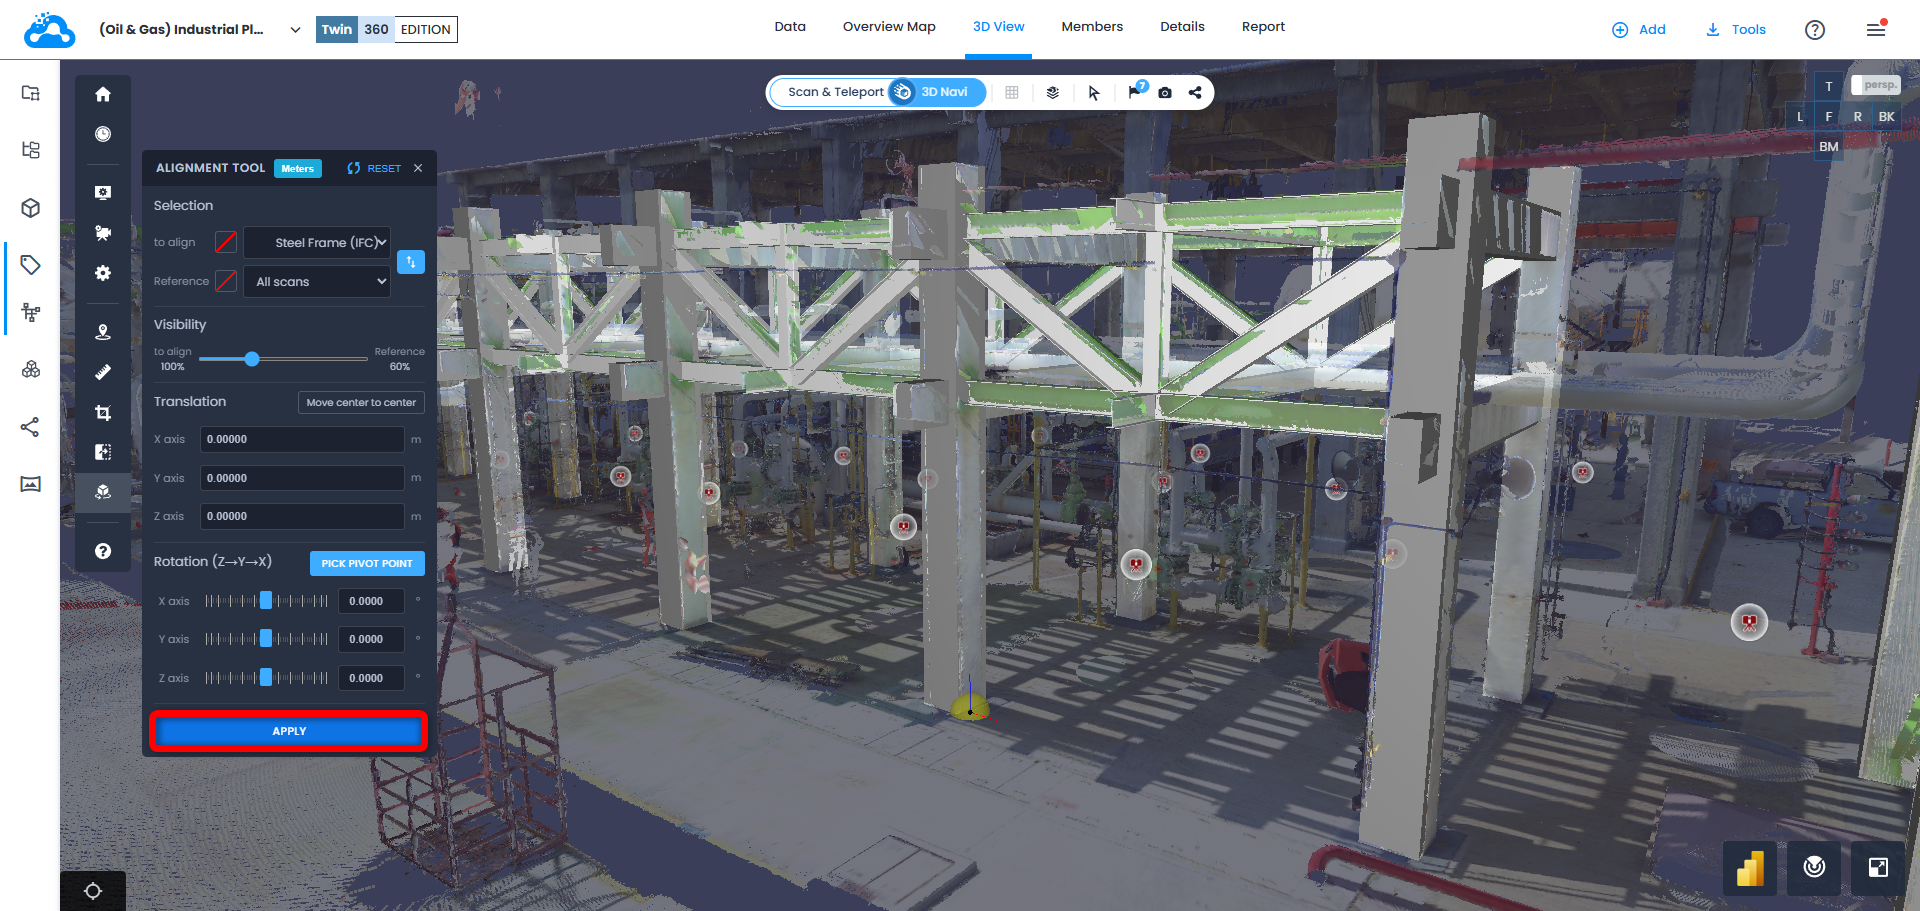
8. Once the alignment is satisfactory, click Apply to save it.
Warning: alignment cannot be undone once you click Apply to save it. To reverse the alignment remember the values applied to apply them with a different sign.
If any alignment transforms were applied to scan data, this transformation will carry over and be applied when downloading and exporting scans from Cintoo as a point cloud (RCP, RCS, E57).
9. To align multiple scan data sets together, assign work zone with scans to align in To align field, and assign a work zone folder with scans to use as a reference in Reference field.
10. Follow the same instructions as steps 5-8 above to align the scans together and save the alignment.
During the alignment process, color overrides can be applied to the data assigned in the To align and Reference fields for a more accurate visualization.
Was this article helpful?
That’s Great!
Thank you for your feedback
Sorry! We couldn't be helpful
Thank you for your feedback
Feedback sent
We appreciate your effort and will try to fix the article