This article describes process of adding users and groups to a Cintoo project, and managing their access afterwards.
This applies to Account Owner and Administrator too. Only the Project Owner can add members on any work zone.
TABLE OF CONTENTS
Members List
Open a project and go to Members tab. Page lists everyone who has access to the project, with Project Owner shown under page title.
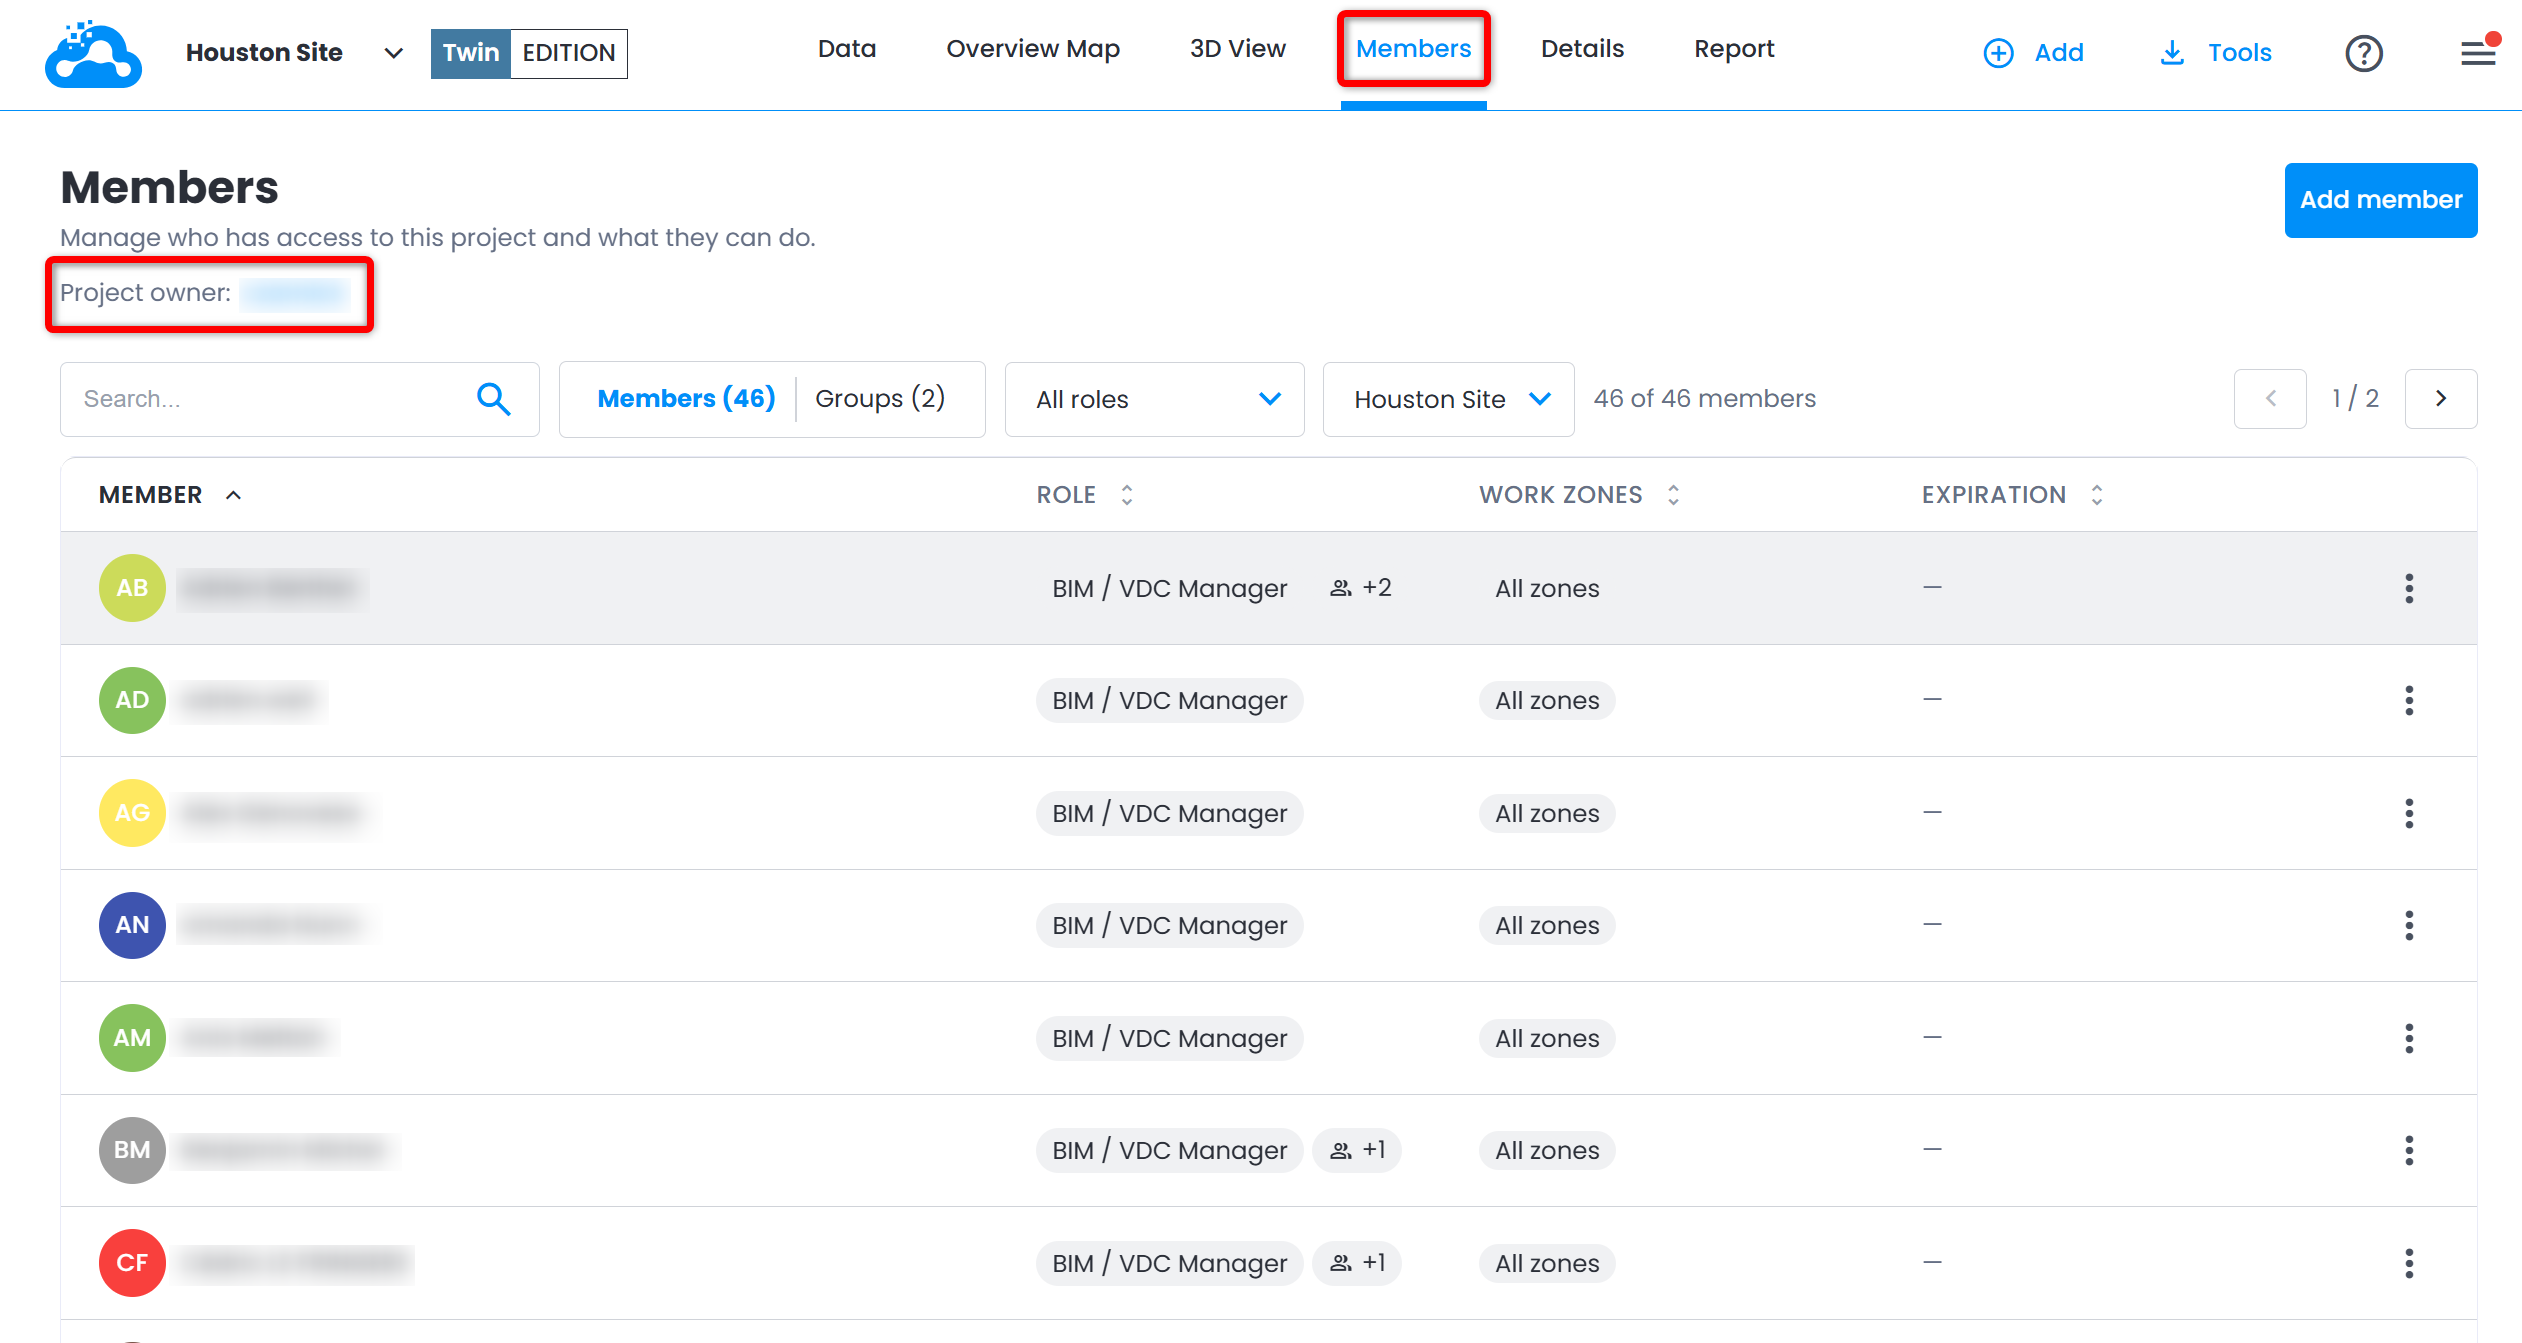

- Switch between Members and Groups to list individual users or groups added to the project. Each button shows the count.
- Use Search... field to filter list by name or email, and All roles drop-down menu to show only one role.
- Use work zone drop-down menu to select a work zone: list shows members and groups that have access to it. Only work zones you have access to are listed.
- Columns Member, Role, Work Zones and Expiration can be sorted. Count above list shows how many results match ("14 of 14 members").

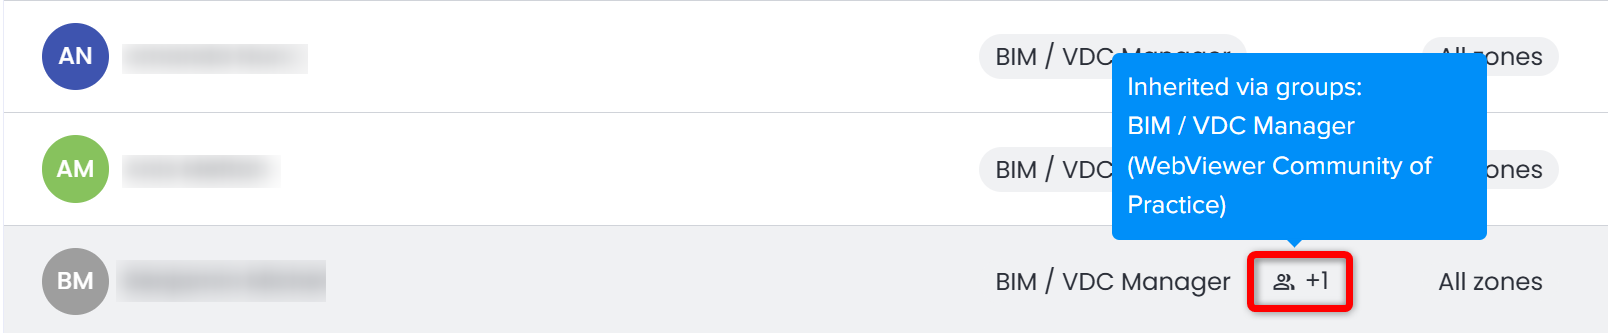
A member who also has access through a group shows a group icon with "+N" next to role. Hover over it to see roles inherited via groups.
Adding Members
Members are added through Add member(s) window, in four steps: Work zones, Select, Expiration and Summary. Use Back at any step to go back - values already entered are kept.
- In Members tab, click Add member.

- Work zones - check work zones new members will have access to and click Continue.
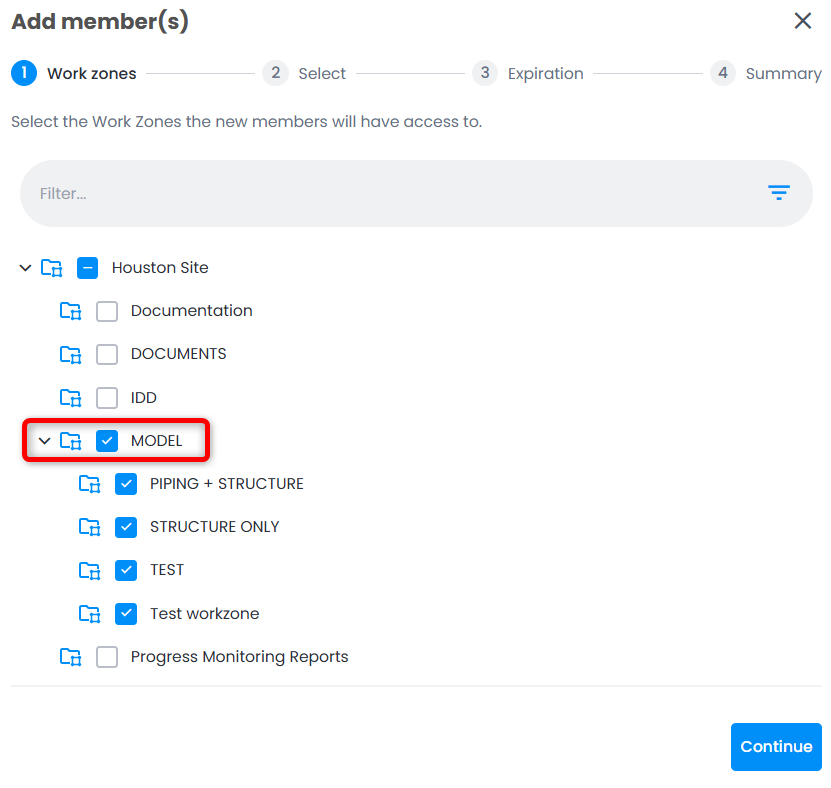
Work zone you are browsing is checked by default, and only work zones you can manage are listed.
Checking project root work zone gives access to all work zones of the project.
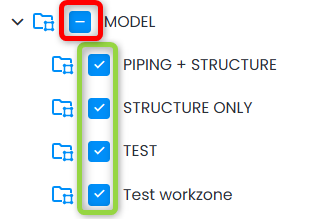
Checking all sub-work zones of a work zone doesn't check the work zone itself - check it to give access to it too.
- Select - choose who to add from one of three tabs:
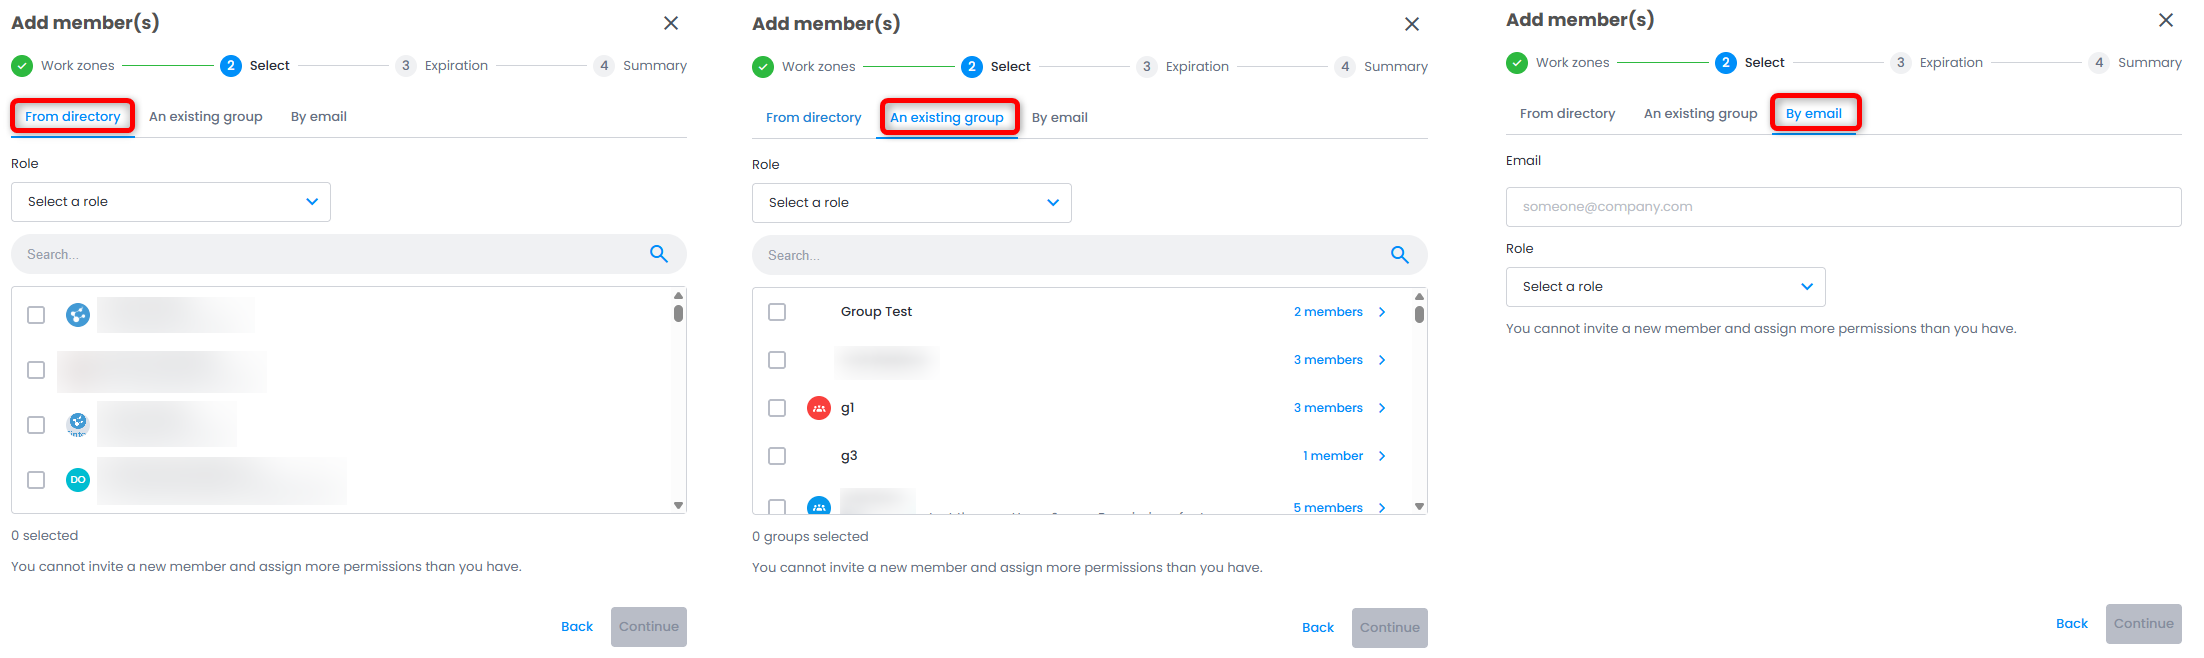
- From directory - check one or more users already in account. Use Search field to find them. Users who already have access to all selected work zones aren't listed, nor is Project Owner. Members whose role is above yours are listed, but cannot be added.
- An existing group - check one or more groups. Every member of a group gets access to the project. Groups that already have access to all selected work zones aren't listed.
- By email - type email address of a person not in account yet. For a person who already has access, Already on your team! is shown.
- In same step, pick a role from Role drop-down menu and click Continue.
Role applies to all members added in this operation.
Click (i) icon next to selected role to see its permissions.
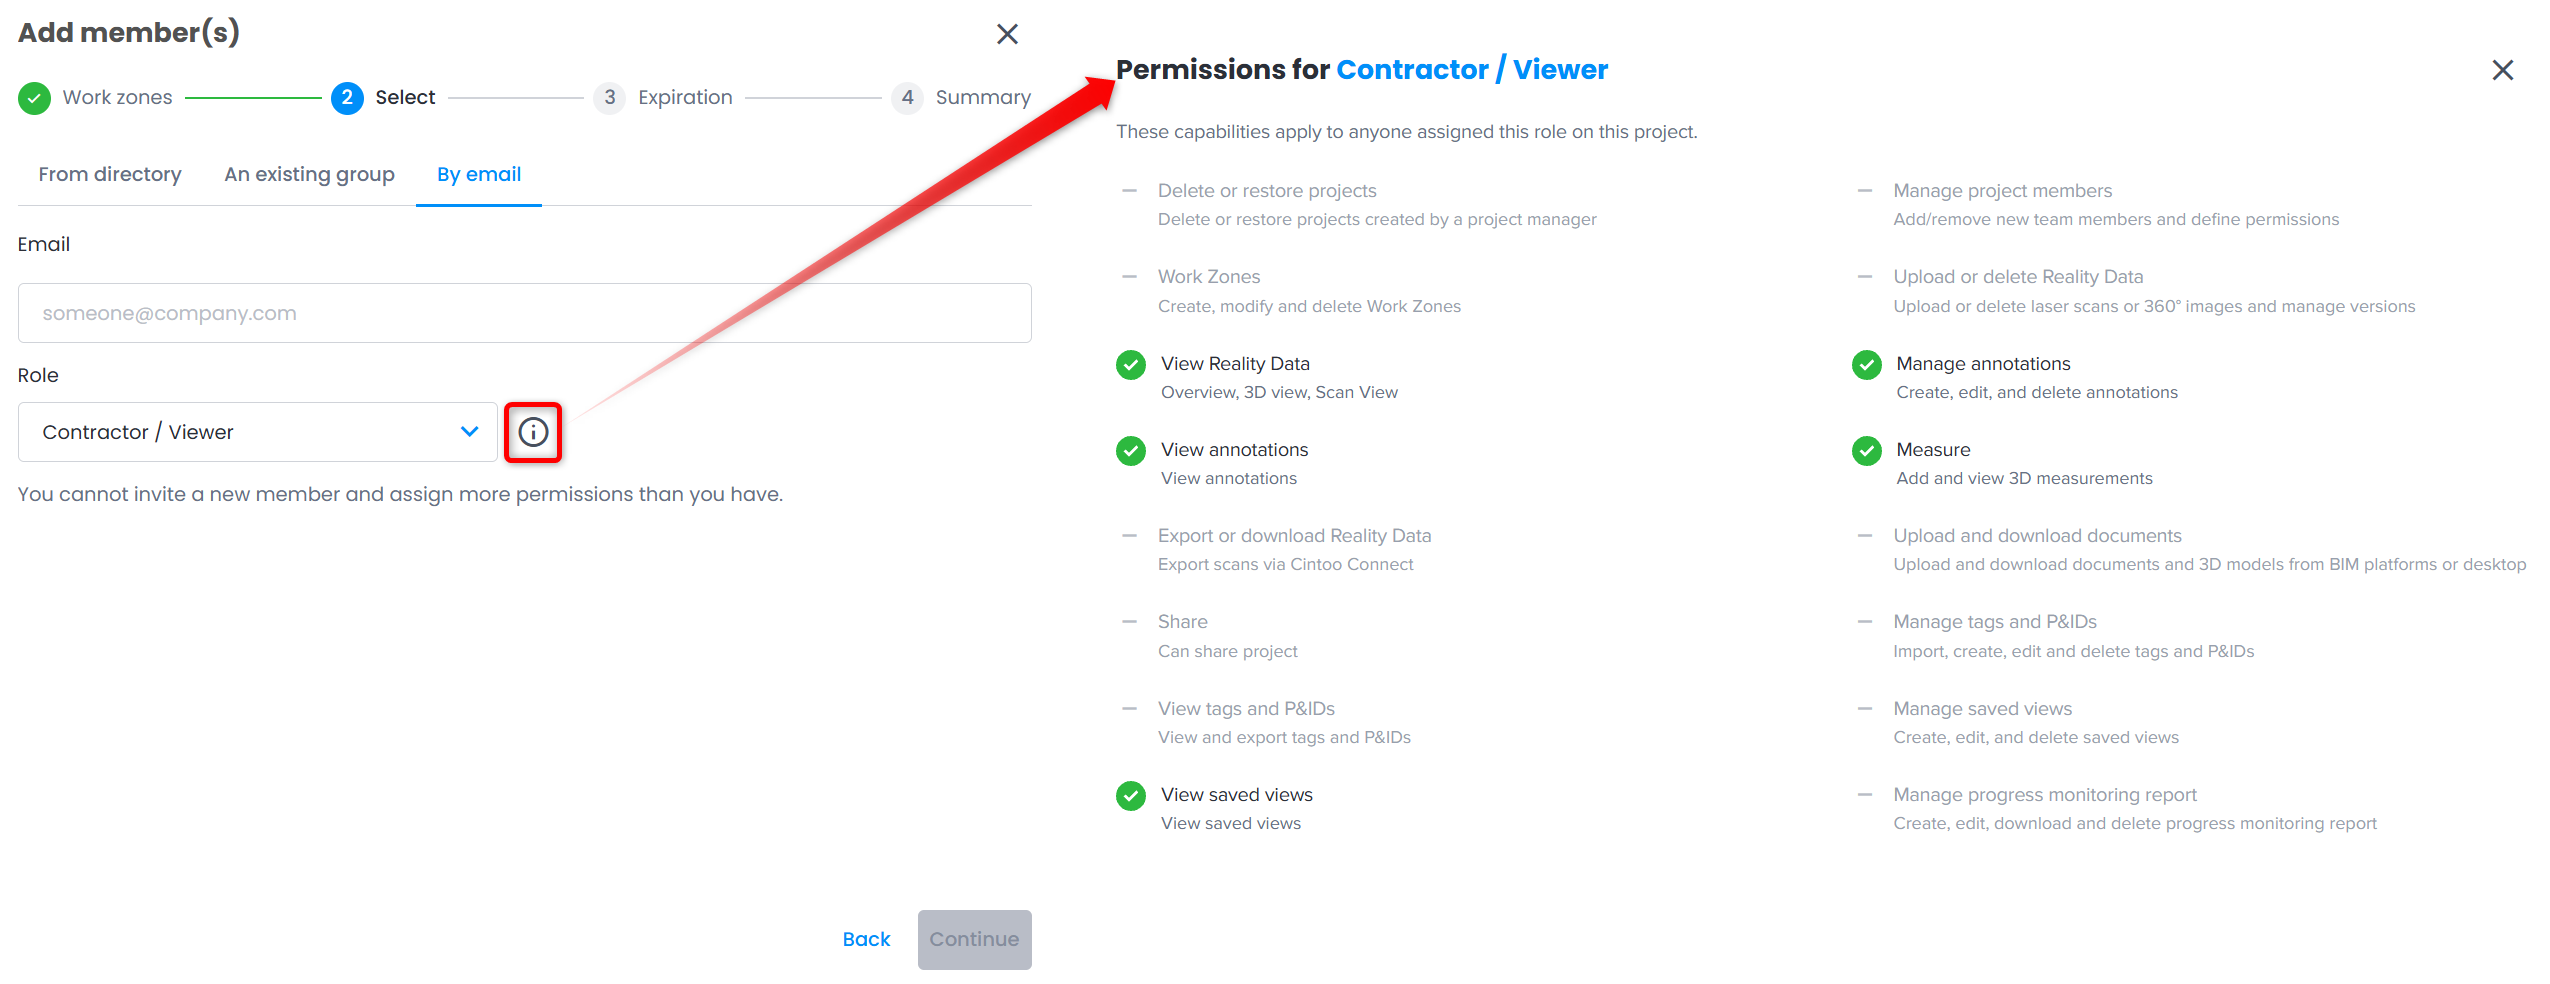 Warning: roles with more permissions than your own on selected work zones aren't listed. Project Owner can assign any role.Warning: BIM / VDC Manager role includes permissions to delete or restore projects, manage project members and upload or delete reality data. Give it only to users who manage project and its data, and choose a role with fewer permissions for users who only need to view, measure or annotate. Compare permissions of all roles in Permissions tab of Users & Permissions.
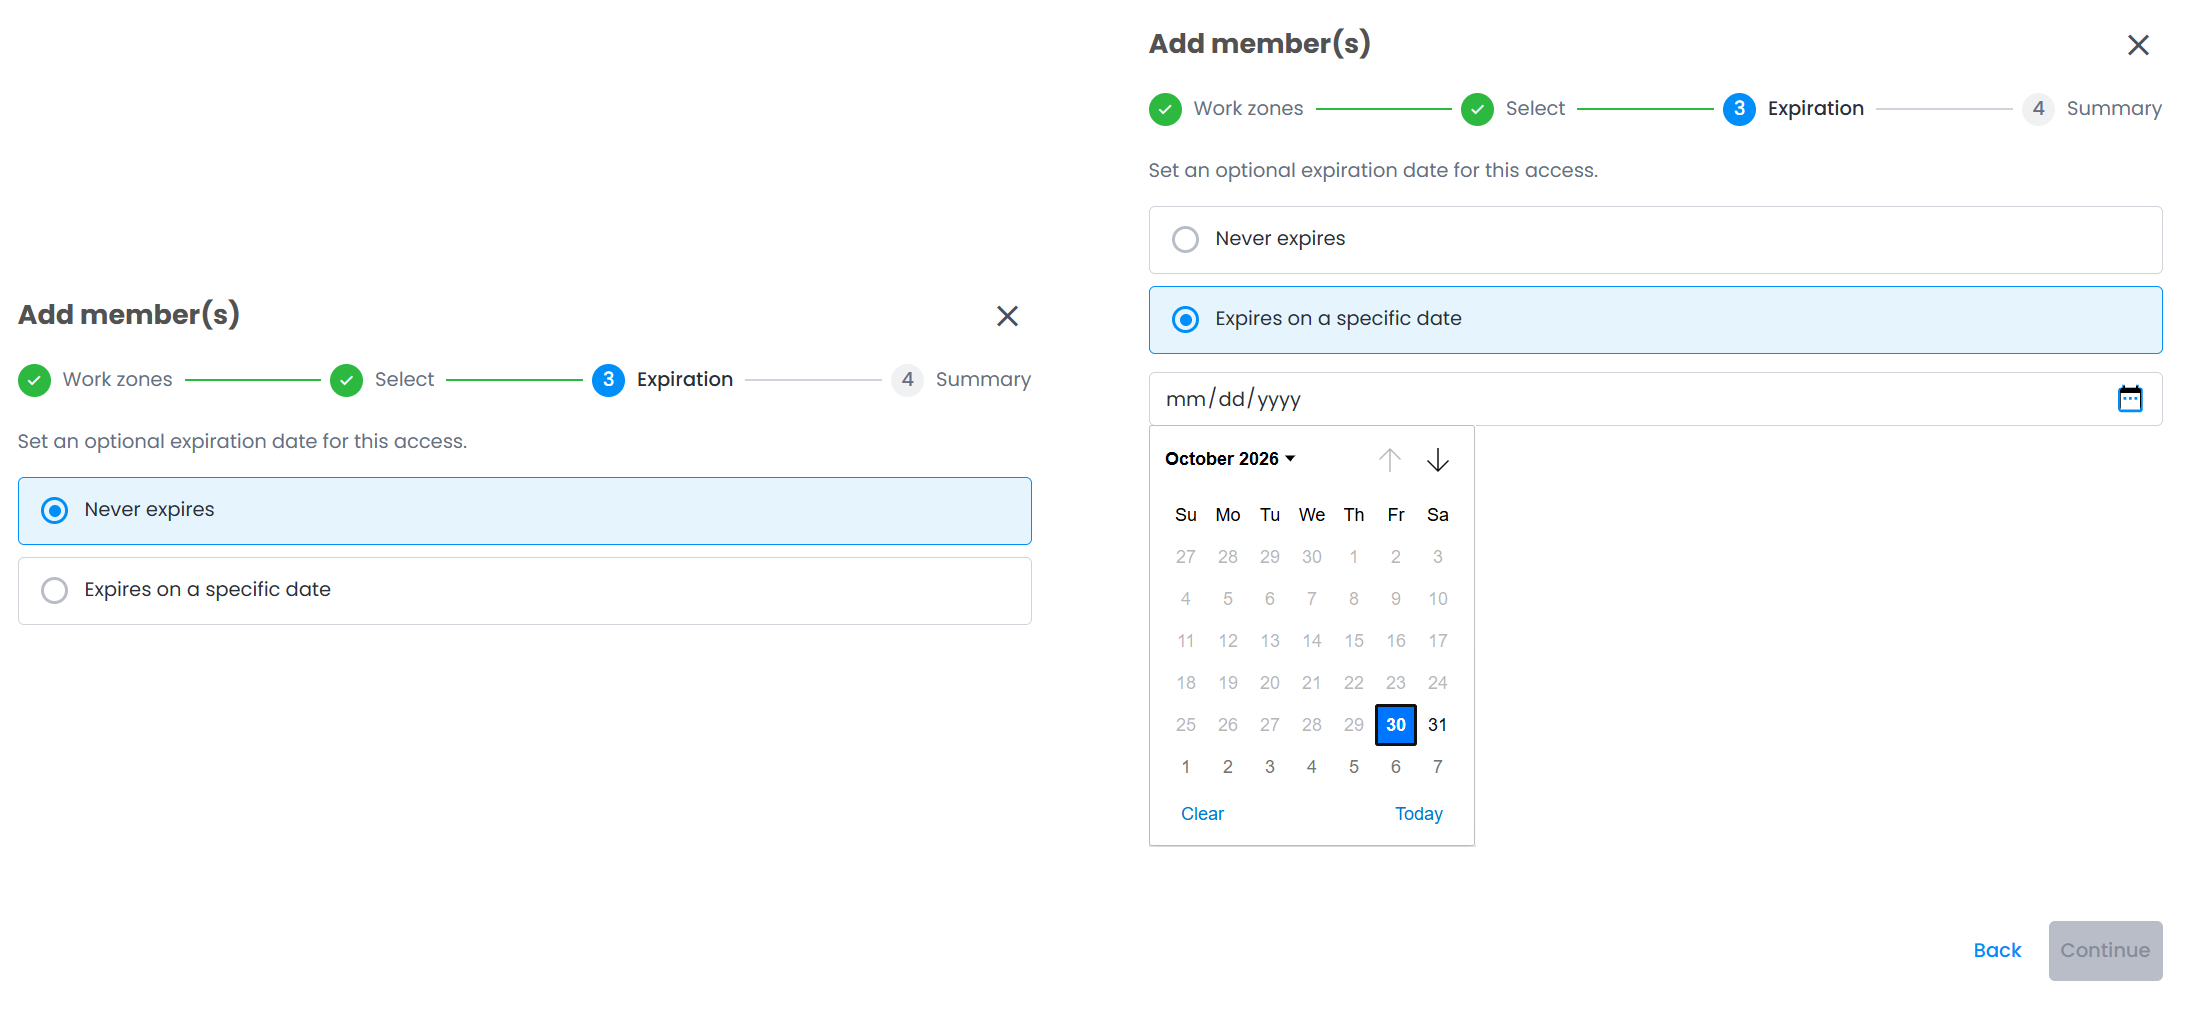
- Expiration - keep Never expires, or select Expires on a specific date to set a date when access ends, then click Continue. See Access Expiration.
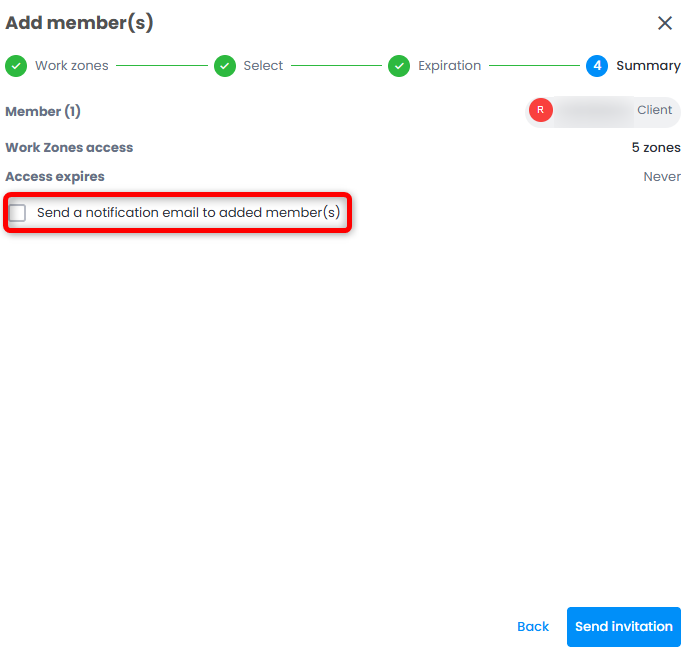
- Summary - review members, role, work zones access and expiration.
Check Send a notification email to added member(s) to send added members an email inviting them to join the team. Checkbox keeps your last choice.
Click Send invitation to finish.
New members appear in list right away.
Member and Group Details
Click member's name in Member column, or ⋮ at the end of its row, to open member details panel.
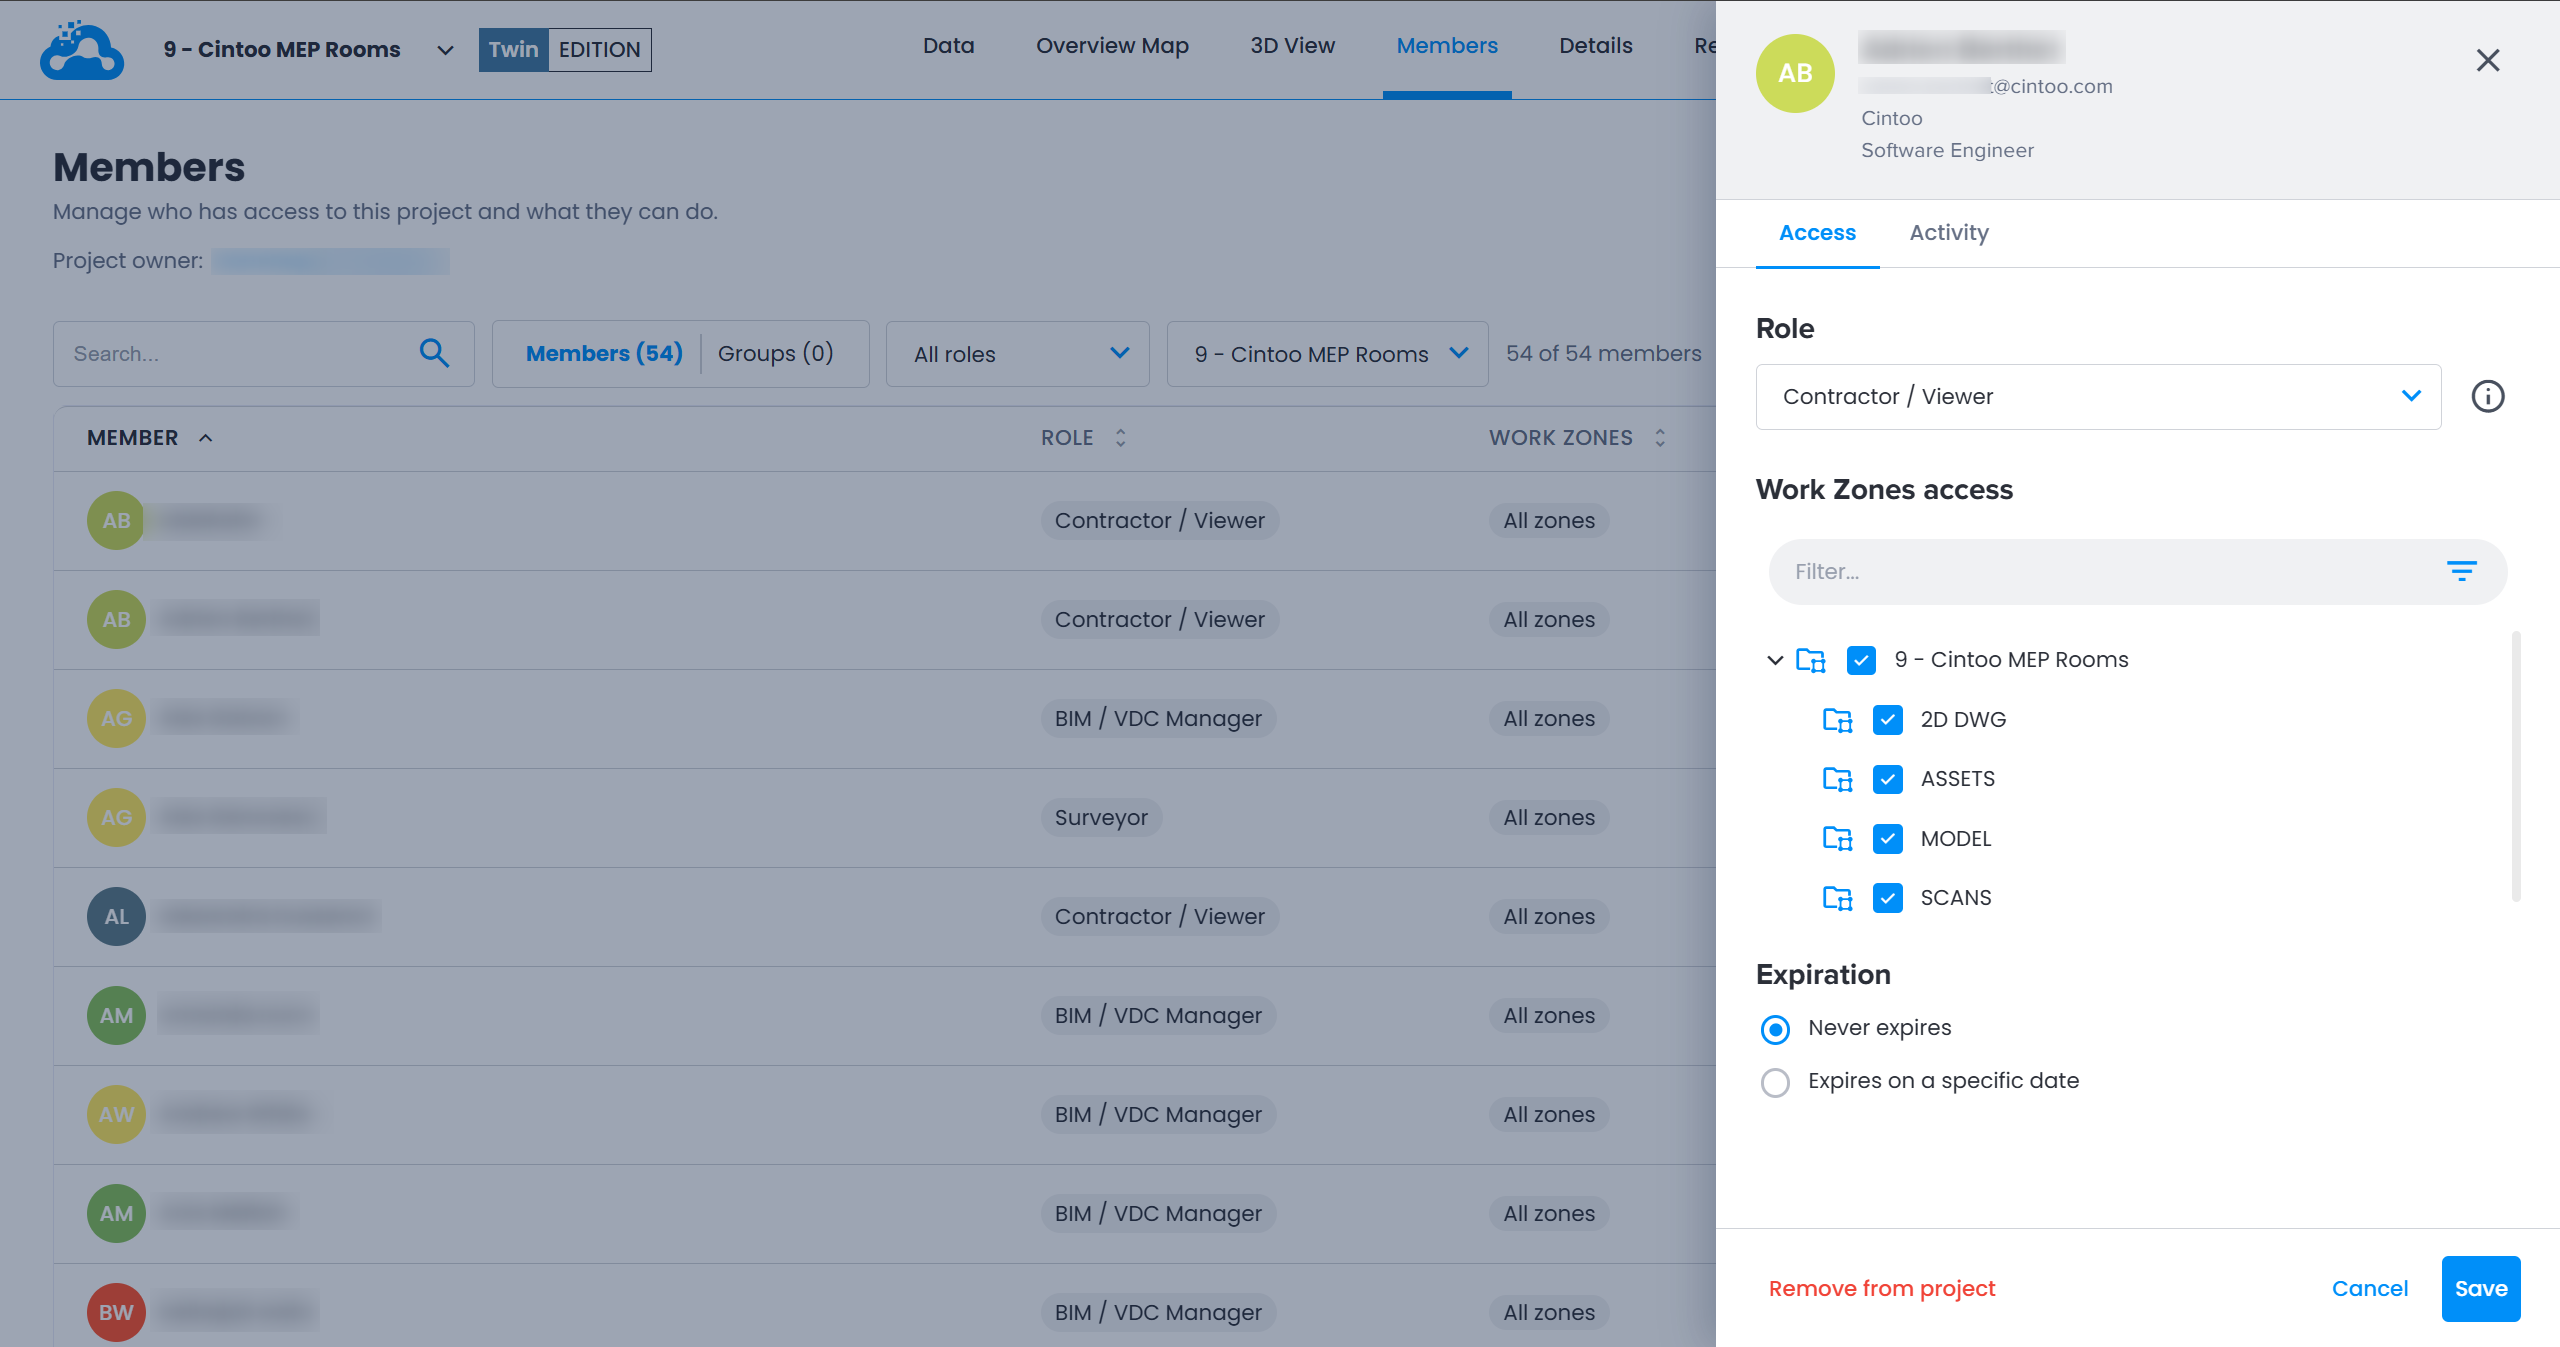
Panel shows member's name and email, with two tabs:
- Access
- Role - change role from drop-down menu. Click (i) icon next to it to see all permissions of selected role. Roles inherited via groups are listed under it.
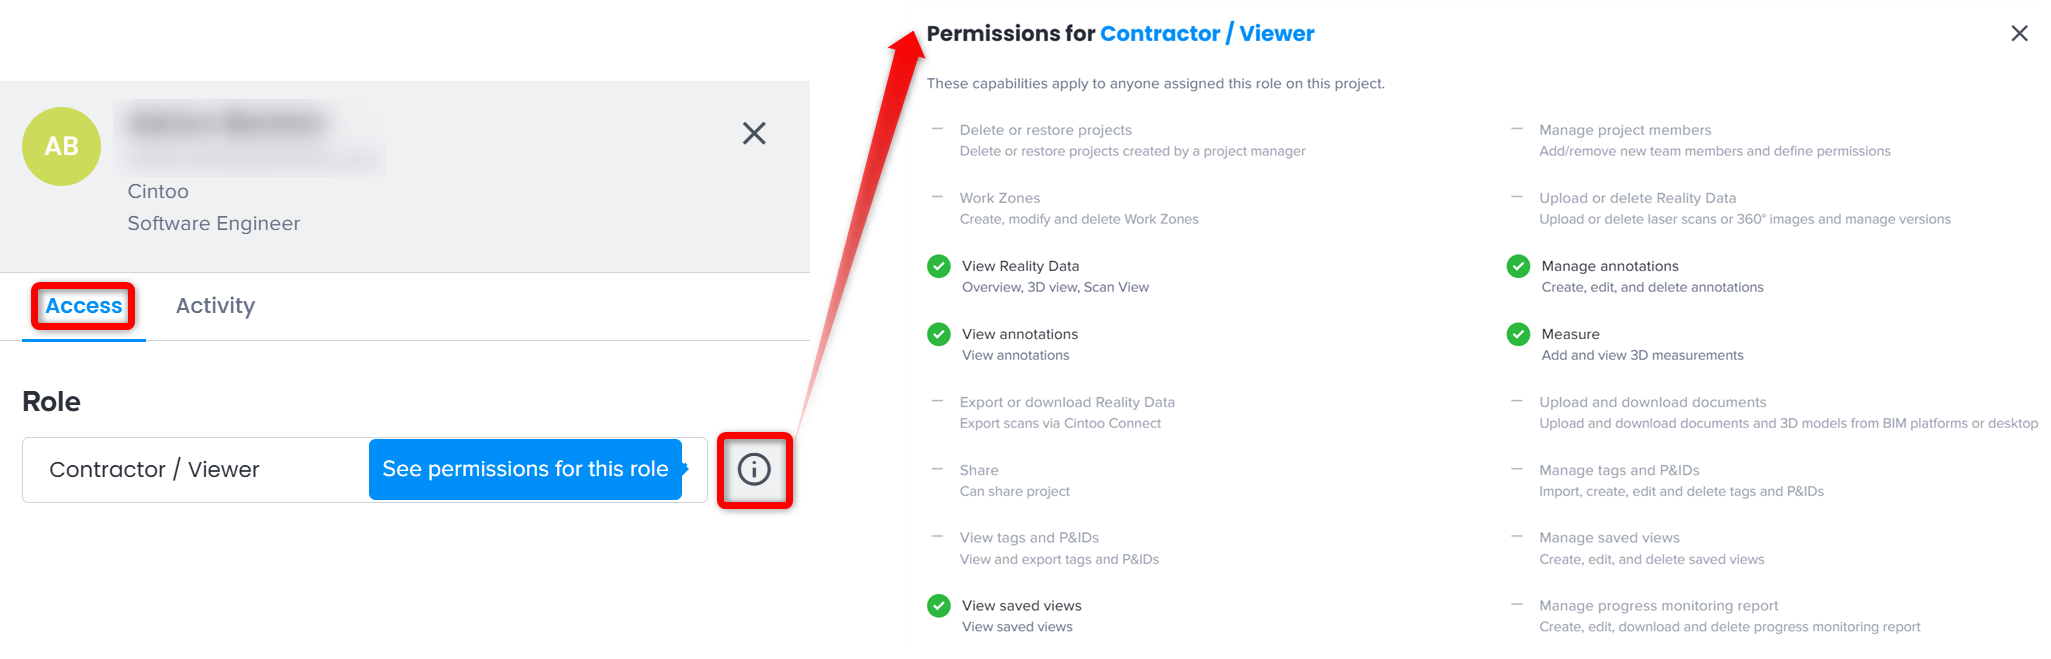
- Work Zones access - check or uncheck work zones member has access to.
- Expiration - see Access Expiration.
- Role - change role from drop-down menu. Click (i) icon next to it to see all permissions of selected role. Roles inherited via groups are listed under it.
- Activity - member's latest actions in the project (up to 100), limited to work zones you have access to.
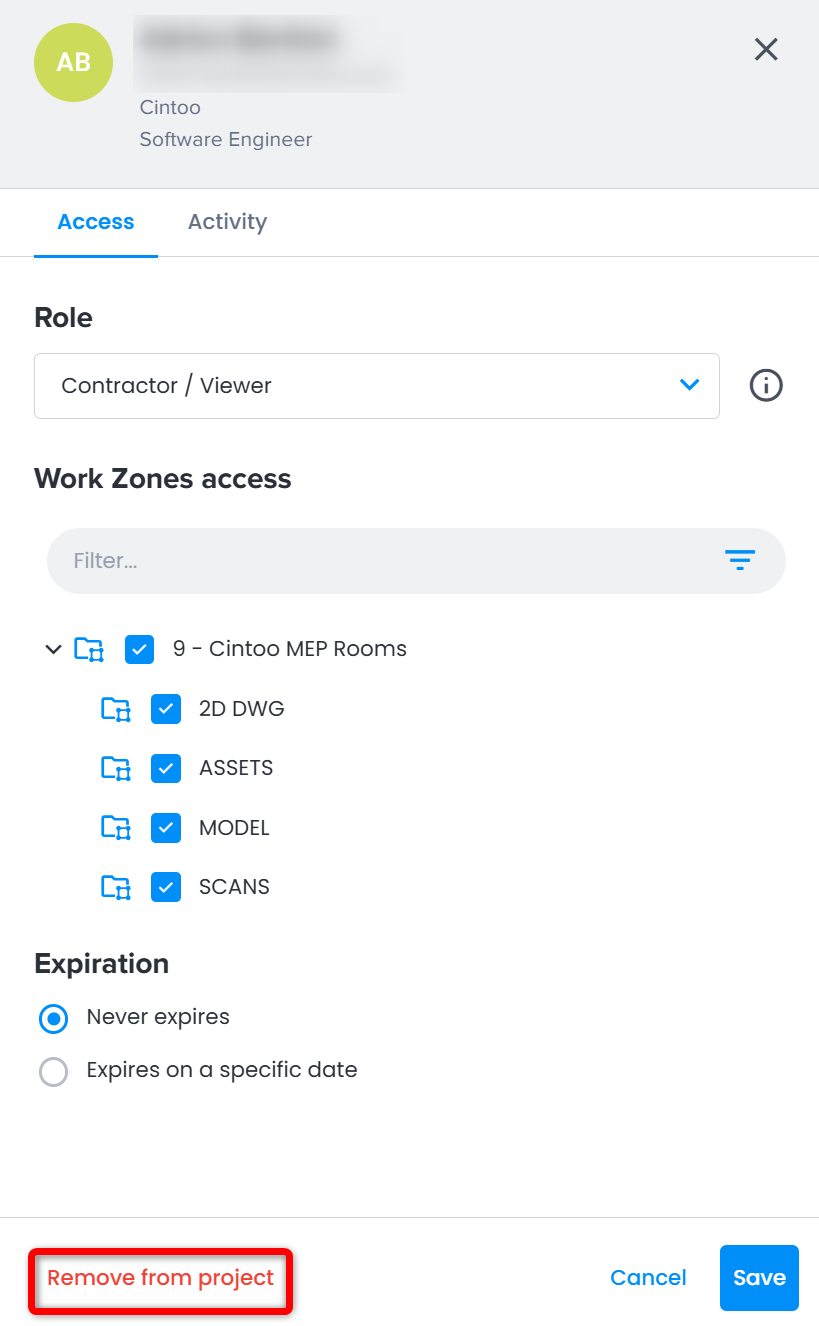
Click Save to apply changes, or Cancel to close panel without saving. To take access away completely, click Remove from project and confirm.
If a member has a role above yours, or access to work zones you don't manage, their panel is view only.
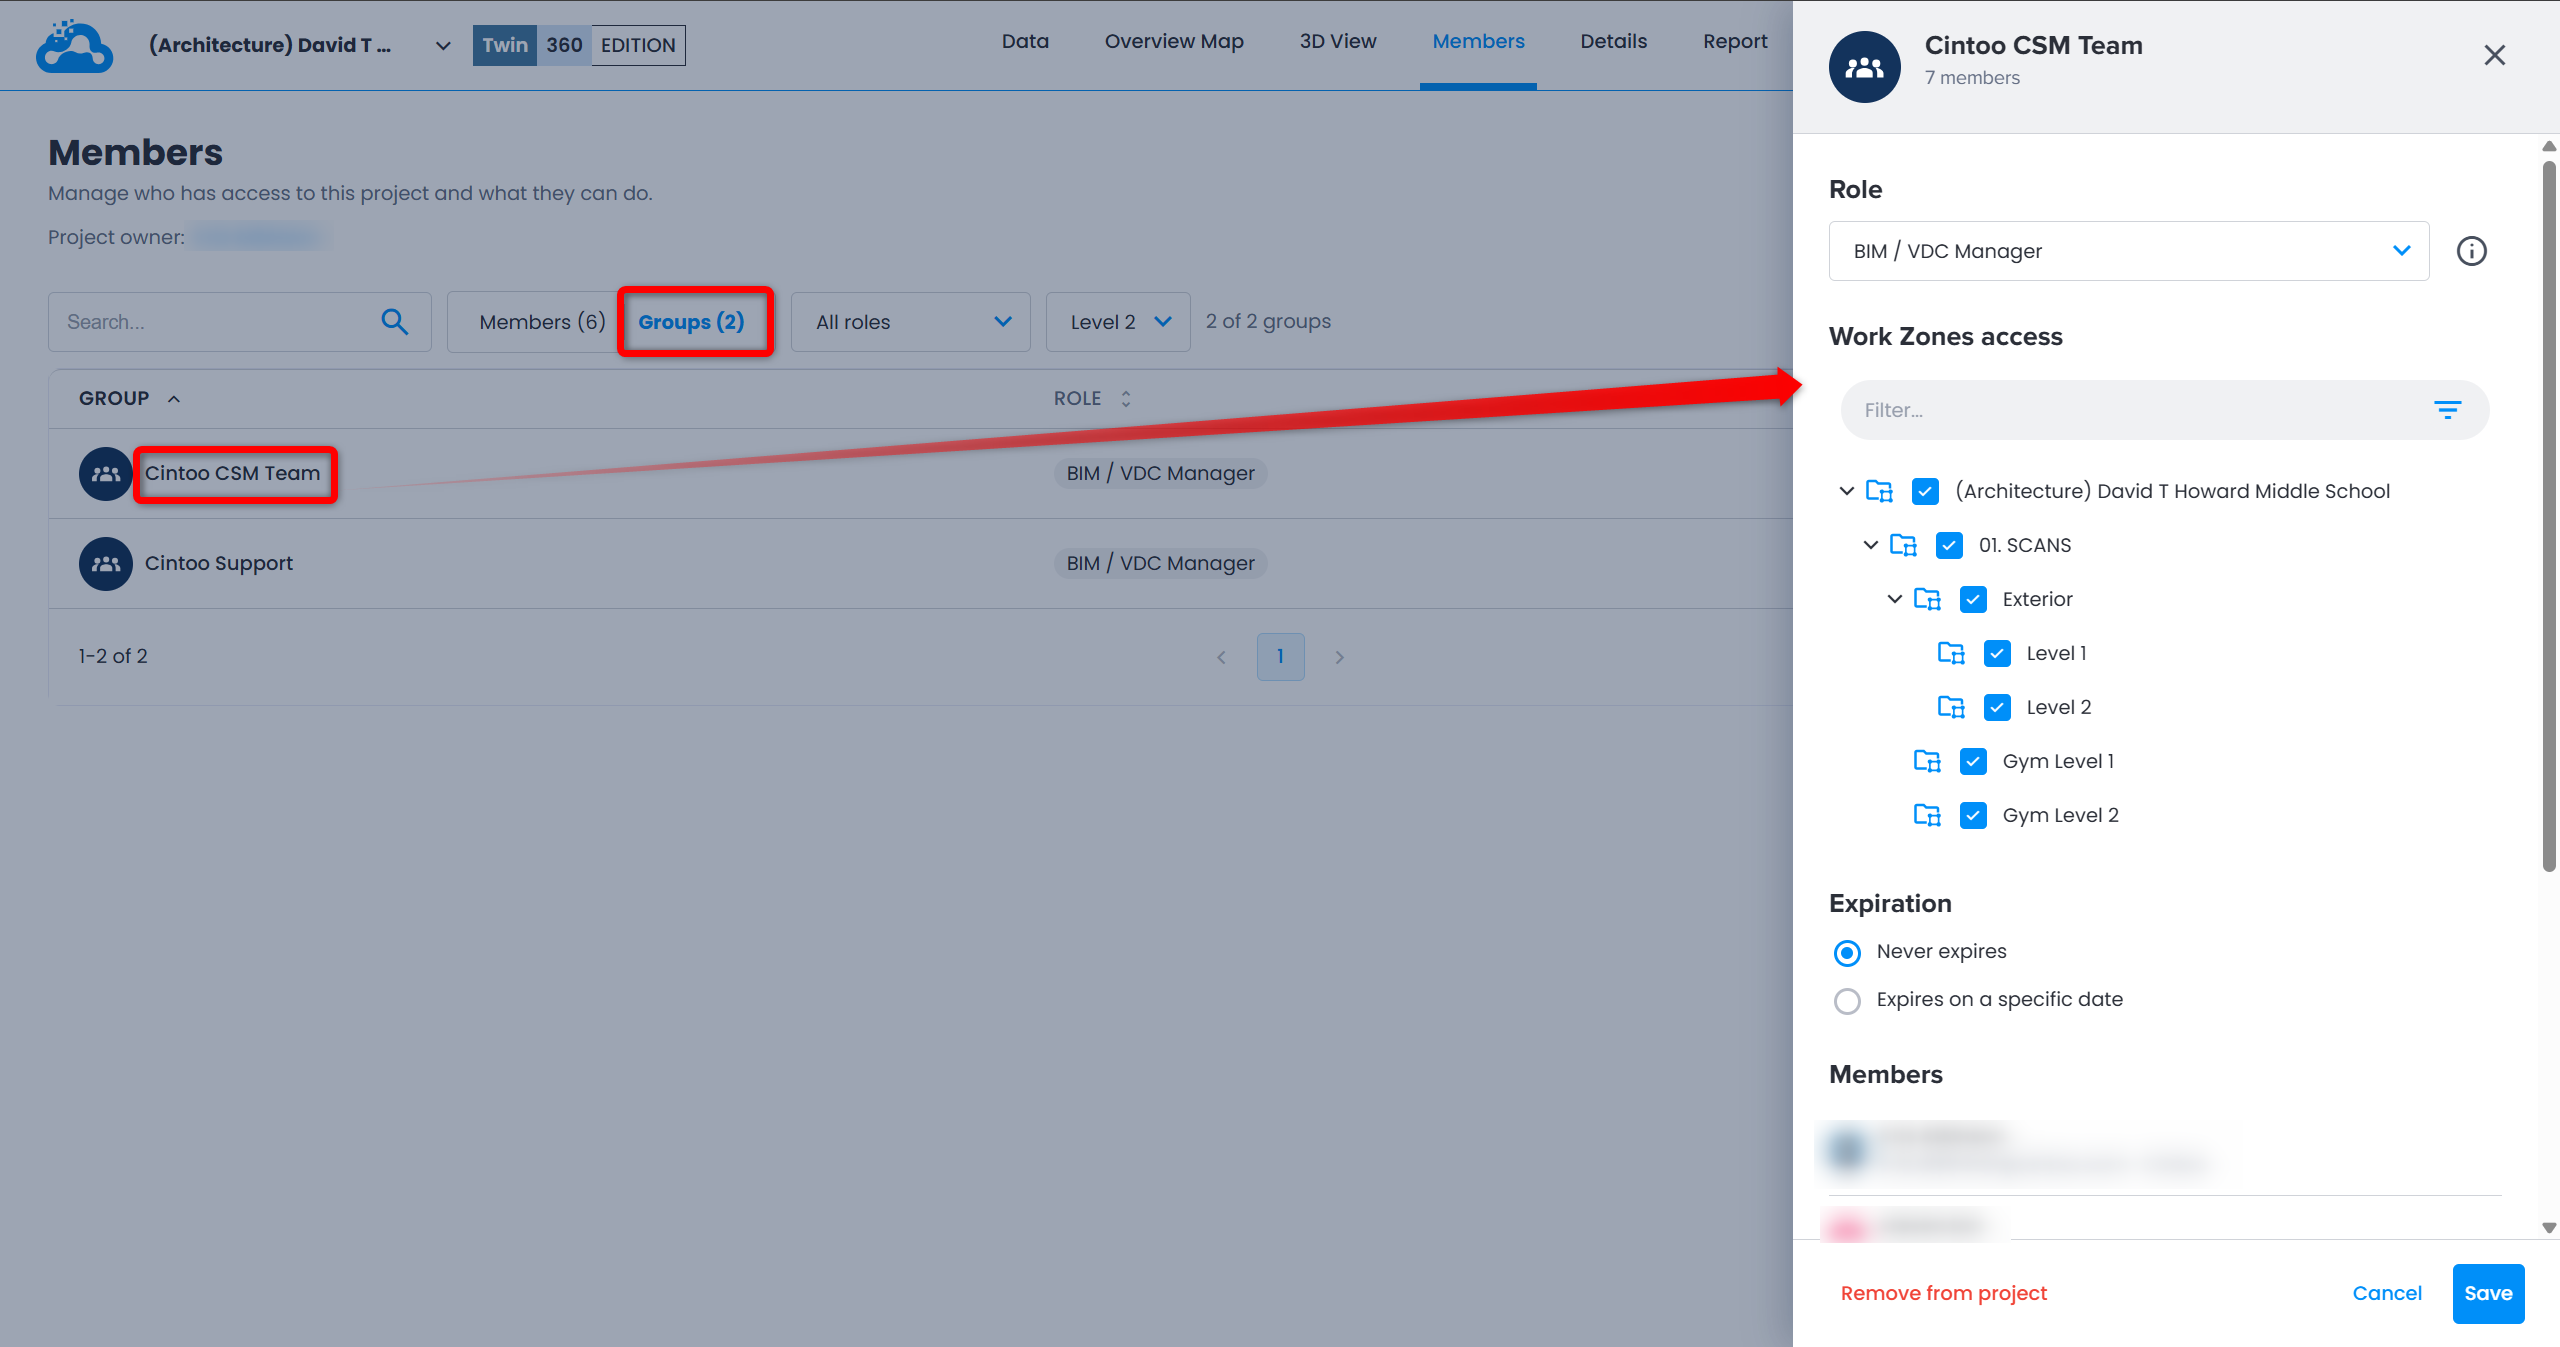
Click a group in Groups list to open group details panel. It has no tabs and works the same way for Role, Work Zones access, Expiration and Remove from project, and lists group members under Members - including users who have access to the project only through this group.
Access Expiration
Access to a project can be limited in time. It works the same way for groups as for members.
Date is set in Add member(s) window or in Expiration section of member or group details panel:
- Never expires - access is permanent.
- Expires on a specific date - pick a date in date picker, then click Save.
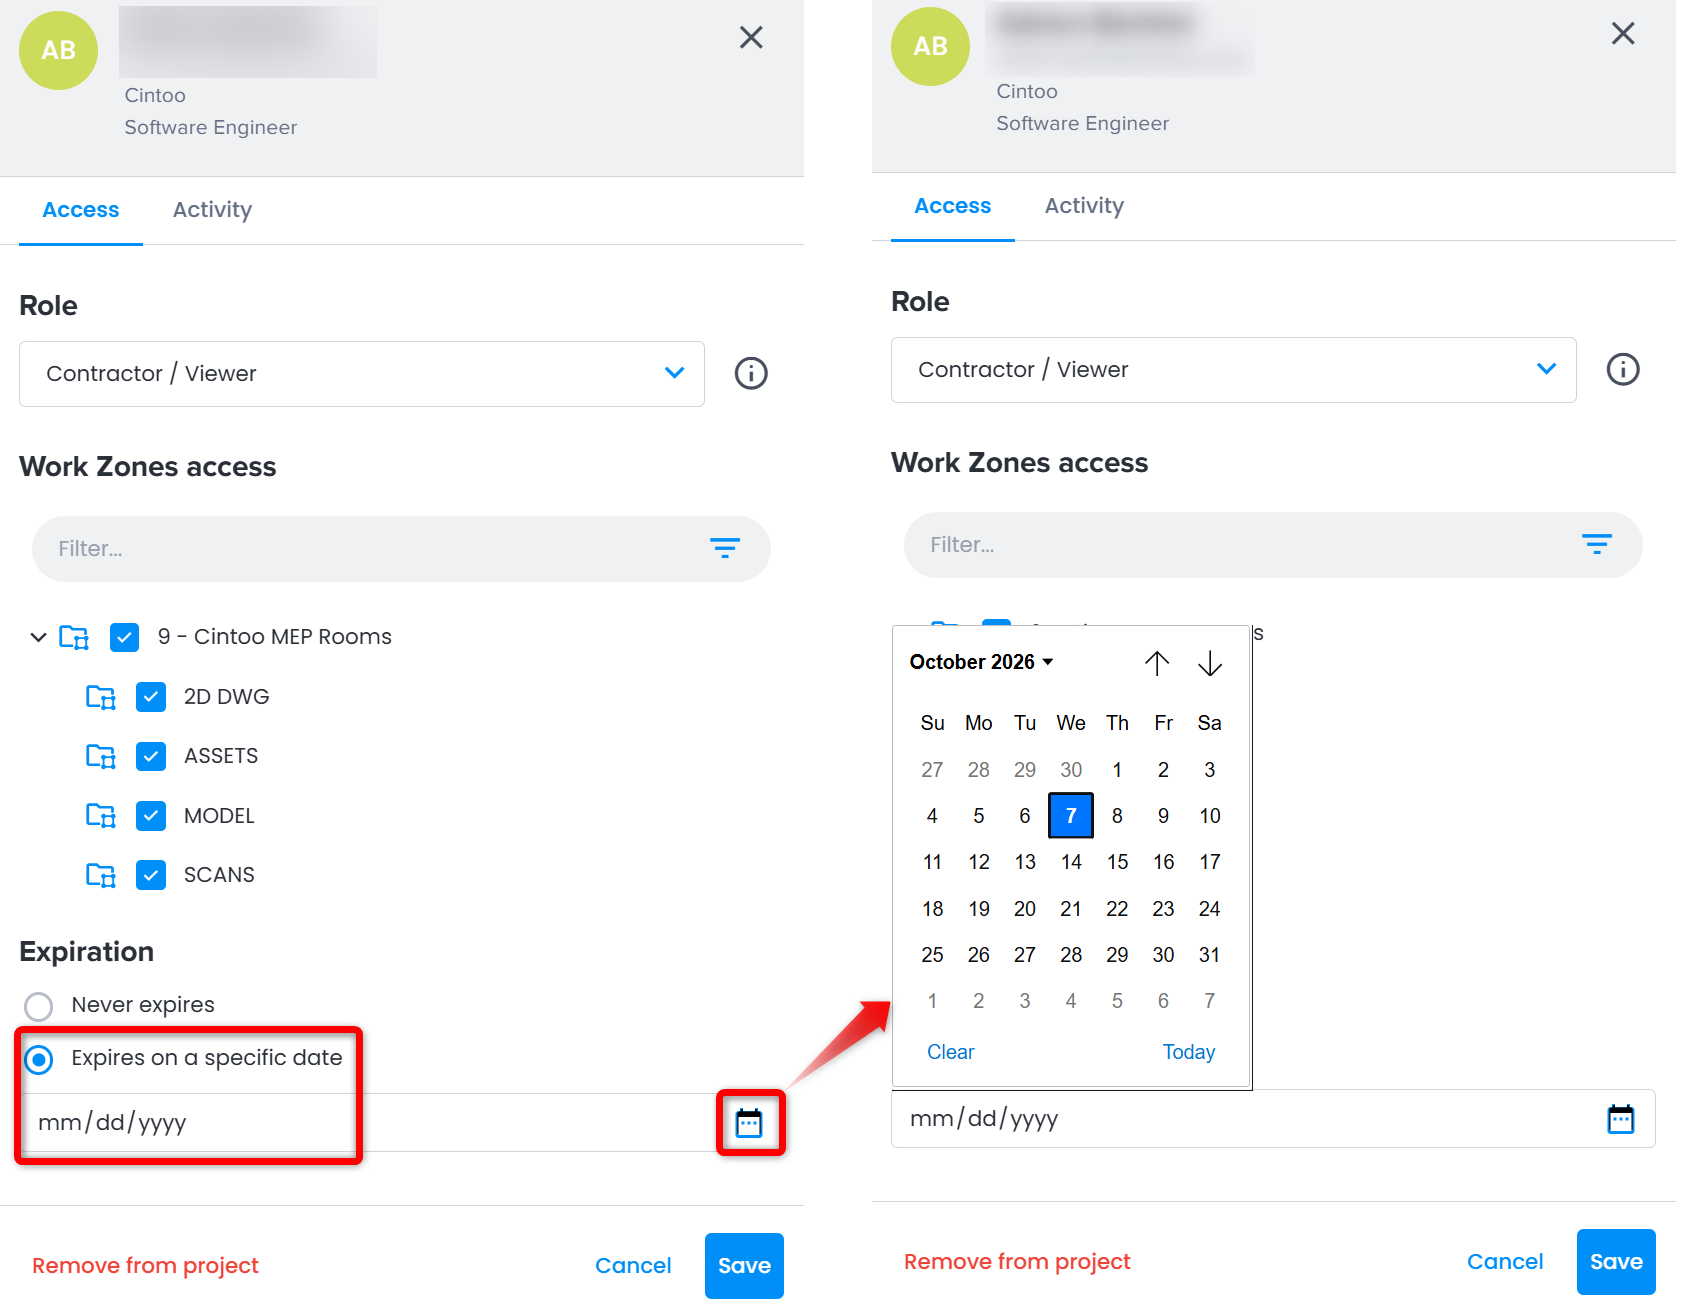
Expiration date is shown in Expiration column on Members tab.
A dash means access never expires.
7 days and 1 day before access ends, two reminder emails are sent:
- to member - expiration date, who to contact to keep access, and Open the project button
- to person managing member's access - member's name, expiration date, and Manage members button to change or remove date
Person managing access is first match of:
- person who last set or changed expiration date, if they can still manage members on that work zone
- otherwise, Administrators who are members of project
- otherwise, Account Owner
For a group, each member of group gets member email, and email to person managing access names group and its number of members.
On selected day, access stays valid until 23:59:59 UTC. After that:
- member disappears from members list and can no longer open the project
- for a group, group disappears from list and its members lose access inherited from it
To restore access, add member or group again with Add member(s) window, optionally with a new expiration date.
API and Bulk Onboarding
Using APIs might be an alternative instrument for adding users to a project. Discover more in the Developer documentation.
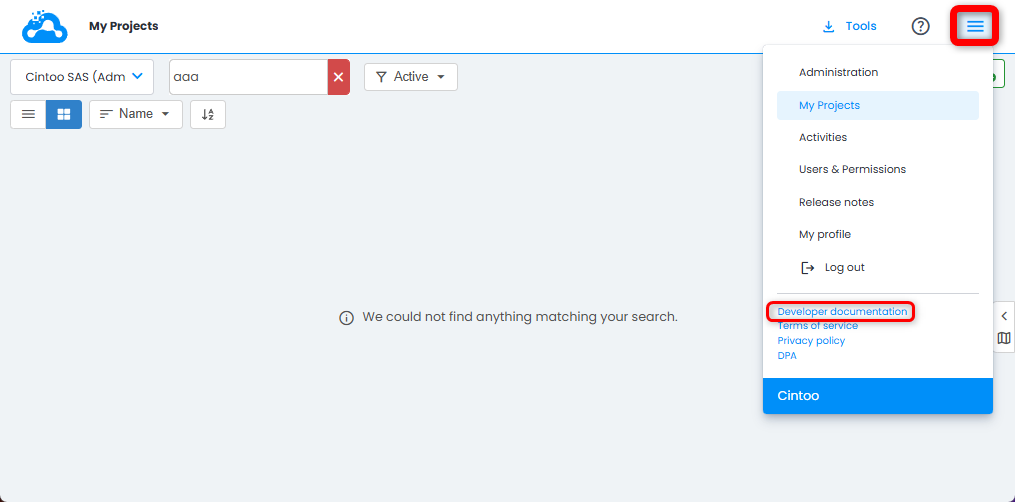
For onboarding of larger number of users upon creation of a Cintoo account, please contact your dedicated Customer Success Manager at Cintoo or Customer Support at support@cintoo.com.
Was this article helpful?
That’s Great!
Thank you for your feedback
Sorry! We couldn't be helpful
Thank you for your feedback
Feedback sent
We appreciate your effort and will try to fix the article