This article describes step-by-step process of creating and exporting Unified Mesh from scan data outlining possible issues that could happen throughout the process.
Permissions: users with roles including Export or Download Reality Data permission can create unified meshes from scan data.
TABLE OF CONTENTS
- Prepare Scans
- Choose Area of Interest
- Create a Mesh
- Troubleshooting
- Download Mesh
- Download Mesh from Cintoo project
Prepare Scans
- If needed, Overview Map has a Rotation tool that allows to align X, Y and Z axis along any region of interest.
- Rotation tool does not change scan's coordinate system. It is used to facilitate cropping, but this rotation is not persistent.
- Select a project or a work zone.

- Rotate scans to make sure that they are orthogonal to the screen axis.

Choose Area of Interest
Select the region of interest using Crop Tool in Overview Map or in 3D View if rotation is not necessary.

Use X, Y or Z crops or any of the 6 cube's faces views to select the meshing region.
In 3D View, crops must be done in 3D Navi mode, not in Scan&Teleport mode.
- In 3D Navi mode, all the scans visible in the crop will be selected for meshing.
- In Scan&Teleport mode, only the selected scan will be used for meshing.
Save or Update the crop.
Create a Mesh
Click on Create Mesh for the selected crop to open Create a Mesh window.
Select resolution (or density) from 2 cm (0.8 inches) to 20 cm (7.9 inches).
- This is the minimum distance between two vertices.
- Be careful when selecting the resolution (see Unified Mesh Use Cases & Examples).
Select mesh export format:
- FBX (Filmbox) - proprietary format developed by Autodesk, used in game development, animation and architecture rendering. Ideal for importing to Revit, Blender, Unreal Engine. Lighter than OBJ.
- OBJ (Wavefront object) - simple and open format used to store 3D geometry (vertices, edges, faces), texture coordinates and materials. Ideal for static mesh exchange.
- STL (Stereolithography) - basic format used primarily in 3D printing, as it stores no color or texture.
- Open USD (Universal Scene Description) - powerful and extensible format for large-scale 3D scenes. It supports geometry, materials, lights, animation and layering. Ideal for collaborative pipelines with platforms like NVIDIA Omniverse.
Warning: if an error message about the limitation of 100 scans pops up, not allowing to generate the mesh.
Check this article to get a work-around for this issue: Mesh Creation limited to 100 Scans.
Warning: huge meshes (large region with very small resolution) take more time to process and will hardly be displayed in any desktop app.
See Unified Mesh Use Cases & Examples section.
Once finished, click Create, the following pop-window appears.

Troubleshooting
If "Mesh creation is limited to 100 scans" error message displays when attempting to create a unified mesh from a Cintoo crop view please follow the steps in Mesh creation error article.
Download Mesh
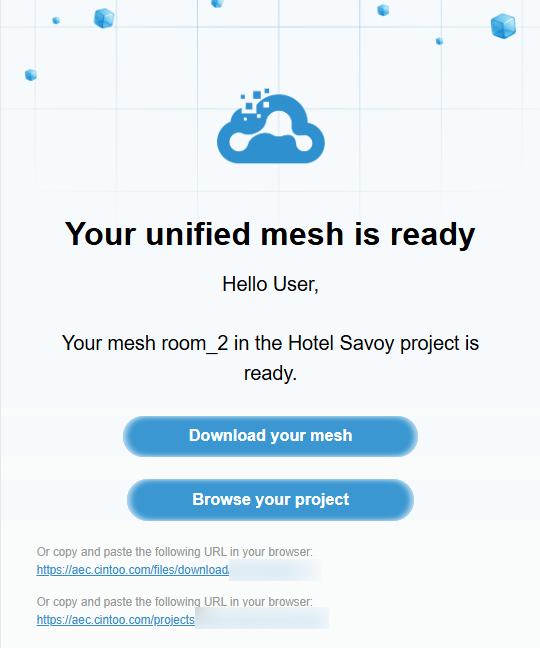
After mesh is created, an email arrives informing mesh is ready to be downloaded:
- download directly using Download your mesh button
- go the project in Cintoo to download from there by using Browse your project button
Download Mesh from Cintoo project
To download the unified mesh from Cintoo, go to the project or work zone and select Data.
Click on Download icon at the right of each unified mesh or select the needed mesh and click Download at the bottom of the page.

Was this article helpful?
That’s Great!
Thank you for your feedback
Sorry! We couldn't be helpful
Thank you for your feedback
Feedback sent
We appreciate your effort and will try to fix the article