This article describes how to create 2D tags for instrumentation and pipes, how to link them to 3D tags and how to ensure continuation between different P&ID pages.
Permissions: users with roles including Manage Tags and P&IDs to import, create, edit and delete P&IDs and View Tags and P&IDs to view P&IDs.
TABLE OF CONTENTS
TWIN Only
Note: P&ID functionality is available only for subscriptions under TWIN edition. BIM edition subscriptions don't grant access to P&IDs.
Contact us via sales@cintoo.com to know more about the upgrade.
Learn more about editions BIM and TWIN.
Navigation
1. Zoom in/out with mouse wheel to observe closer all the schema details
2. Return to the view of the full page by clicking Fit button at the bottom right

3. To close P&ID Viewer either click on cross at the top right or on toggle P&ID Viewer on top of P&ID Explorer.
P&ID Navigation bar can be moved at users convenience to any place inside P&ID Viewer.

4. Top panel in P&ID Viewer allows to add new instrumentation and pipes, as well as linking them to 3D tags and linking pages between each other.
If more than one P&ID is present in a work zone it allows to easily navigate between different P&IDs and their respective pages.

Note: making any changes on a P&ID page and leaving for another P&ID page saves the changes automatically and gives a notification about it.
2D tags
2D tag - indication of a graphical representation of a physical object depicted schematically in P&ID documentation that could eventually be linked to a 3D tag within a Cintoo project to bridge the gap between real world and documentation.
There are two types of 2D tags present in Cintoo:
- instrumentation - covering any equipment being reflected on documentation schemas
- pipes - any connections between equipment objects reflected on documentation schemas
How to Add Instrumentation
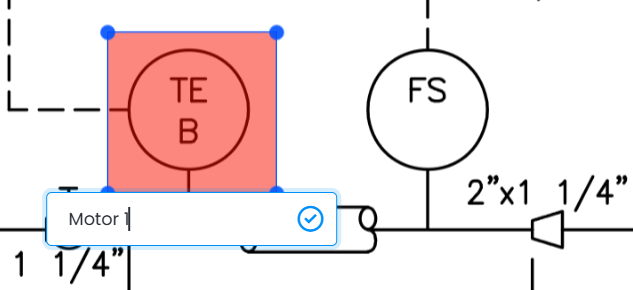
1. In P&ID Viewer on the top panel click Add instrumentation to enter into instrumentation defining mode.

2. Select dynamically the form of the object to fit the object depicted.
To save the name by default click anywhere on the P&ID page.
To set a desired name for an instrument input the name then click on checkmark icon to confirm.
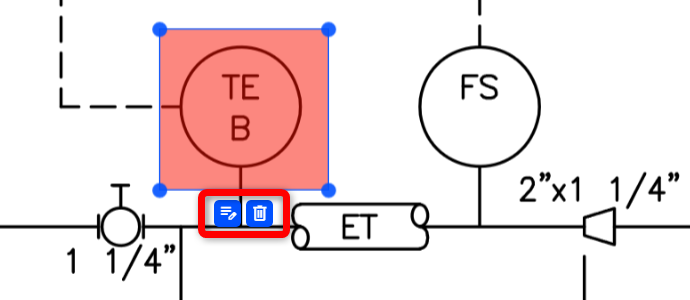
3. If needed an instrument could be renamed by clicking on Edit name icon or removed by clicking on Delete icon.
4. It's possible to create and shape multiple objects (Instrumentation and Pipes) in one run.
Note: hold Ctrl key on keyboard to skip Name choice dialogue to continue placing boxes.

5. Move instrument shapes and reshape them if needed by moving the corners at any time.
6. Click Save on the top panel. Created 2D tags appear in P&ID Explorer tree structure under corresponding P&ID page with a red box icon. Red color means that the link between 2D tag and 3D tag was not yet established.


7. Change Name by clicking Edit or hide Instrumentation object from visualization in P&ID Viewer by clicking Hide.

How to Add Pipe
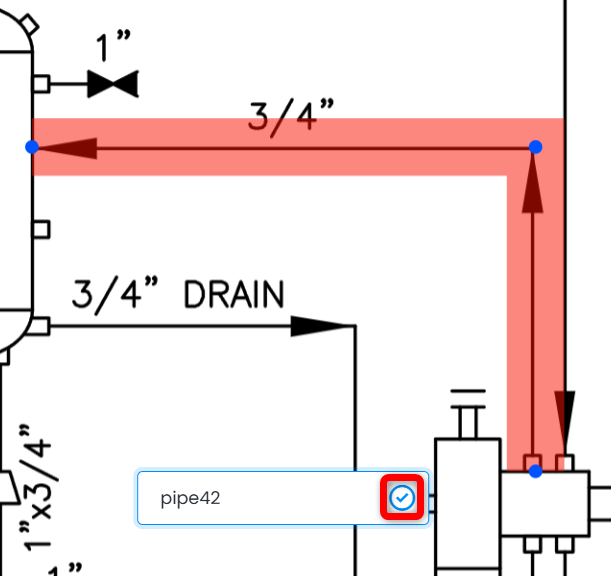
1. In P&ID Viewer on the top panel click Add pipe to enter into pipe drawing mode.

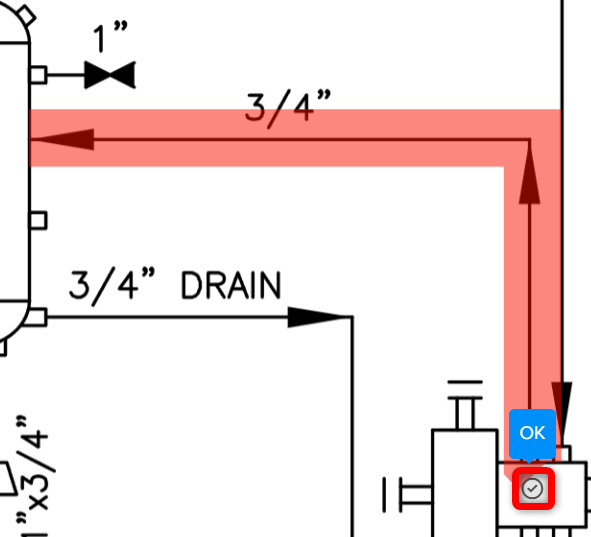
2. Select the start of the pipe with a click, move the mouse to draw a line in any direction, click again for an elbow, continue until satisfied with the fit of the object depicted.
If there's been a mistake it's possible to cancel pipe definition by clicking Add pipe button again.
Once finished click on the OK checkmark below the last point.
3. To save the name by default click anywhere on the P&ID page.
To set a desired name for a pipe input the name then click on checkmark icon to confirm.
3. If needed a pipe could be renamed by clicking on Edit name icon or removed by clicking on Delete icon.
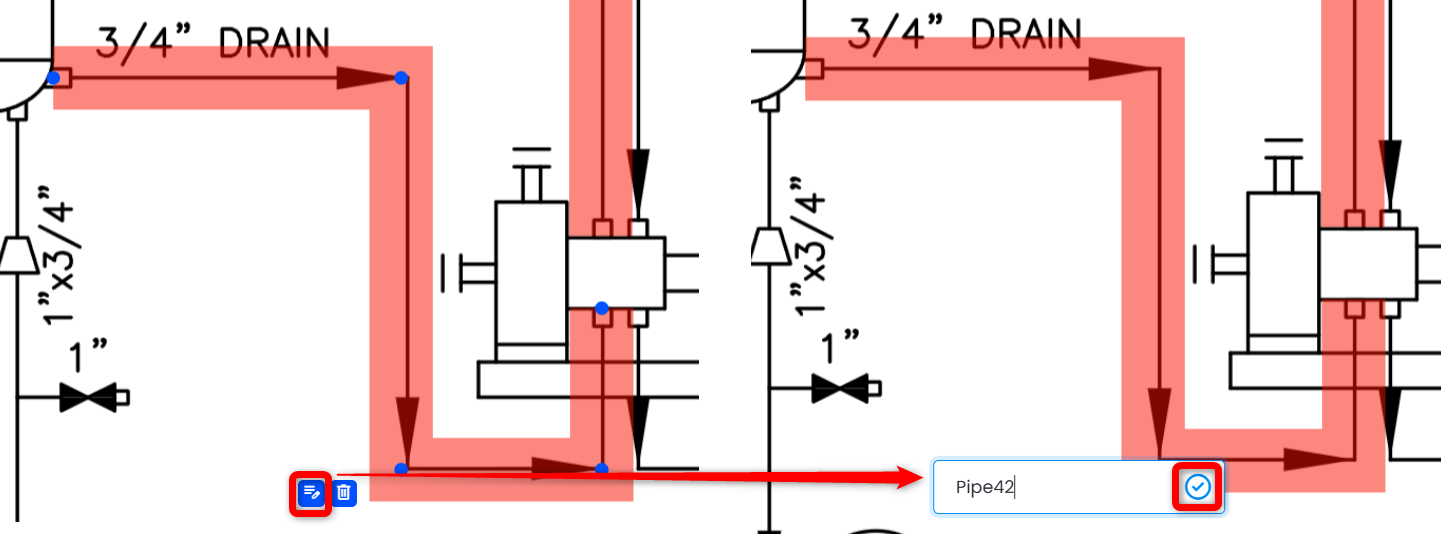
4. It's possible to create and shape multiple objects (Instrumentation and Pipes) in one run.
Note: hold Ctrl key on keyboard to skip Name choice dialogue to continue placing pipes.

5. Click Save on the top panel. Created 2D tags appear in P&ID Explorer tree structure under corresponding P&ID page with a red pipe icon. Red color means that the link between 2D tag and 3D tag was not yet established.


6. It's possible to change the form of a pipe by at any time by:
- moving any point in any direction - drag and drop a point

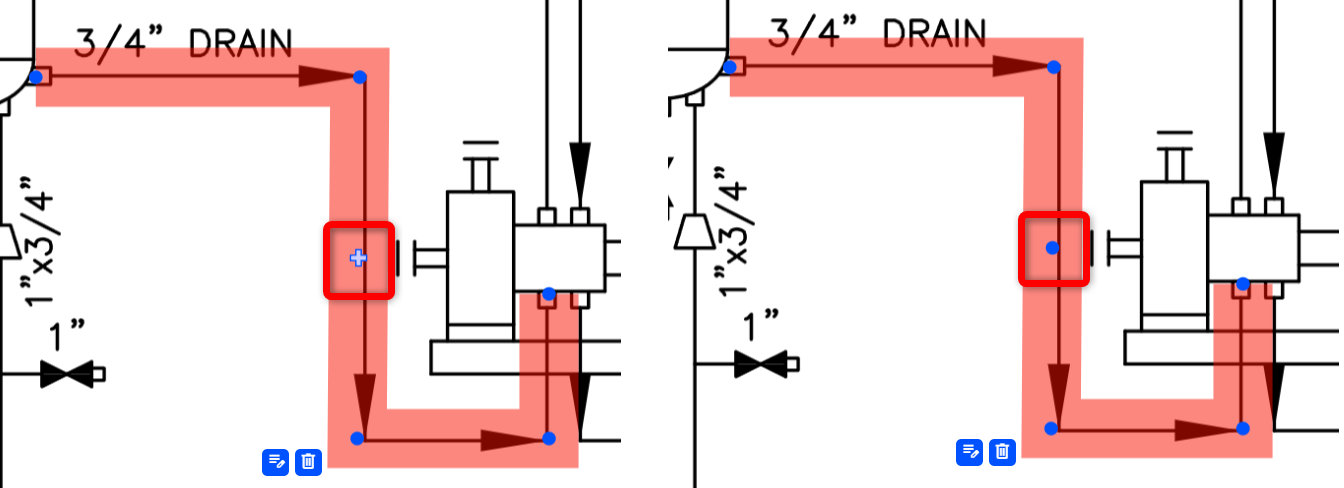
- moving any segment - drag and drop beyond blue '+' sign
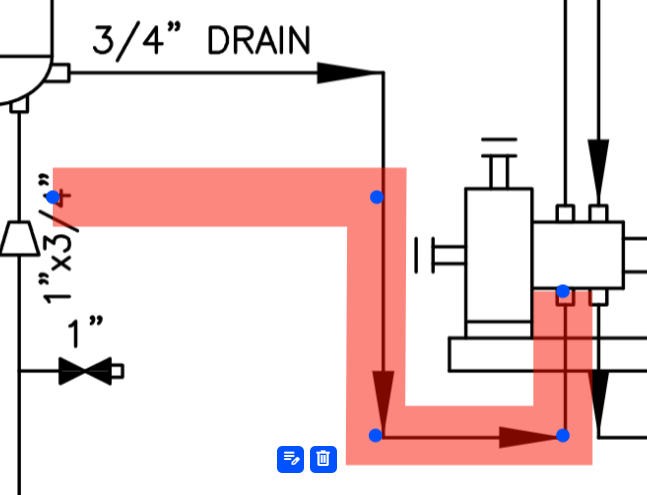
- adding points between existing points - hover over a segment and click blue '+' sign
- deleting any point - right mouse button click
Note: for convenience pipe angles close to vertical and horizontal directions are snapped automatically.
7. Change Name by clicking Edit or hide Pipe object from visualization in P&ID Viewer by clicking Hide.

Link 2D Tags with 3D Tags
1. Open both Tag Explorer and P&ID Explorer.
2. Select a P&ID object in P&ID Explorer and tag(s), to establish a link with, in Tag Explorer using CTRL.
It's not possible to link multiple P&ID objects at once. Corresponding message is shown.


3. Click Link to X tags on the top panel in P&ID Viewer.

4. The icon for P&ID object in P&ID Explorer changes its color to black. This serves as an indication of an existing link.

5. For a tag in Tag Explorer linked to P&ID object there is an indication of a link.

6. In 3D View tags that are linked to P&ID items are marked with a green link sign.
7. To unlink a 3D tag from a 2D tag select a P&ID object in P&ID Explorer and click Unlink on the top panel of P&ID Viewer.

8. If a 3D tag is linked with 2D tag double click on it or right click in Tag Explorer and click Focus in the P&ID viewer.
P&ID Explorer and P&ID Viewer with selected corresponding P&ID object are opened. Additionally tag is focused in 3D View.

9. Double click on a P&ID item linked with 3D tag in P&ID Explorer:
- P&ID Viewer is focused on the bounding box/line of corresponding P&ID item
- 3D View is getting focused on 3D tag
- Tag Explorer highlights a tag linked (corresponding tag list should be visible)

Linking P&ID Pages
Smoothly navigate between connected documentation parts by linking P&ID pages together.
1. On the top panel click Add page link.

2. Add an arrow shaped object with a click. Adjust position and size. Change direction by clicking Switch below the arrow. Change Name by clicking Edit name. This could be done at any time.

Note: if adding multiple page links in one run, hold Ctrl key on keyboard to skip Name selection dialogue box.
3. In P&ID Explorer tree structure unpaired page link object is saved with red page icon.

4. Create second page link on another P&ID page following steps 1 and 2. Once created select both page link objects using Ctrl and click Link pages on the top bar in P&ID Viewer.

Warning: linking multi-selection of page links and linking page links from the same page is not possible.
5. Once linked both icons for page links become black. Arrows in P&ID Viewer change color from red to green.

6. Click Go to to navigate to the linked P&ID page.

7. To remove the link between two page link objects select one of them either in P&ID Viewer or in P&ID Explorer tree and click Unlink on the top panel in P&ID Viewer.

Actions
Following list of actions is available from bottom menu.

- Information - showing parent P&ID and P&ID page information, creation parameters and date
- Copy URL - easy way to get a link leading to the corresponding object in P&ID Viewer
- Need validation - makes a checkmark appear for certain object(s) signaling the need of confirmation for an element

- Focus - opens corresponding P&ID page centered on the selected element. Also available from right mouse button click on an element.
- Delete - removes an element after confirmation
- Edit - duplication of Name changing action
- Link to - linking 2D tag to 3D tag(s) described in Link 2D tags with 3D tags
Was this article helpful?
That’s Great!
Thank you for your feedback
Sorry! We couldn't be helpful
Thank you for your feedback
Feedback sent
We appreciate your effort and will try to fix the article