Following this article, get to know Cintoo Workspace application, log into Cintoo account and tenant, choose settings for controls and quality parameters.
TABLE OF CONTENTS
- Installation and Launch
- Targeted Tenant
- Visual Quality
- Scans Quality
- Controllers Configuration
- Control Tips
- Sign In
Installation and Launch
Install application called Cintoo Workspace, following standard installation procedure. Launch application by double clicking CintooWorkspace.exe.
Starting menu with options to sign in with a Cintoo account, choose a Targeted tenant, choose Visual quality, and set up Controllers configuration will be displayed. All settings on starting menu are saved between sessions.
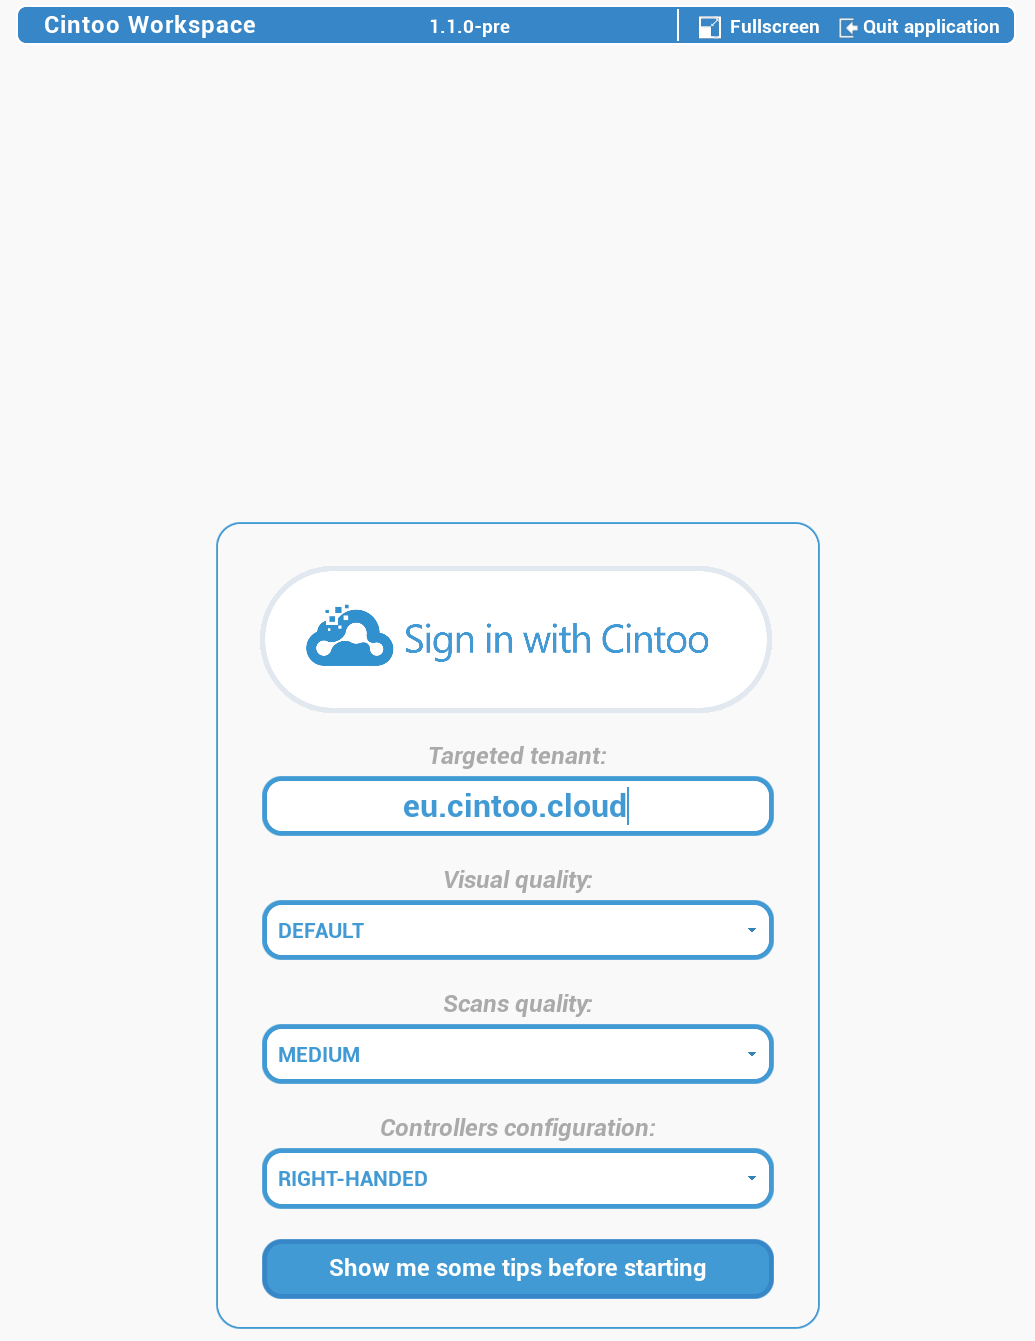
Targeted Tenant
Define Targeted tenant. Tenant value is saved for future logins and could be changed at any time.
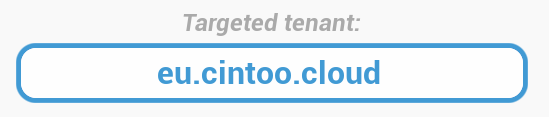
- For EU tenant, type eu.cintoo.cloud
- For US tenant, type us.cintoo.cloud
- For Canadian tenant, type ca.cintoo.cloud
- For custom tenant, type [company name].cintoo.cloud
Visual Quality
Set Visual quality that best fits the needs according to a description below.
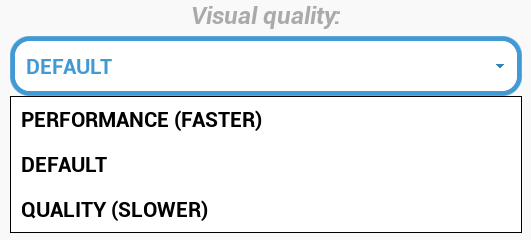
- Performance (Faster) - favors frame rate, using Nvidia DLSS and NIS upscaling
- Default - standard rendering
- Quality (Slower) - favors image quality, using Nvidia Image Enhancement
All three options also work on non-Nvidia graphic cards.
Selected Visual quality is kept between sessions and can also be changed later from Options menu on top panel in Desktop mode. Change applies immediately, in both VR and Desktop modes.
Scans Quality
Affects data quality directly.
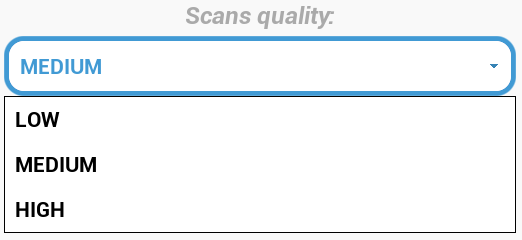
- Low - minimum quality for fast data visualization without much details. Adapted to low-end workstation or low-speed network.
- Medium - all-around quality with more details, best fit for working with large scenes. Adapted to mid-range workstation.
- High - allows to perform detailed actions and review with scan data. Requires a good workstation and high-speed network.
Selected Scans quality is kept between sessions and can also be changed later from Options menu on top panel in Desktop mode. Change applies to scans streamed after it, in both VR and Desktop modes.
Controllers Configuration

- Right-handed
- Left-handed
In Left-handed mode, all controller inputs are mirrored, across whole application.
Control Tips
Review controls by clicking Show me some tips before starting.

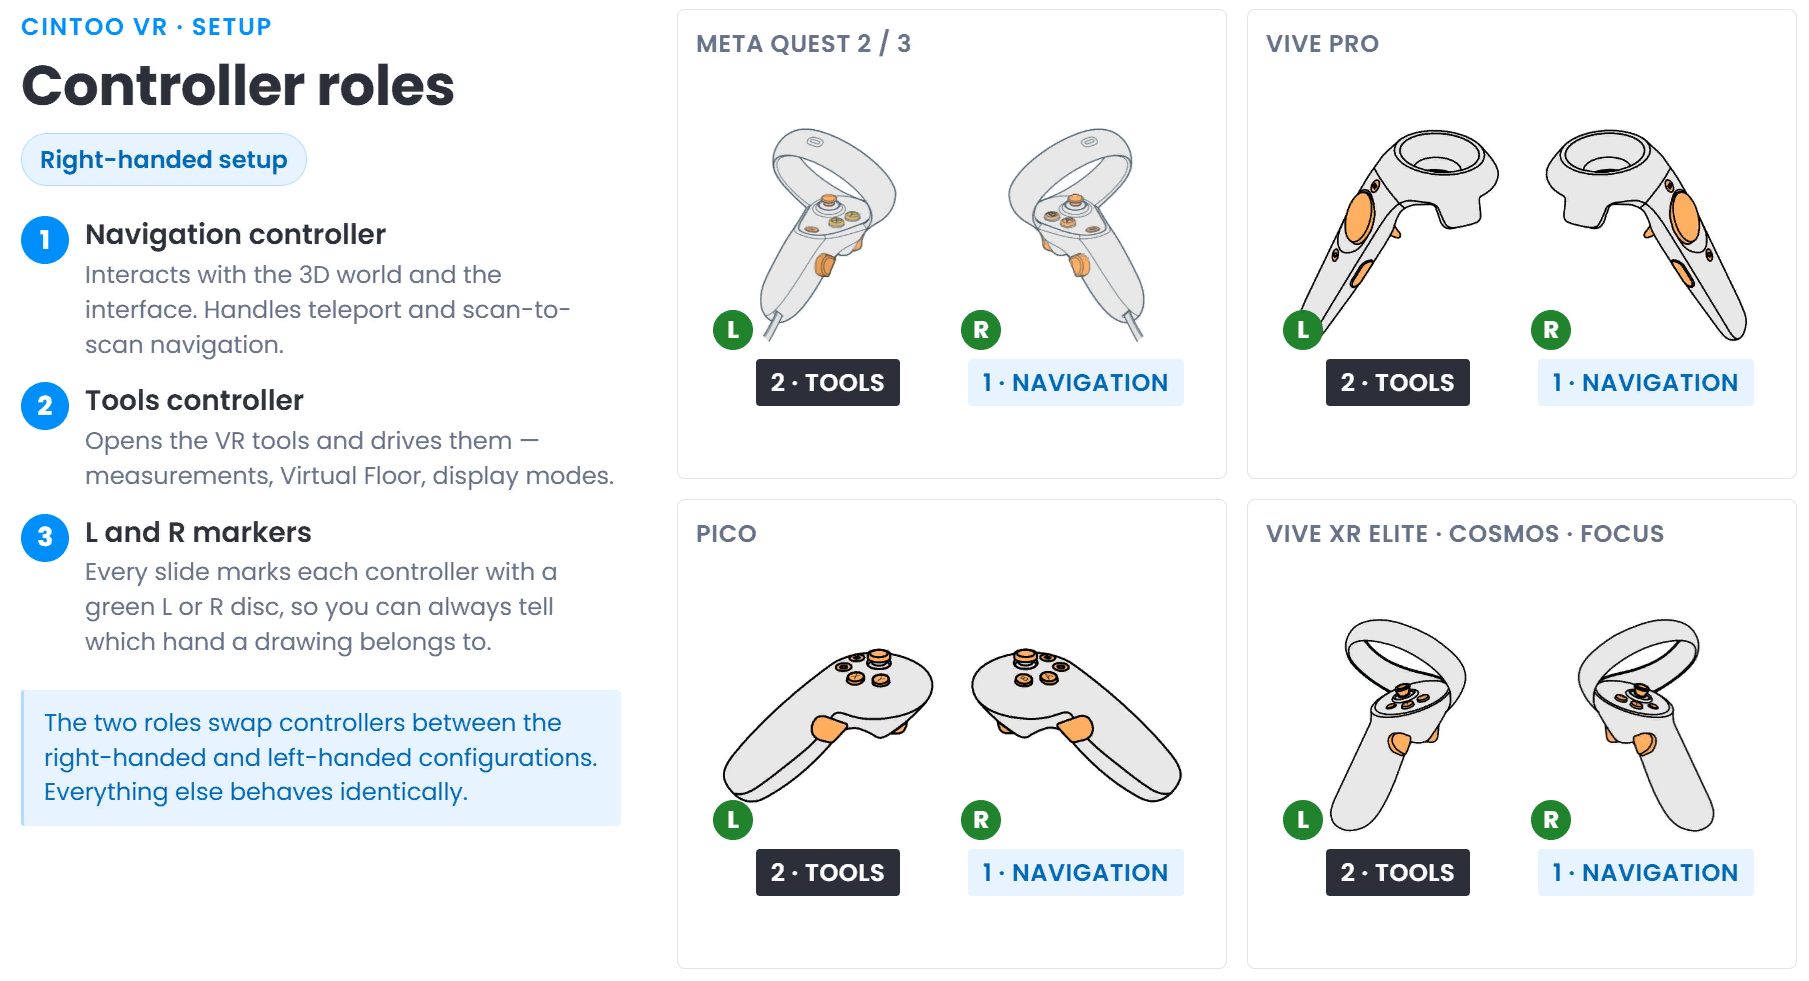
Controller Roles
Button layout of each controller depends on chosen handedness - see Controllers.
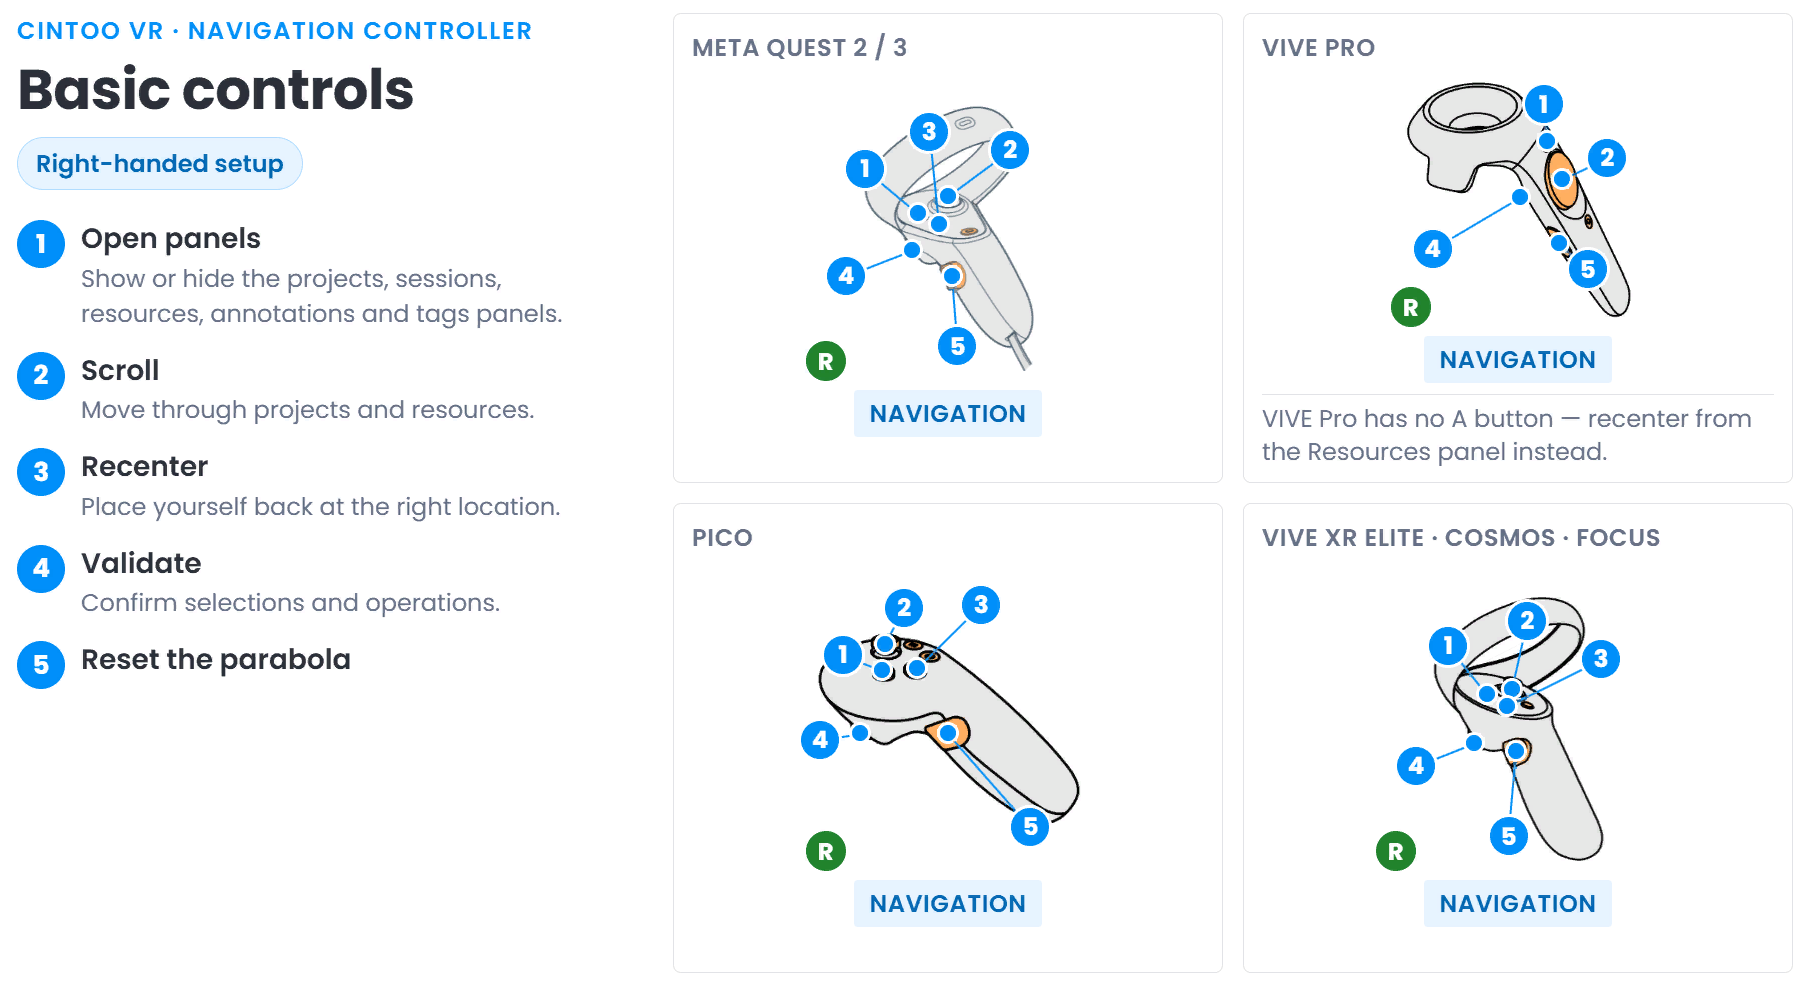
Basic Controls
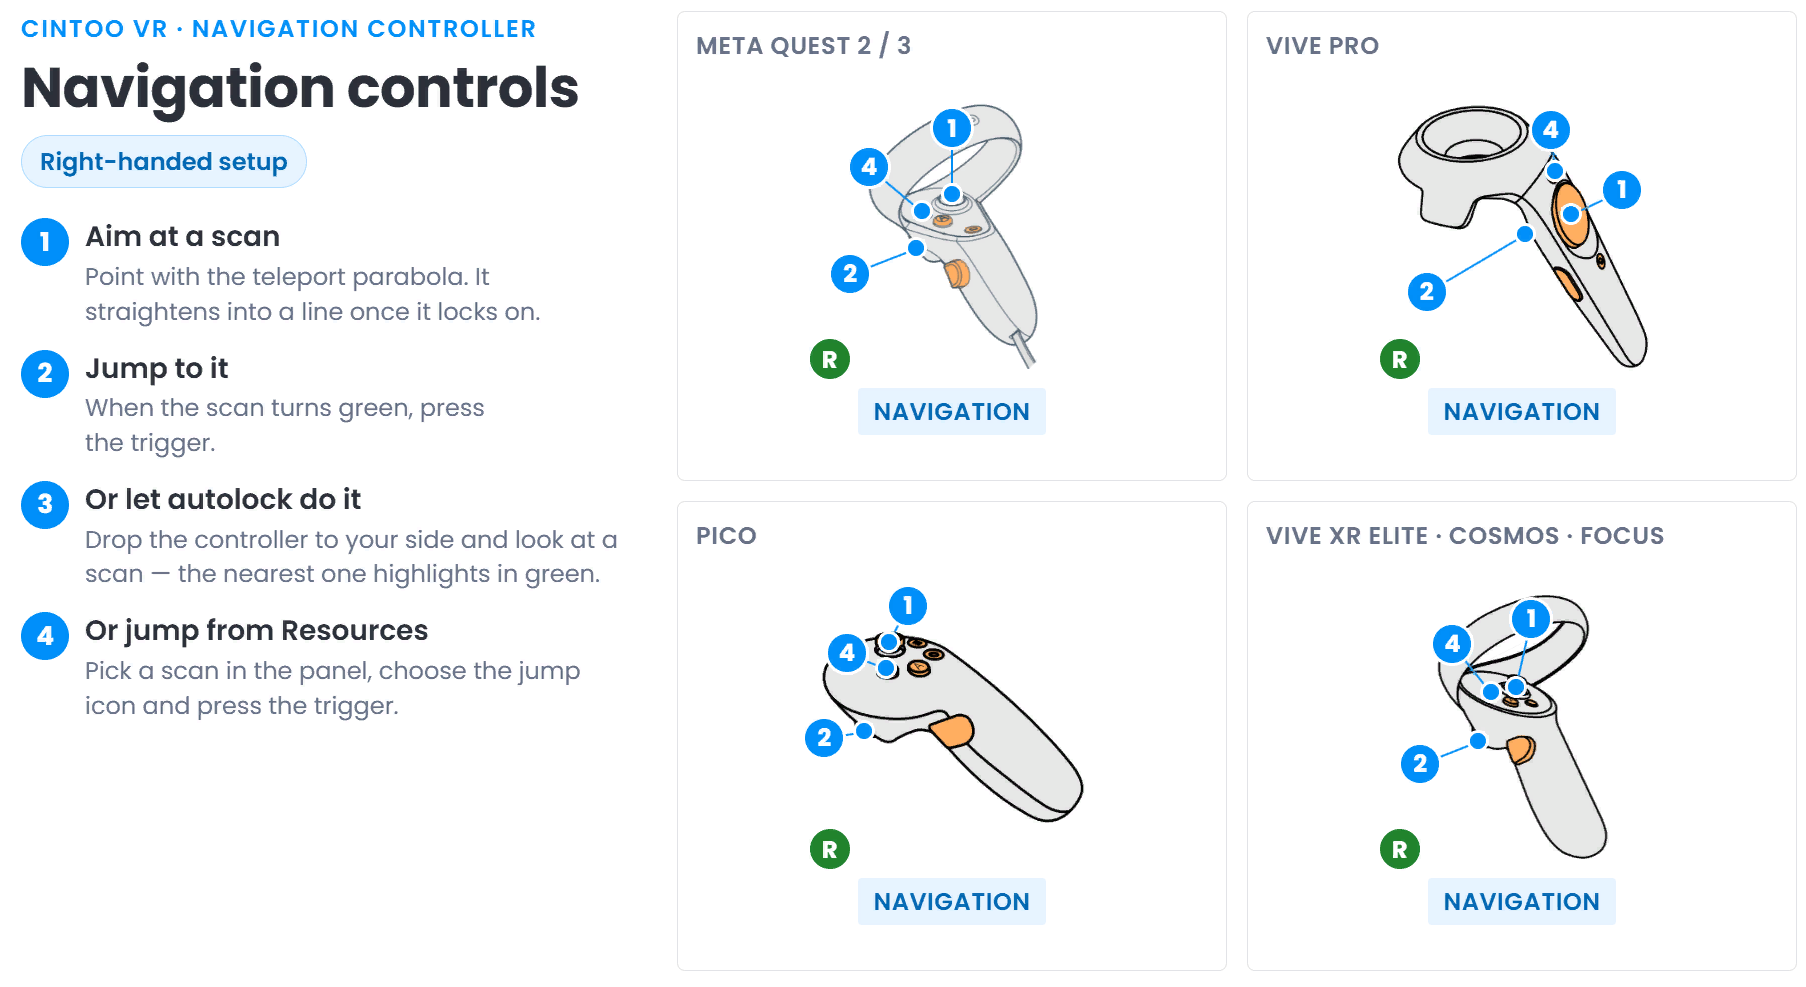
Navigation Controls
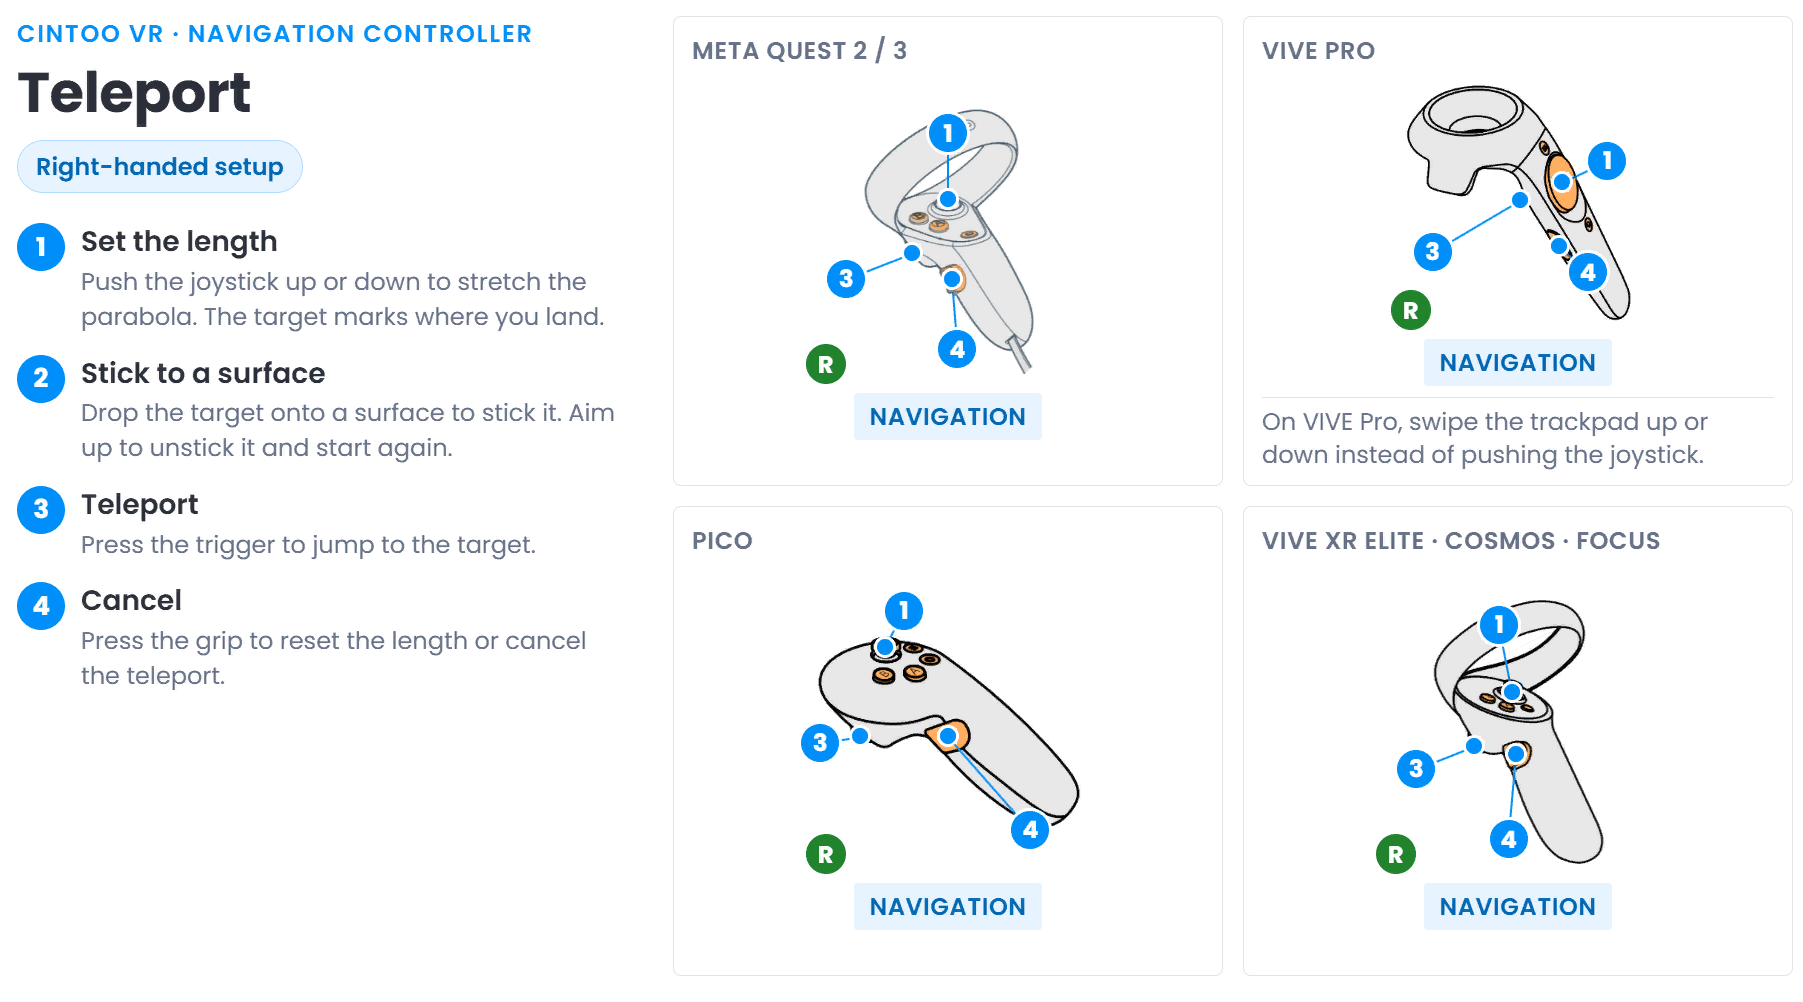
Teleport
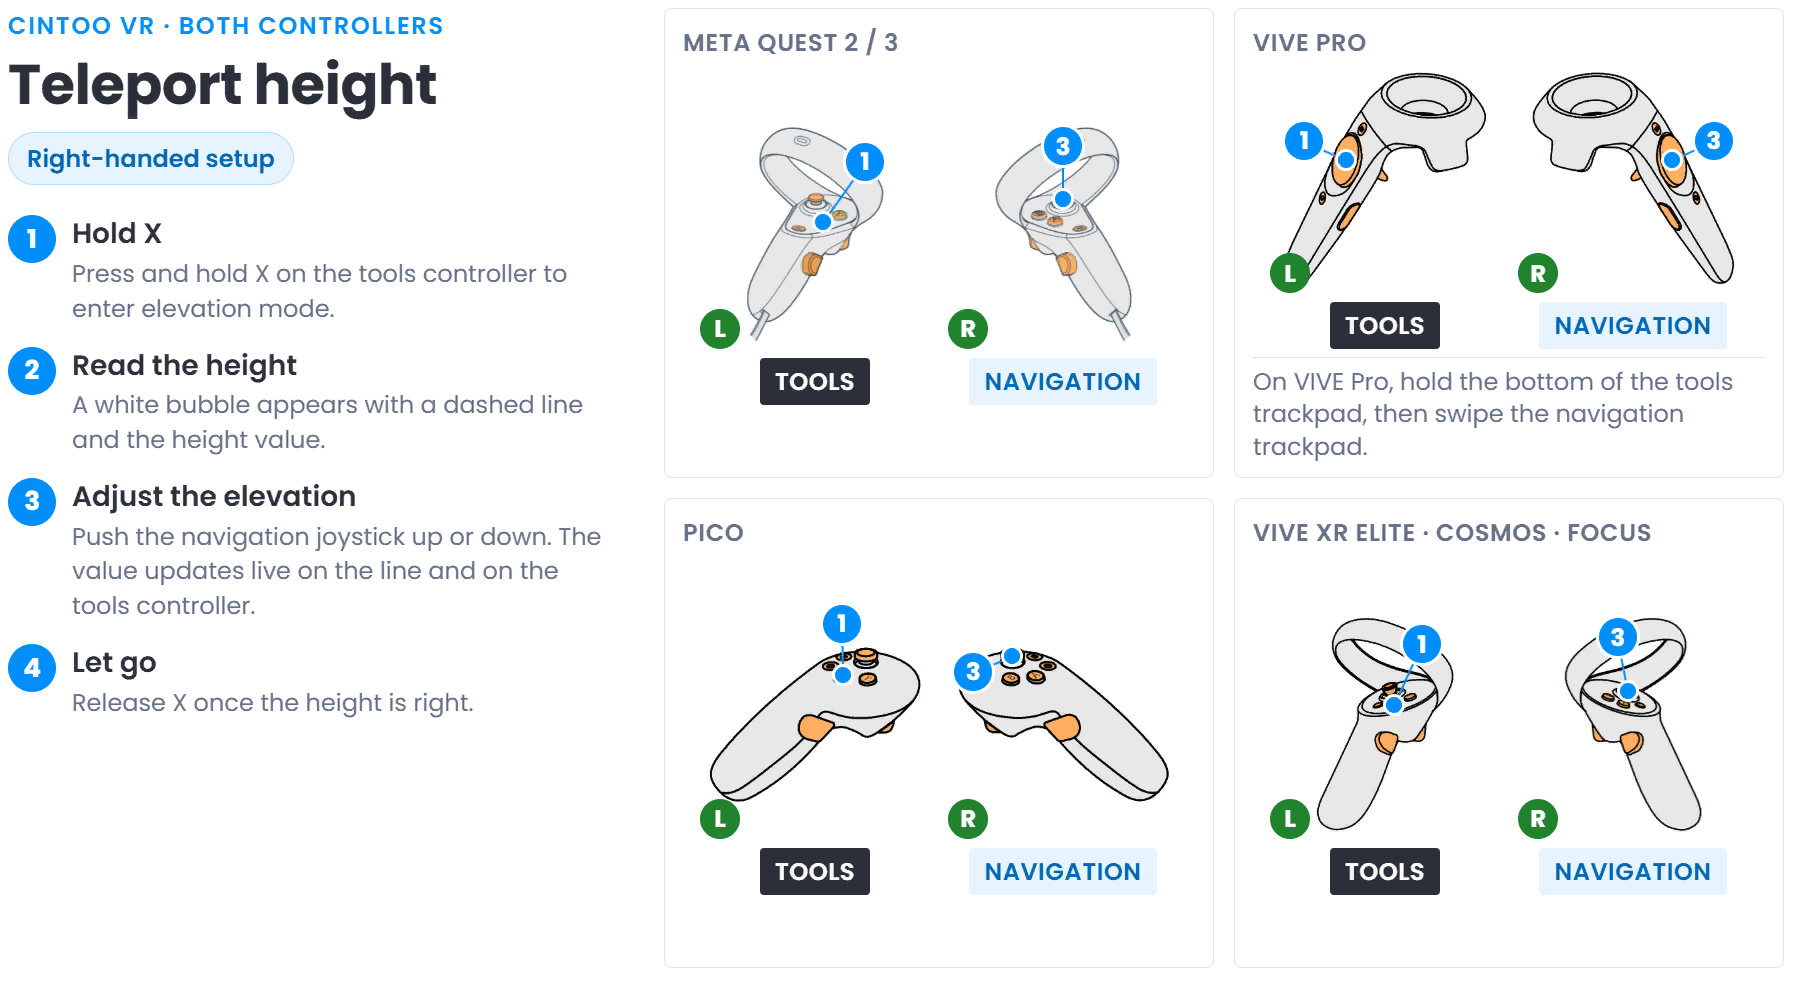
Teleport Height
Chosen height is kept between sessions - across projects, after changing units, after restarting application or signing out and back in, and after switching between Exo and Ego.
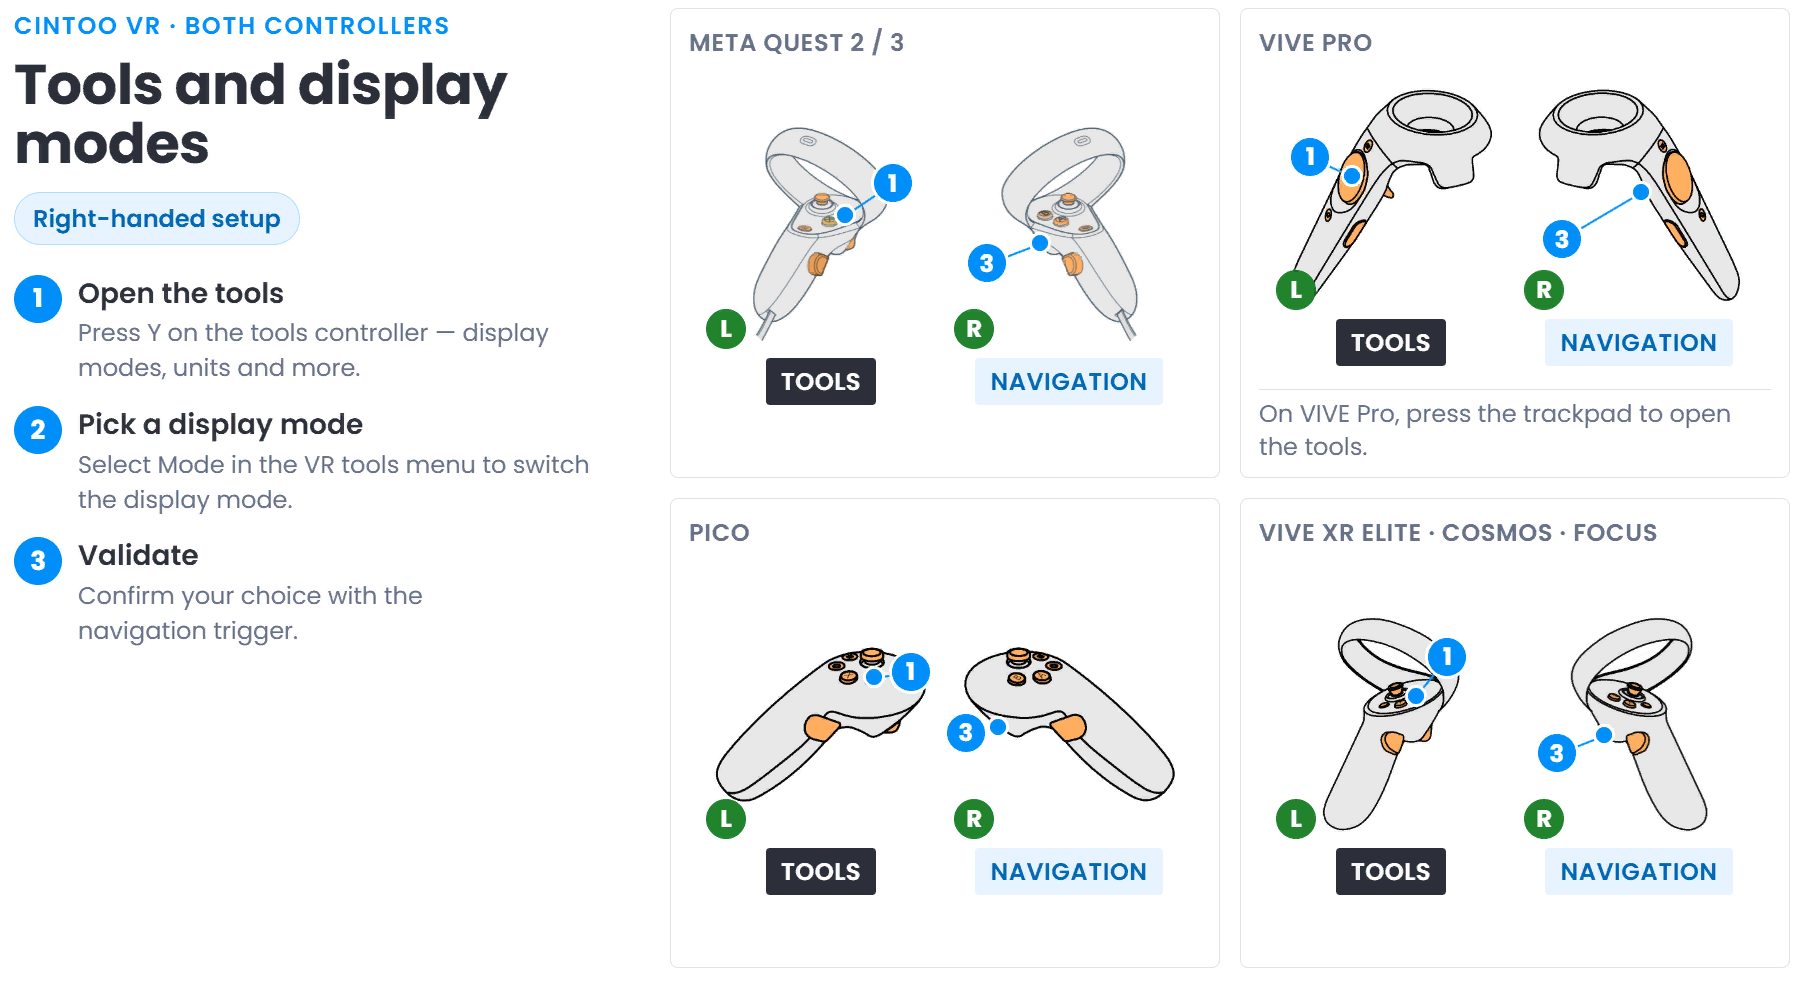
Tools and Display Modes
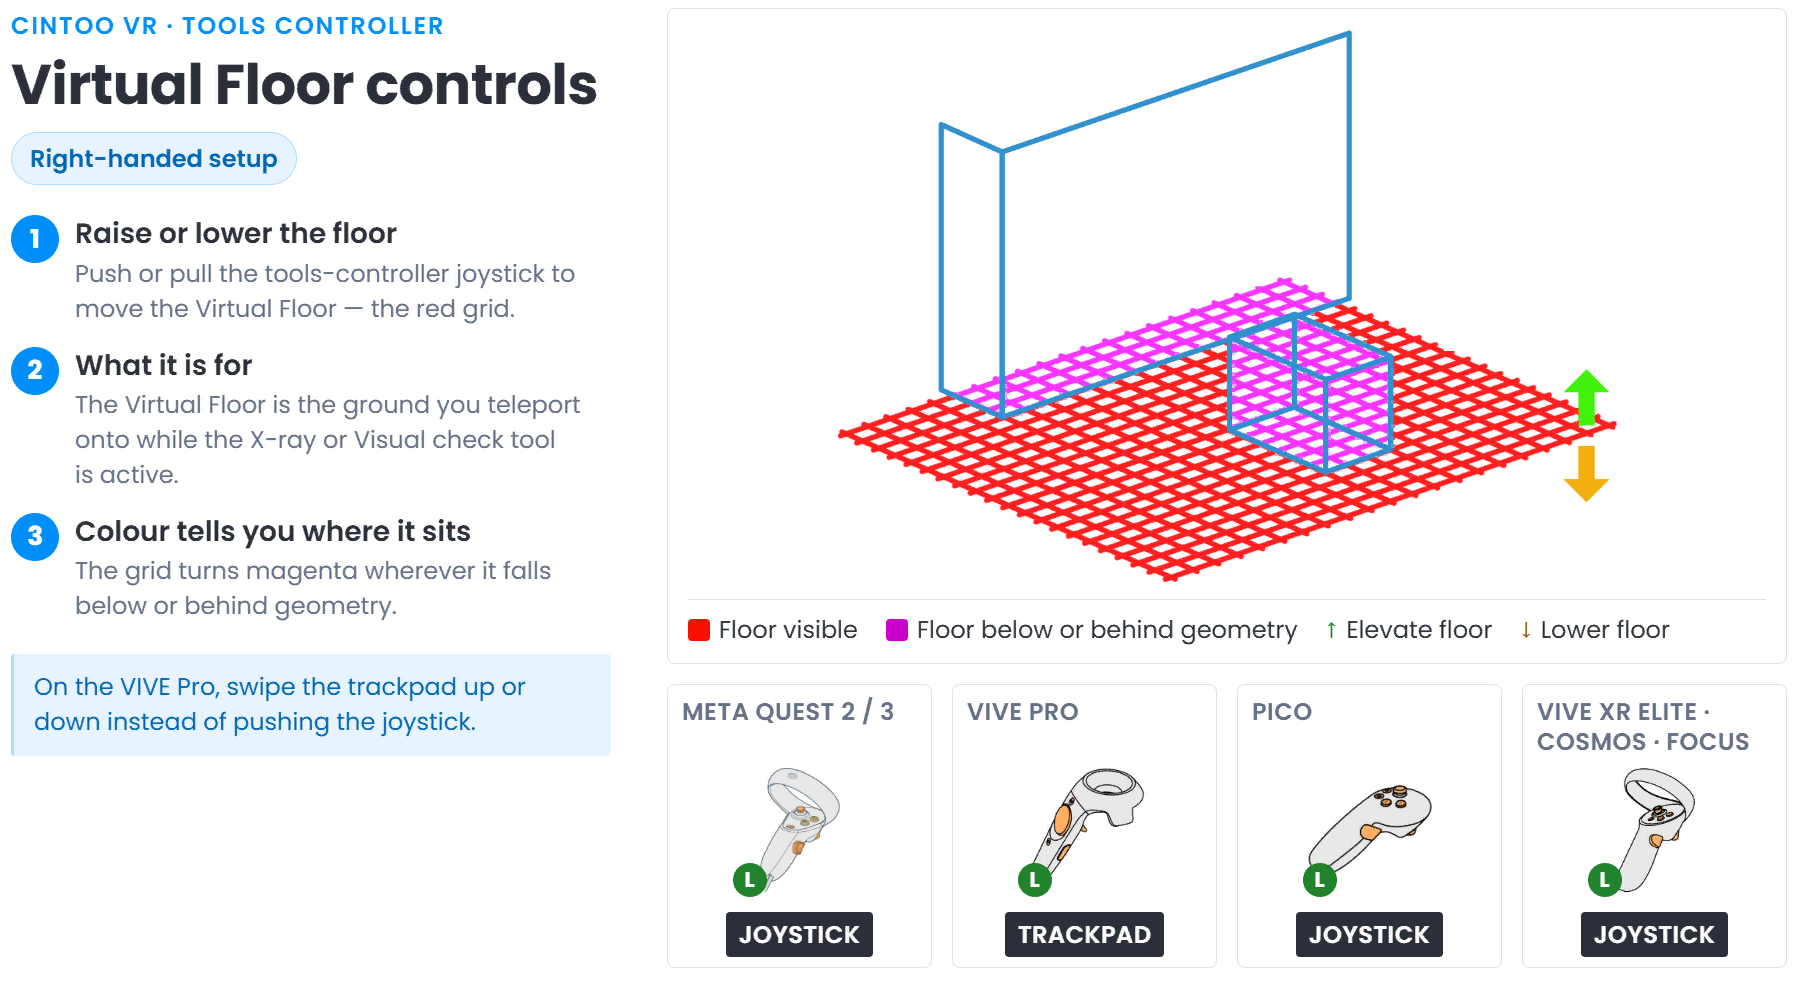
Virtual Floor Controls
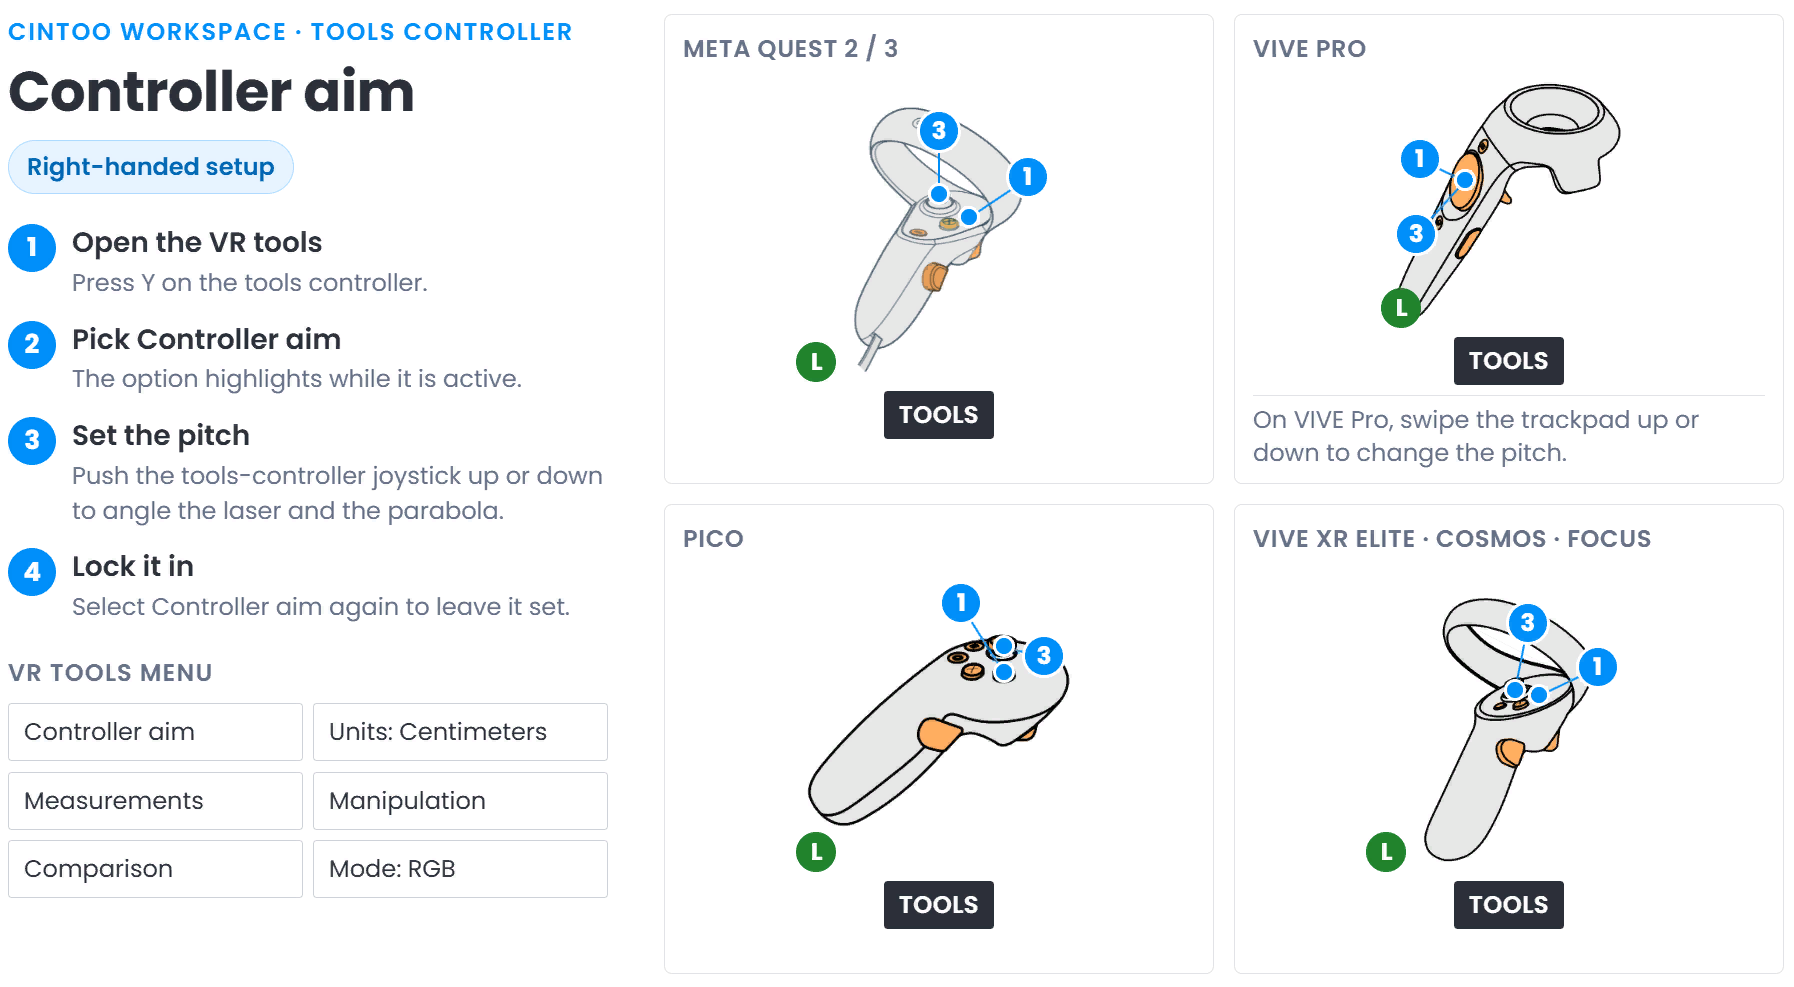
Controller Aim
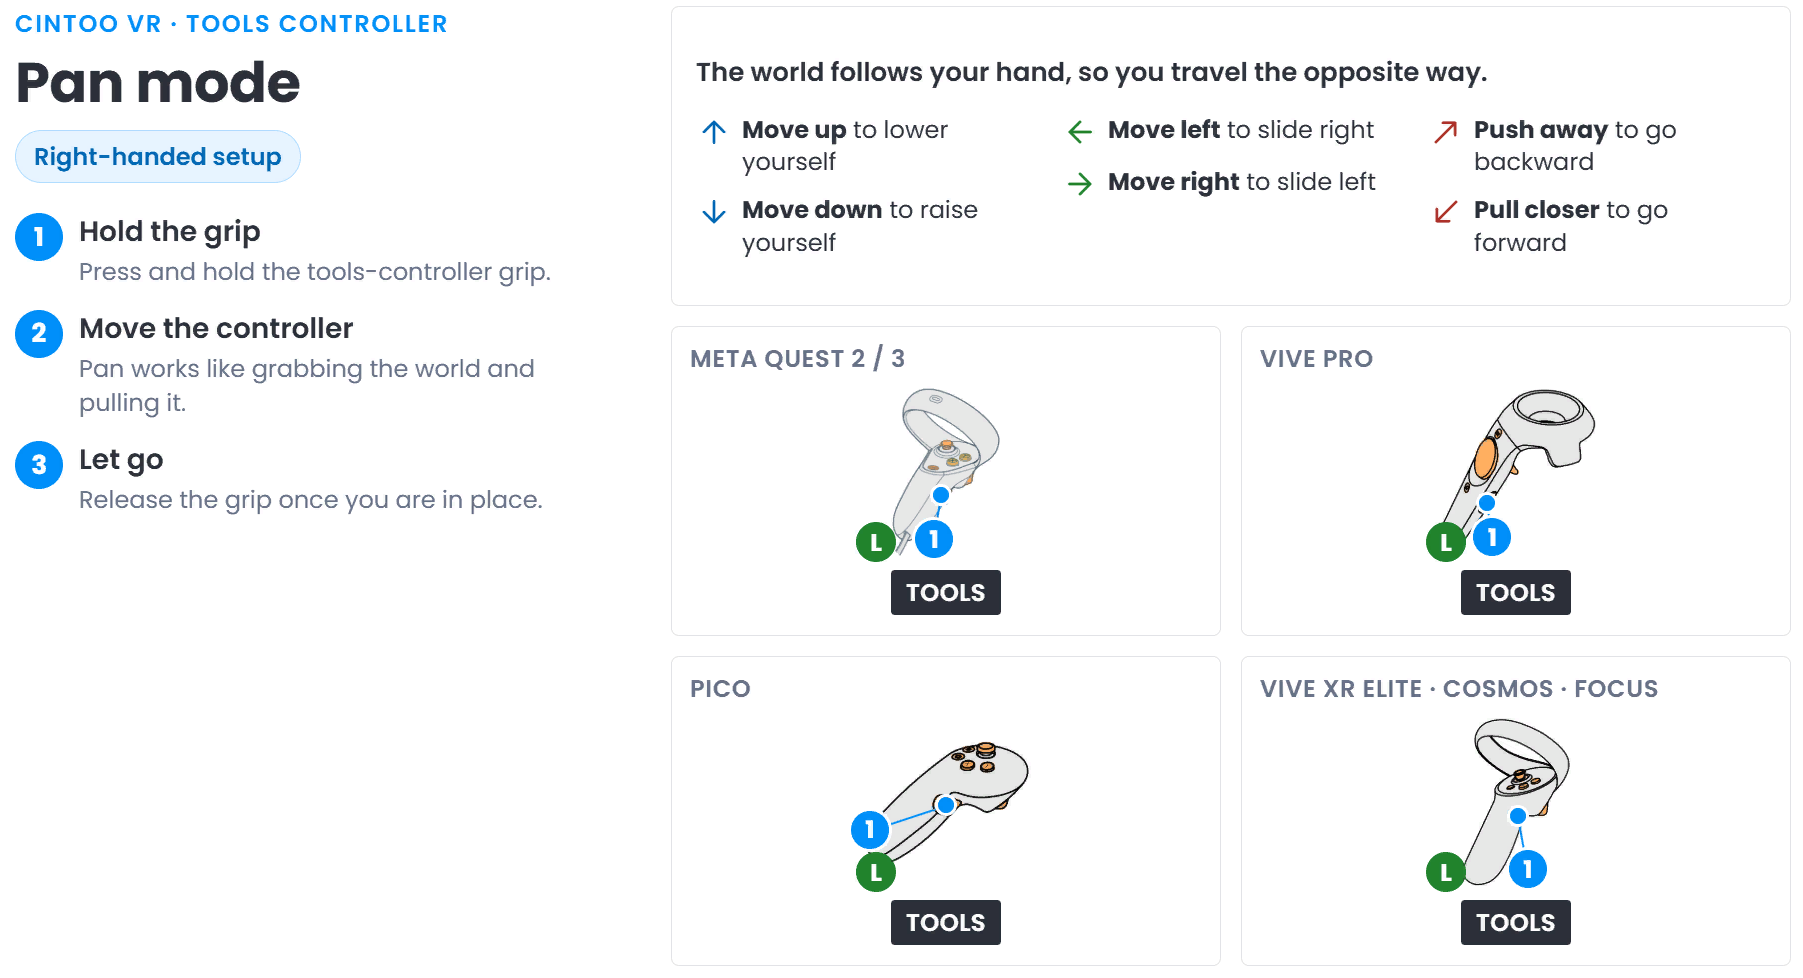
Pan Mode
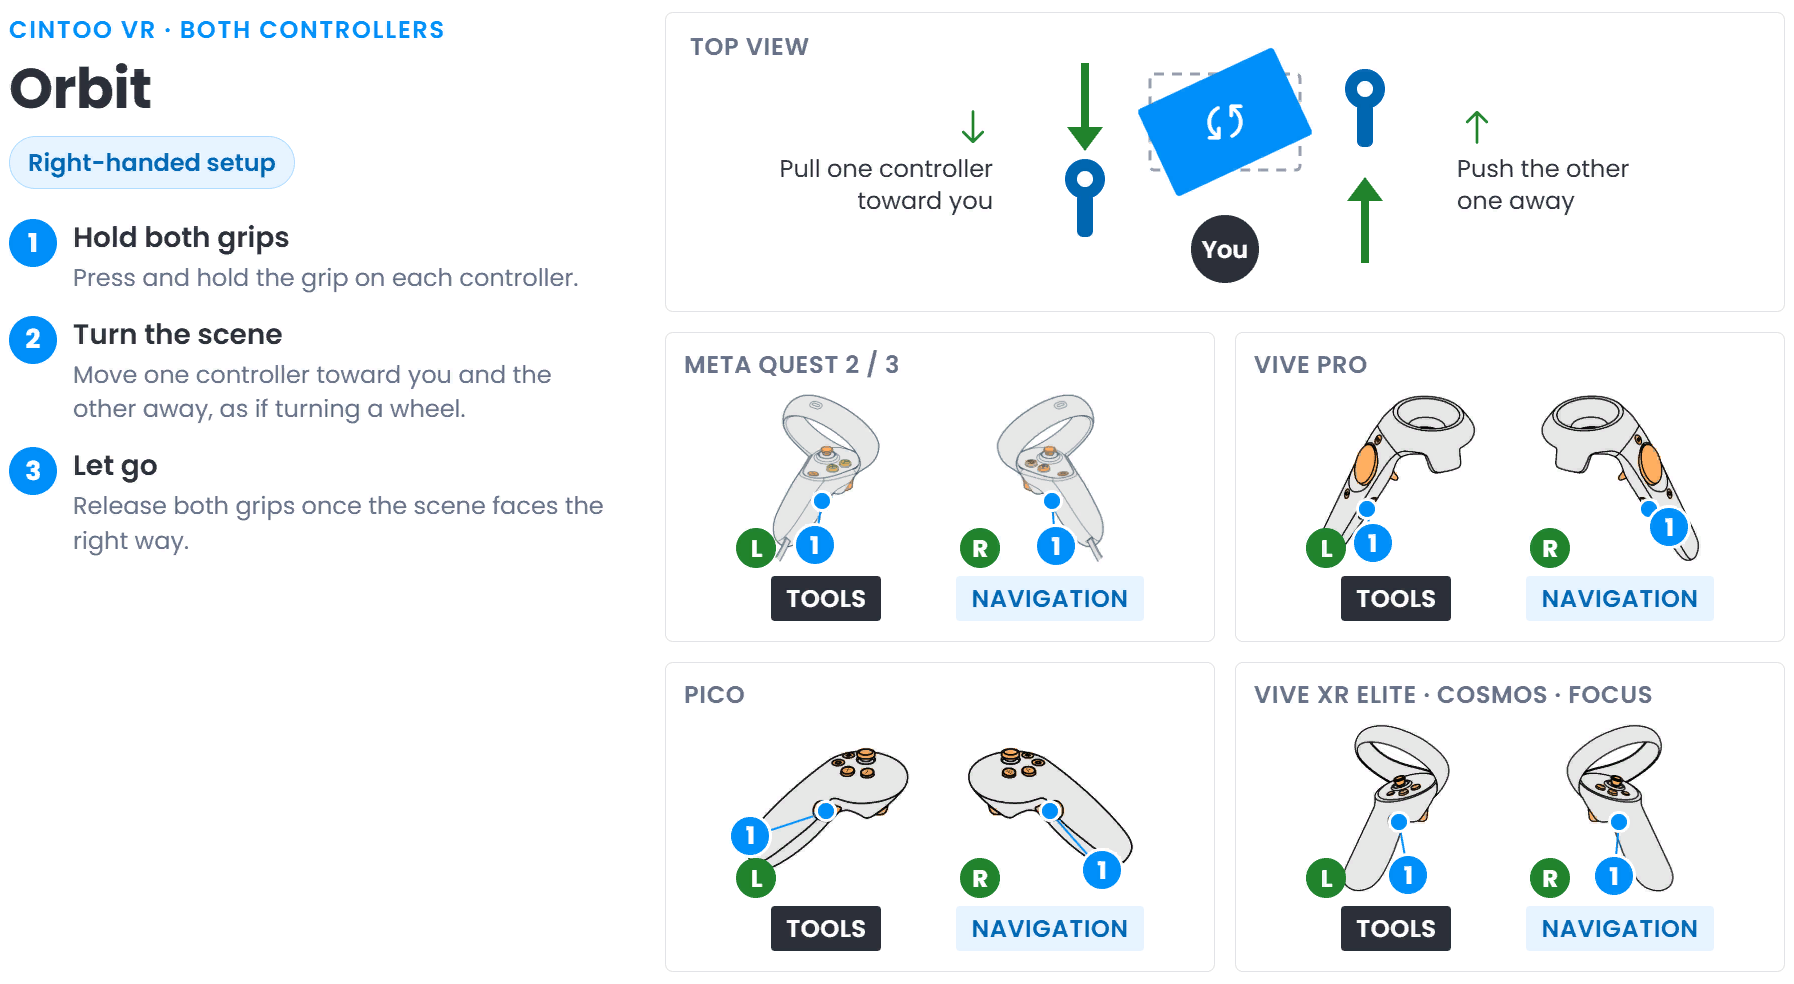
Orbit
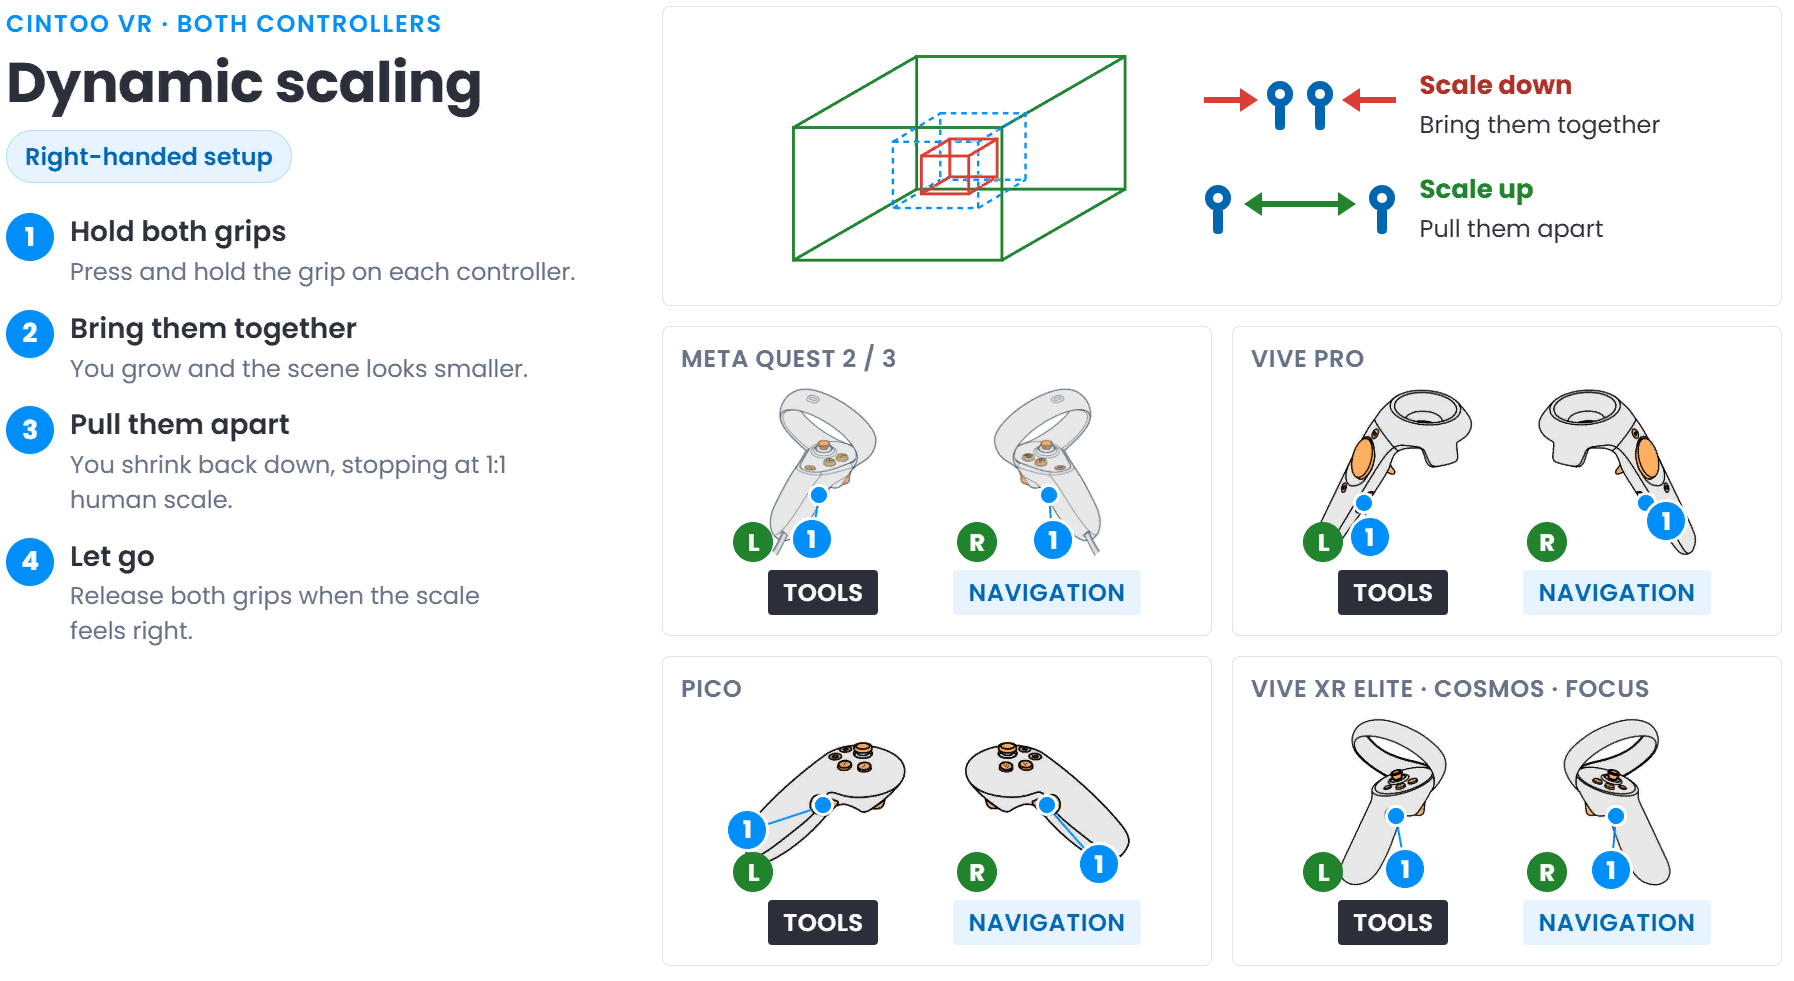
Dynamic Scaling
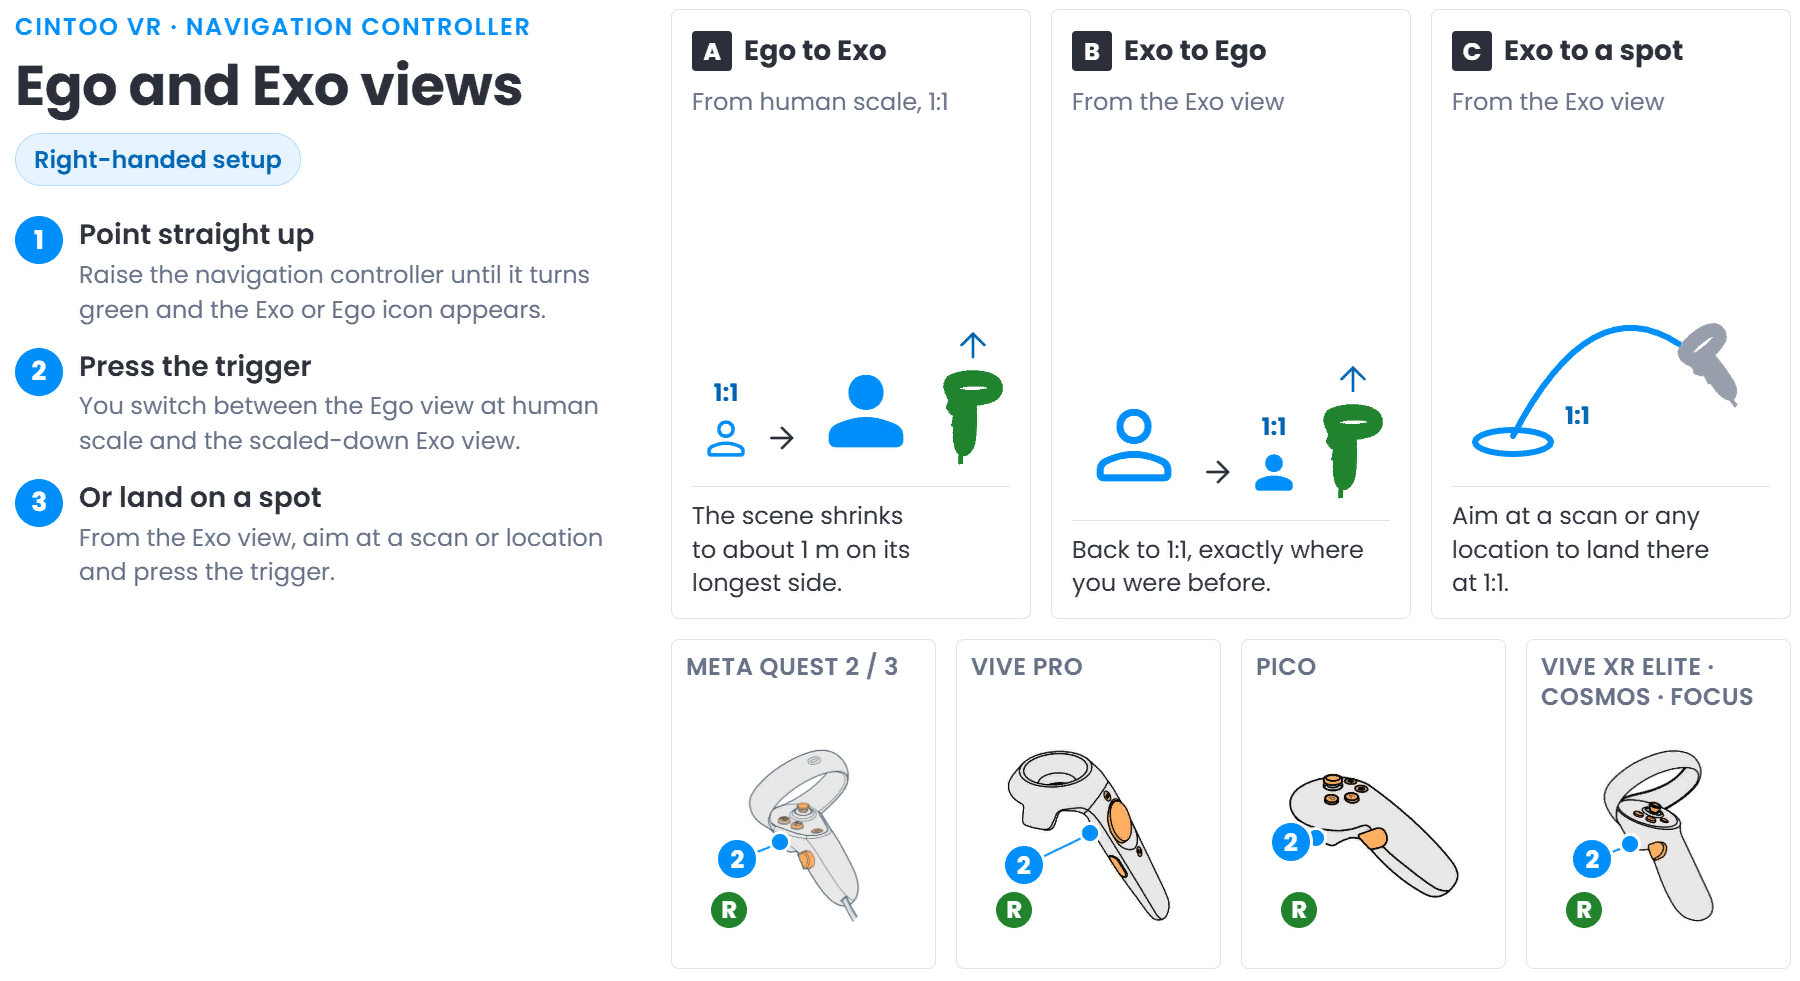
Ego and Exo Views
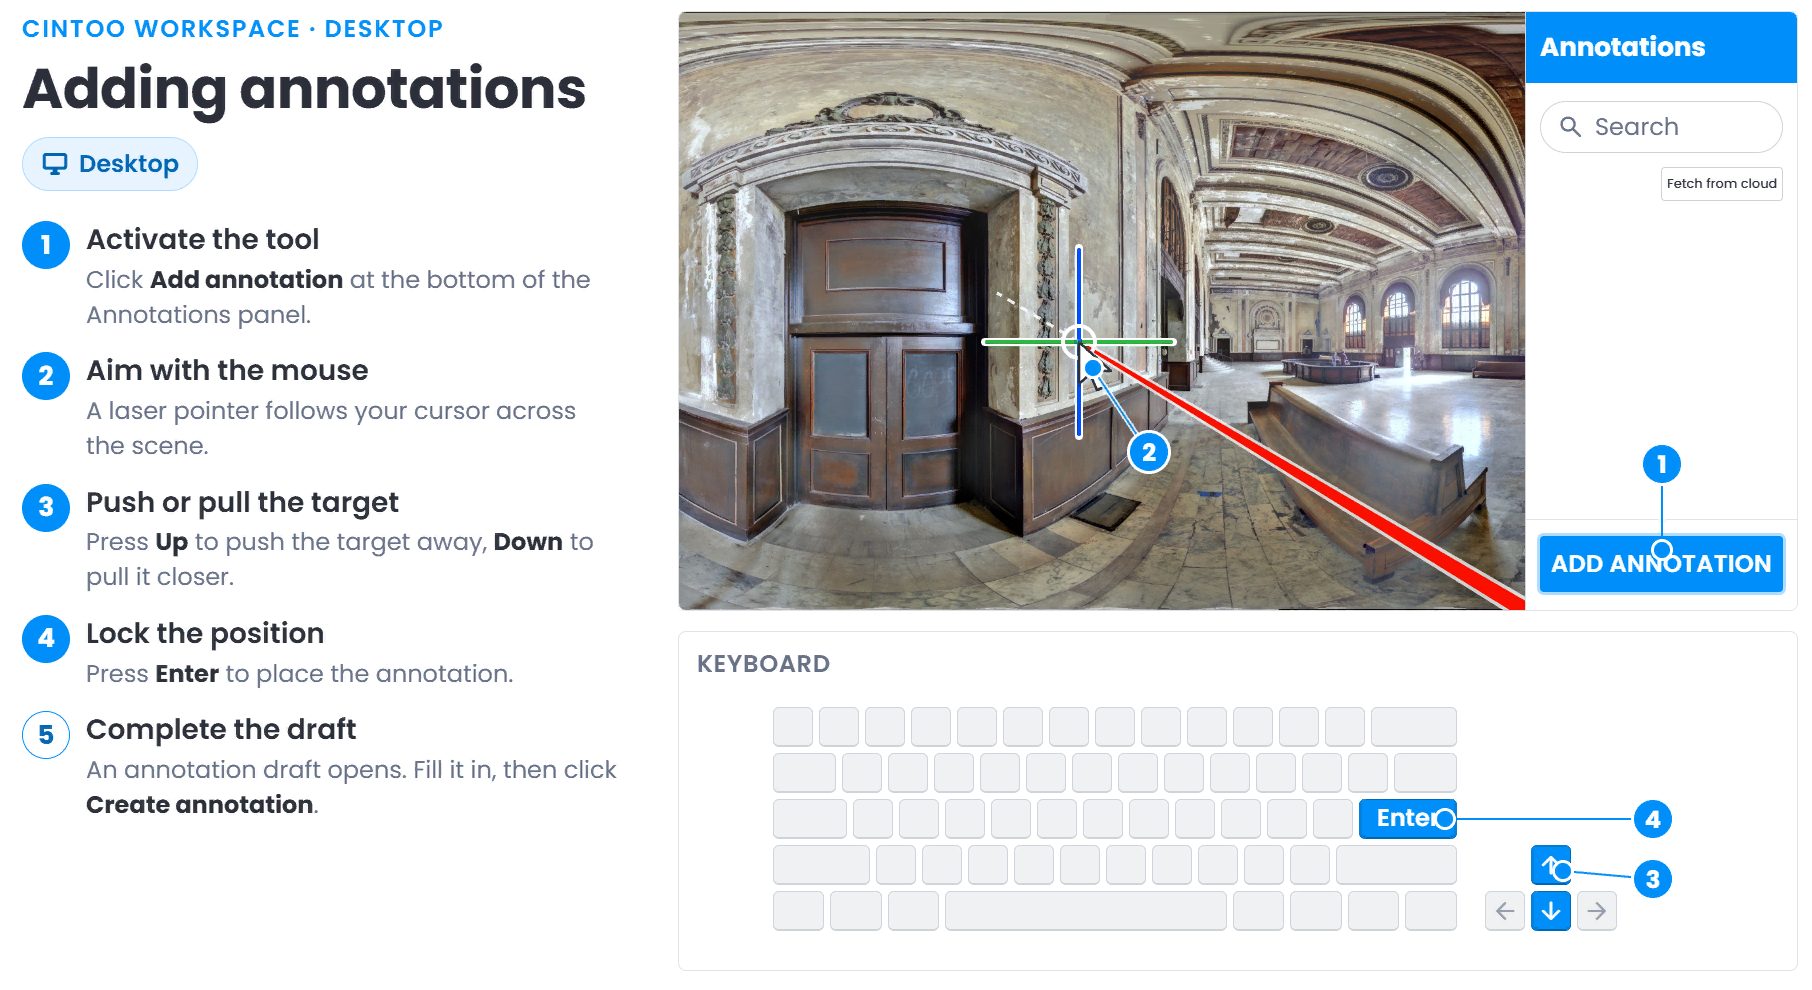
Adding Annotations
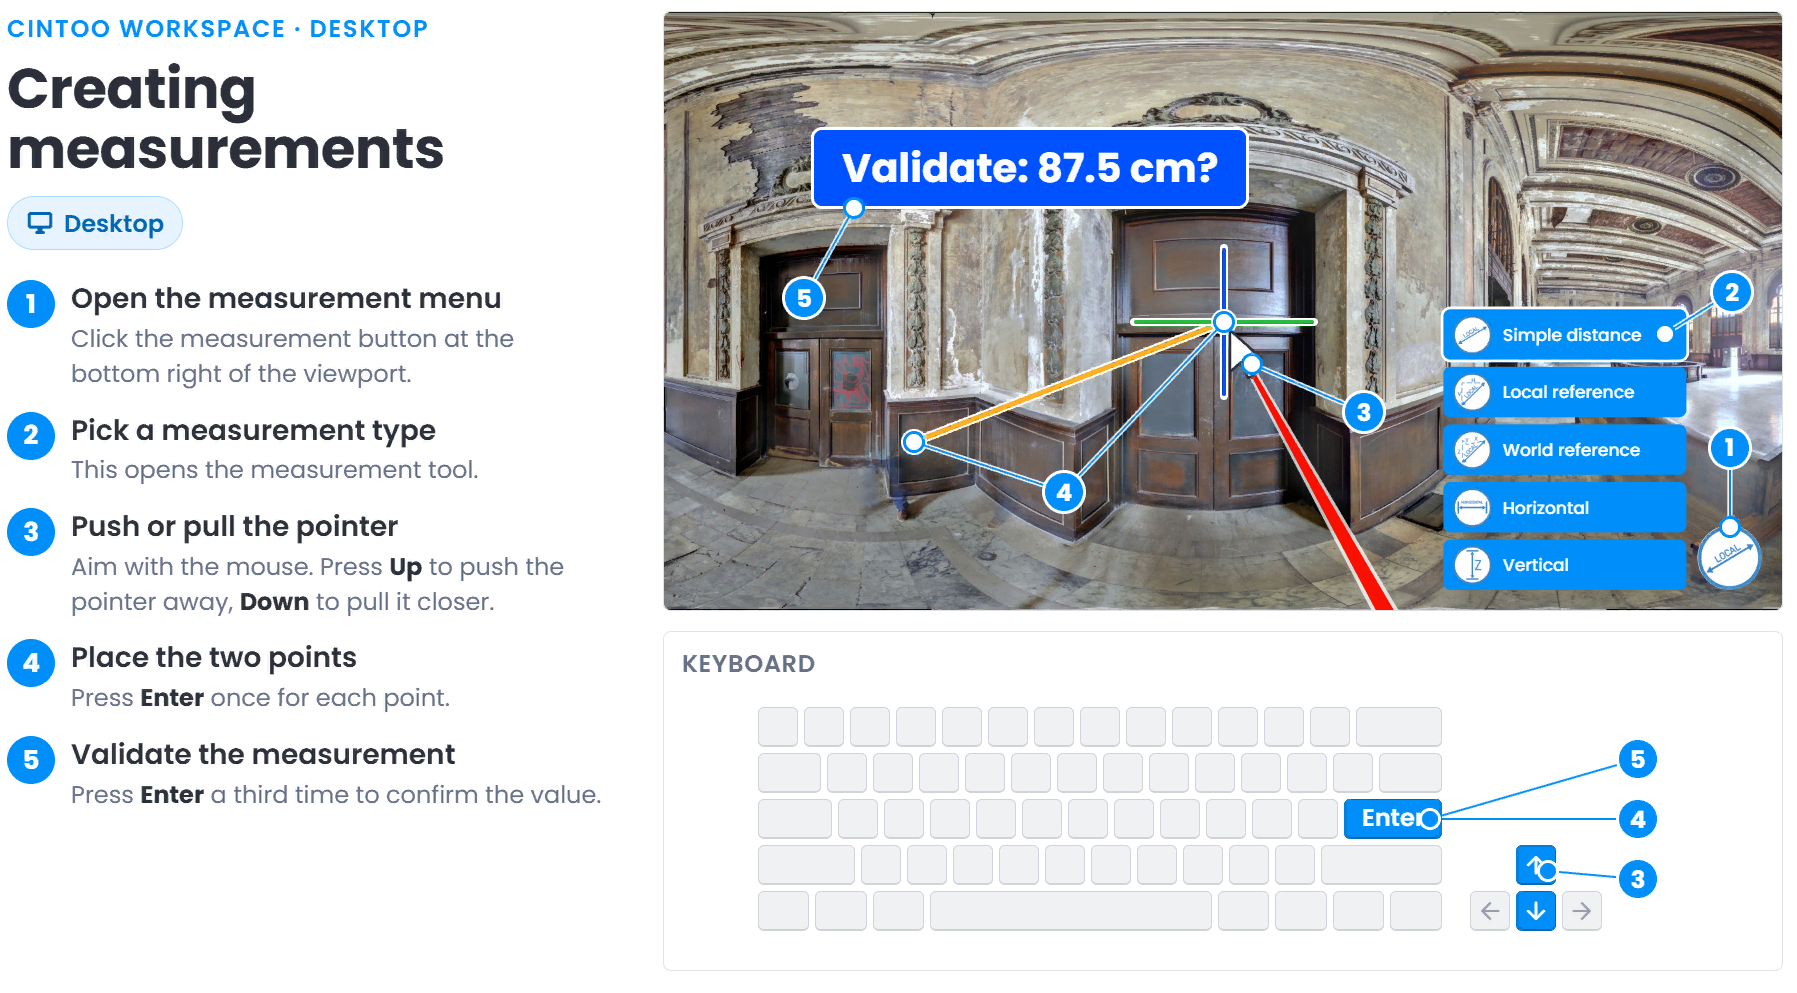
Creating Measurements
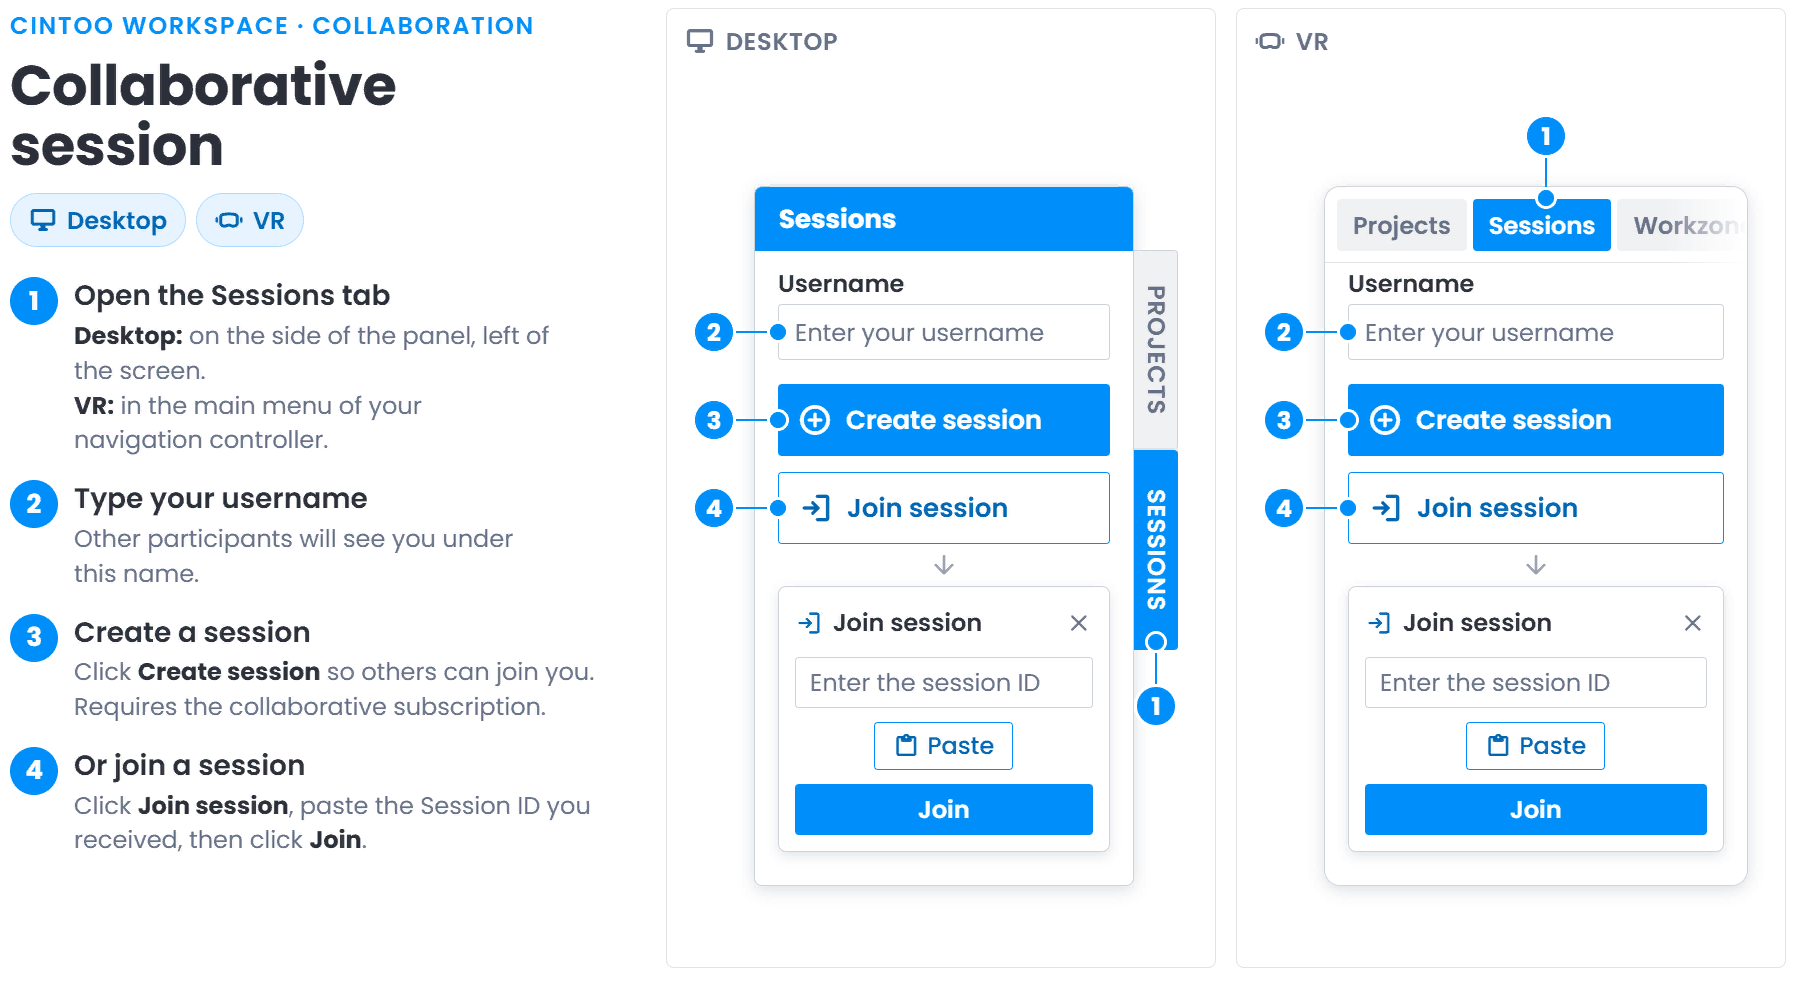
Collaborative Session
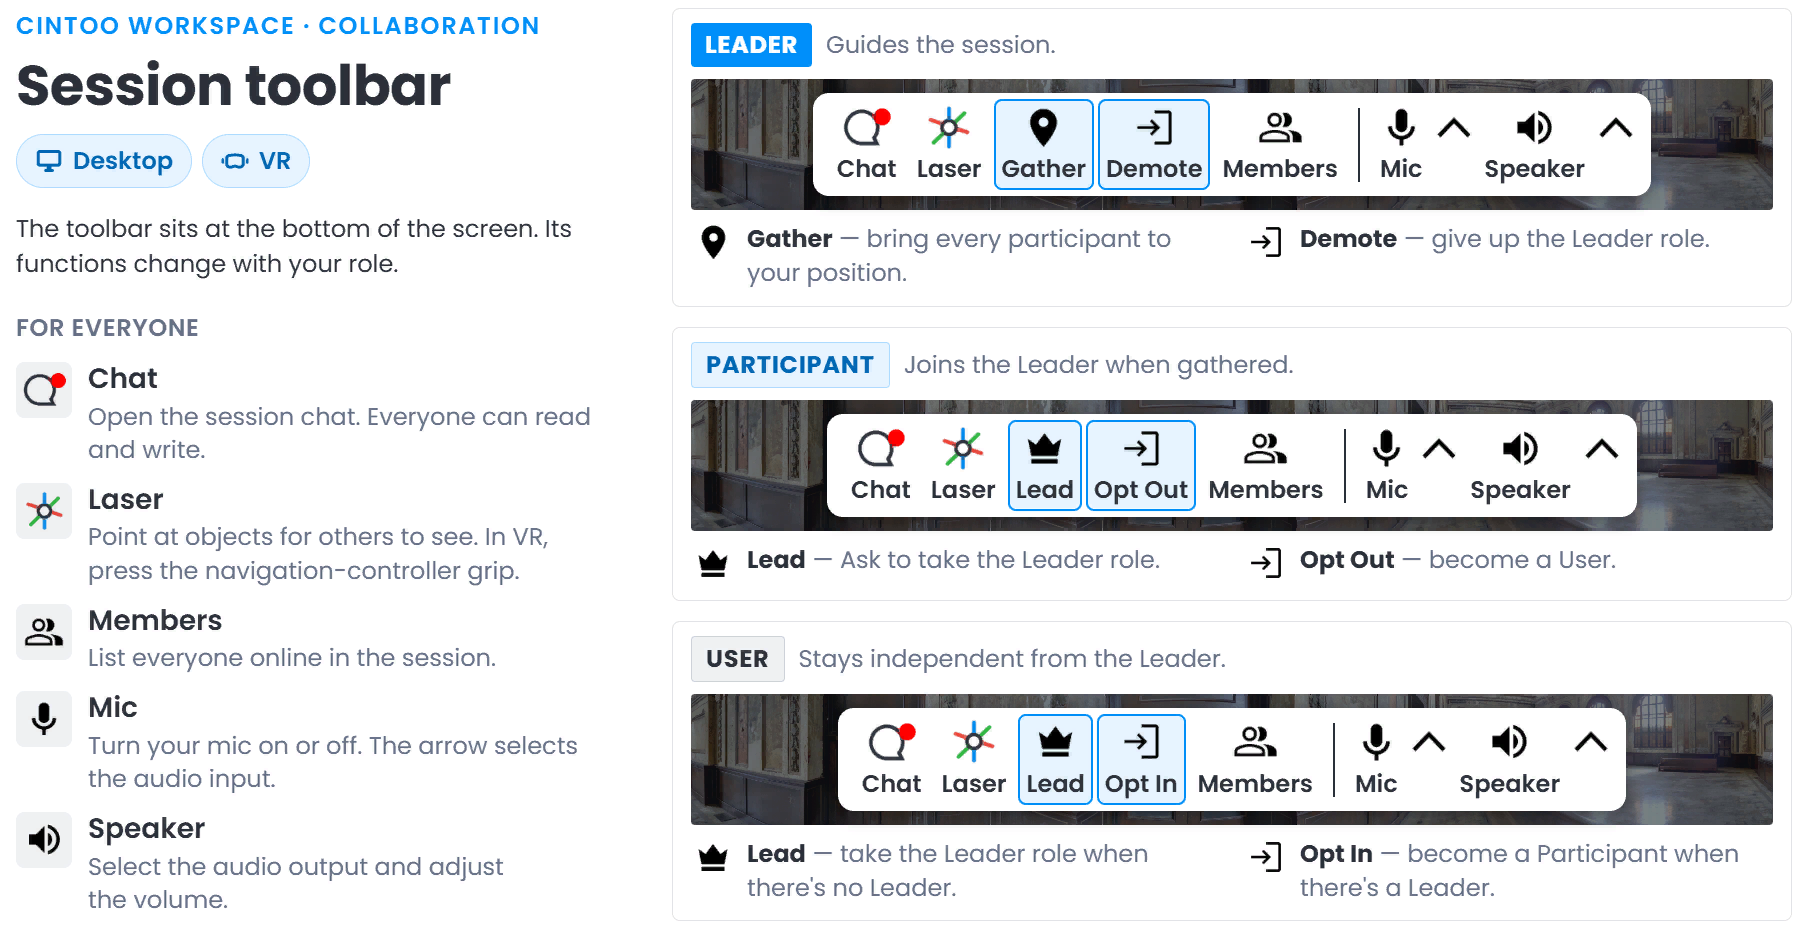
Session Toolbar
Sign In
- Button Sign in with Cintoo allows to connect to a Cintoo account.
- Click Sign in with Cintoo. A page will open in browser to sign in to Cintoo account.
Enter Cintoo login credentials to sign in.
- In Authorize application dialogue, click Allow.
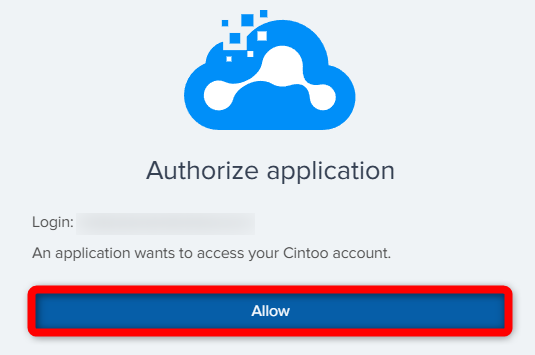
If authorization is not allowed after one minute, Login failed message will be displayed.
Hover mouse cursor over Login failed message, and click Retry Log in.
- Once successfully connected, Projects panel will display a list of projects in the account.
- Signing in also unlocks Sessions tab, used to create and join multi-user sessions. Full workflow is described in Multi-User Collaboration.
- To quit Cintoo Workspace press Quit application at the top of the screen. ESC does not quit application in Desktop mode - it closes dialogs, and exits VR mode when in VR.

Was this article helpful?
That’s Great!
Thank you for your feedback
Sorry! We couldn't be helpful
Thank you for your feedback
Feedback sent
We appreciate your effort and will try to fix the article