This article describes how to create linear measurements from any pair of panoramic images in Cintoo - scans, 360 video frames and 360 images, including stereoscopic 360 panoramic images (for example, coming from R2S solution).
TABLE OF CONTENTS
- Requirements and Recommendations
- Restrictions
- Import 360 Images
- Create Stereo Measurement
- Manage Stereo Measurements
- Exporting List of Measurements
Requirements and Recommendations
Stereo measurement reconstructs a 3D segment by matching same two points on two different panoramic images: Image A and Image B. Any panoramic image in the scene can be used - scans, 360 video frames and 360 images.
Stereo measurements are performed in 3D View in 2D Panoramic display mode. Starting a stereo measurement switches to this mode automatically.
A scene needs at least 2 panoramic images. With fewer, Stereo is disabled in measurement type list.
Instead create a dedicated work zone with a clear name to store measurements in one place or save them to the same work zone where associated data is stored.
Restrictions
- Panoramic images must be well aligned in the 3D coordinate system
- 3D measurements will be linear measurements only
- Image A and Image B must be two different panoramic images
Import 360 Images
360 images are imported with Cintoo Connect, as described in Import & Display 360° Images (Beta):
- Place 360 images in a single folder together with a CSV file listing their position and orientation, in same coordinate system as scans.
- In a work zone, choose 360° Image via Resource button in Resource Explorer, via 360° Image / Video button in 360 Edition Explorer or via Add menu on the top right - or click Prepare & upload on 360° Images tile in Data tab. Cintoo Connect launches.
- Click Select 360 Images and select the CSV file. Cintoo Connect reads 360 images it lists from the same folder. Click Import.
Create Stereo Measurement
- Optionally, select a panoramic image to use it as Image A - in any explorer, such as Resource Explorer or 360 Edition Explorer, or directly in 3D View. Otherwise, Cintoo uses panoramic image nearest to camera.
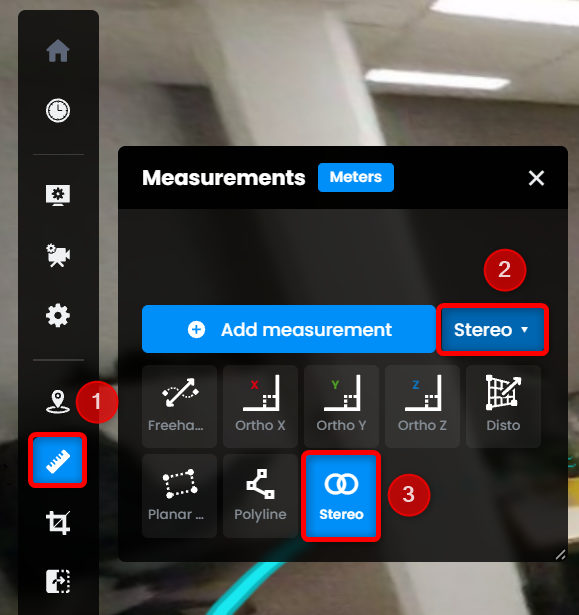
- Click on Measurements icon on the sidebar, select Stereo in measurement type list and place the measurement.
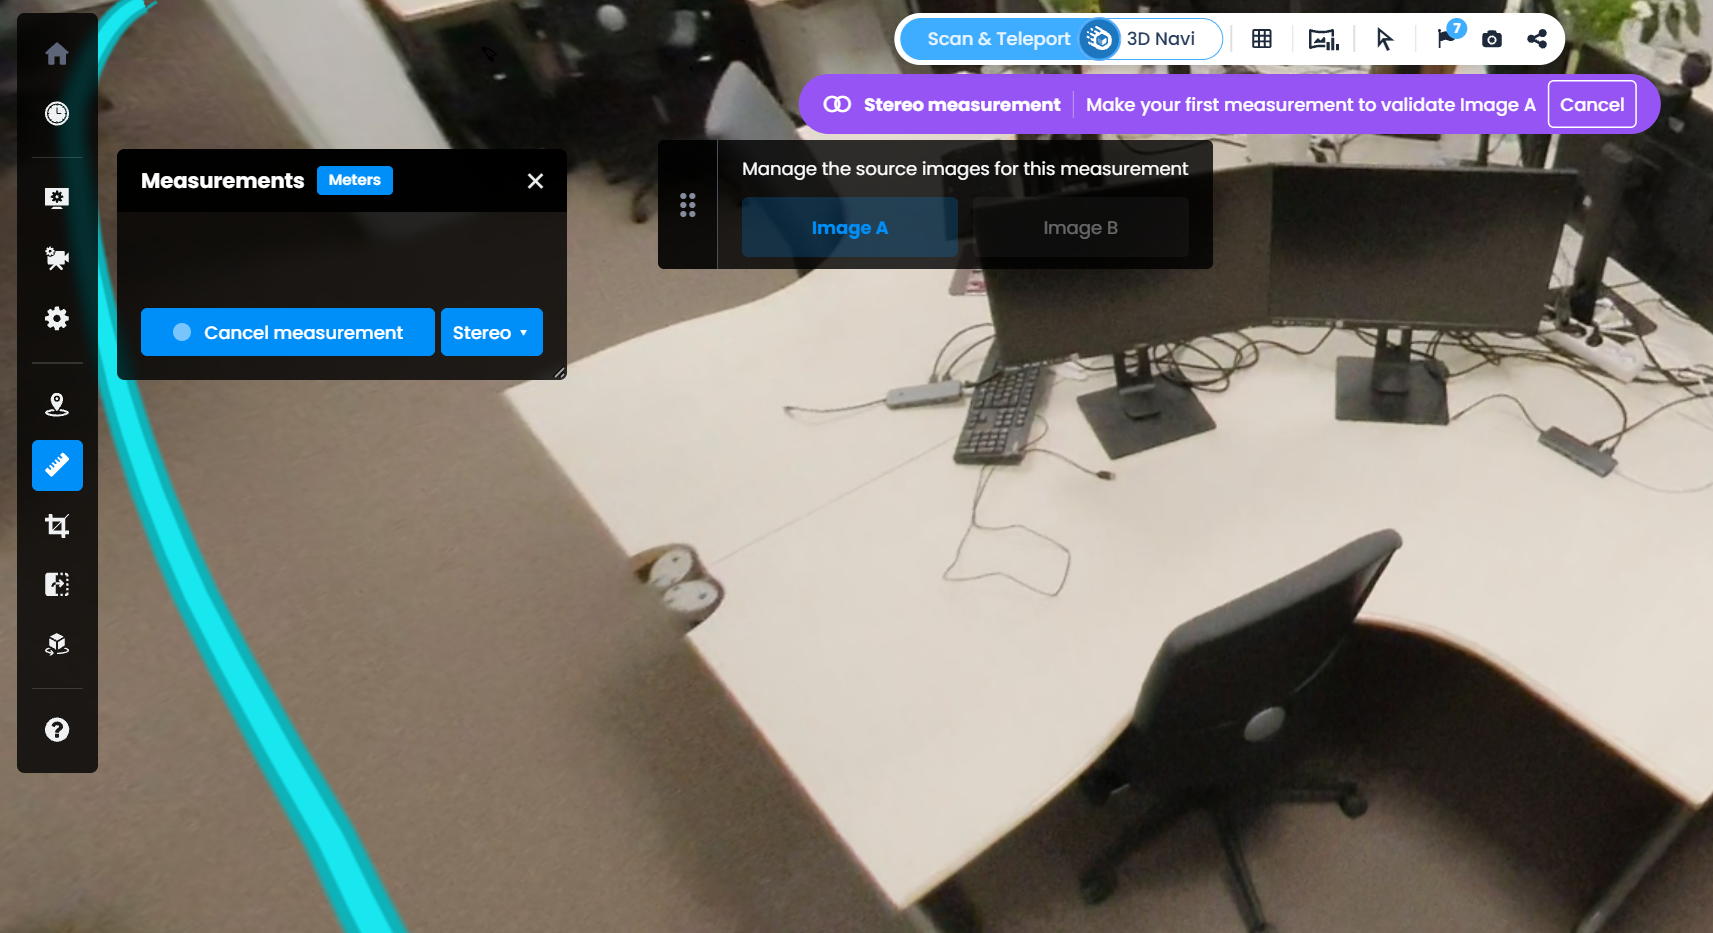
- Cintoo opens Image A in 2D Panoramic mode and shows two guides:
- Image A / Image B toolbar at top of 3D View - active image is highlighted. Image B stays disabled until Image A is validated.
- Stereo measurement help chip with next step to do, Cancel and Done buttons.
- Click 2 points that correspond to a desired linear measurement to validate Image A.
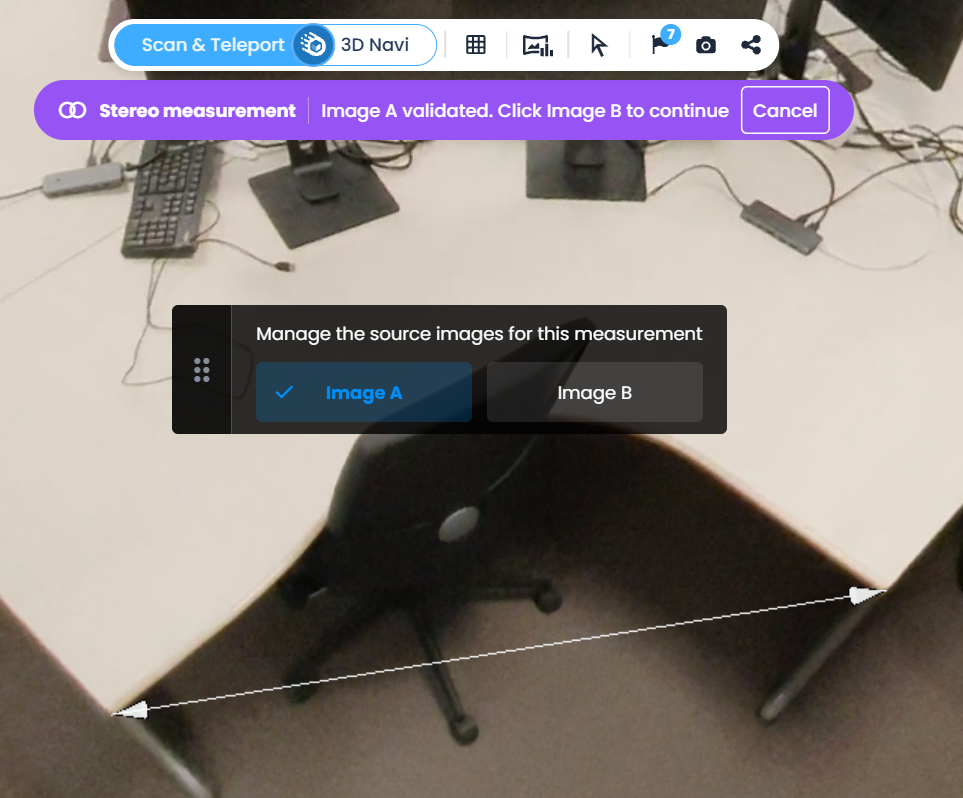
Once validated, check mark next to Image A is displayed.
- Make a measurement for Image B. Points are always placed on panoramic image currently displayed, so any panoramic image other than Image A can be used. A neighboring 360 image is proposed by default.
Click same 2 points on Image B. Measurement is computed and its length is displayed on the segment.
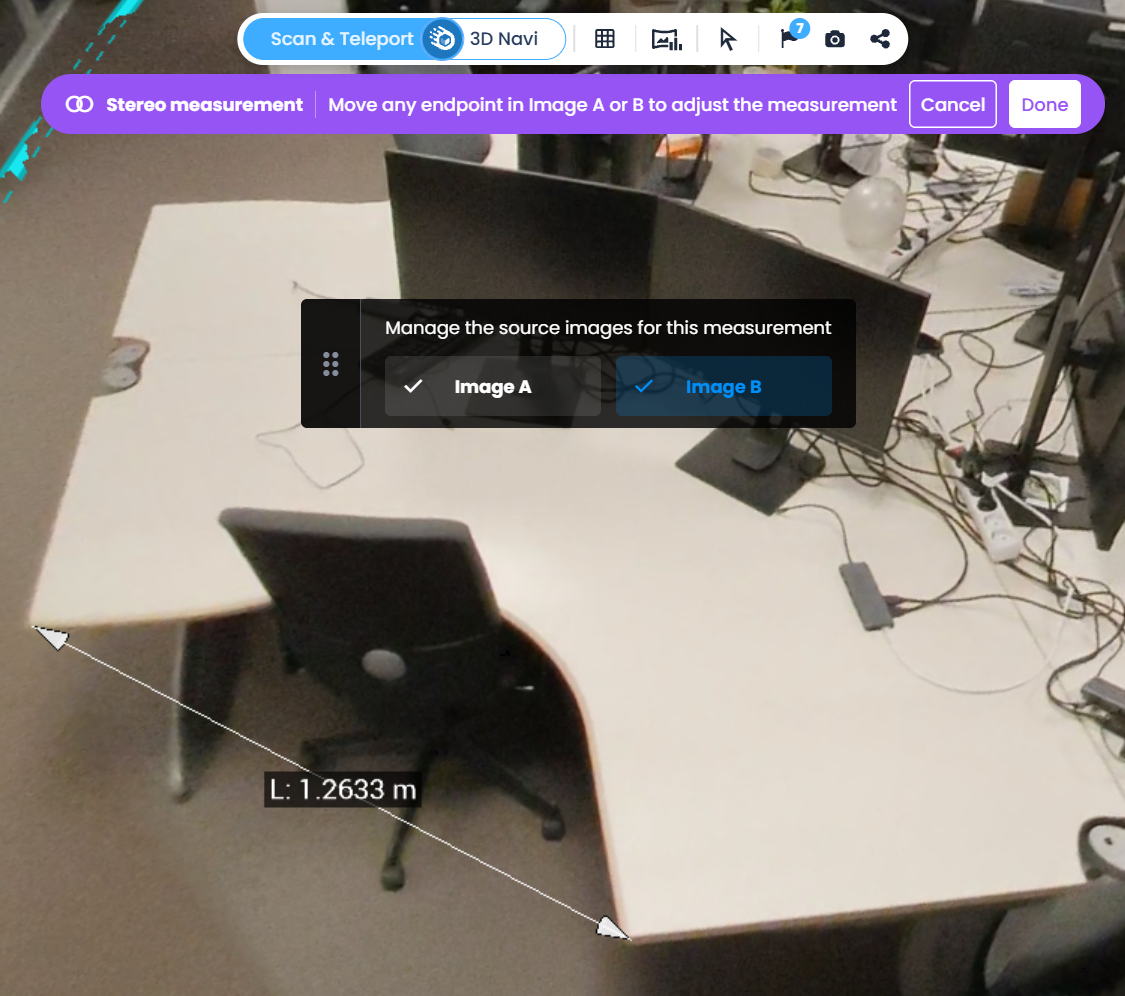
- To adjust measurement, move any endpoint in Image A or Image B by clicking on it and placing with mouse. Click a validated image in toolbar to go back to it. A new segment placed on another panoramic image replaces segment of active image.
- Click Done in help chip to save measurement. Done appears only once measurement is computed. Cancel discards measurement in progress.
 Note: while stereo measurement is in progress, display mode can be changed or camera moved freely. Placed points are kept and shown again on return.
Manage Stereo Measurements
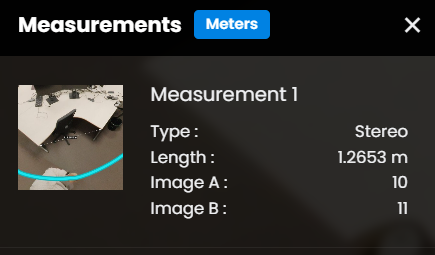
- All linear measurements are listed in Measurements List. Stereo measurements show Stereo as Type, their Length and names of Image A and Image B.
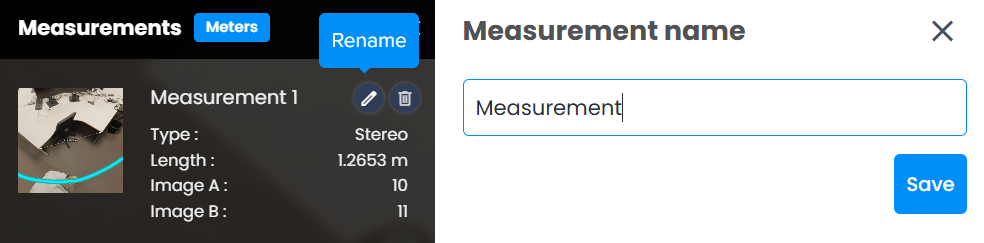
- Measurement Name is editable at any time by clicking on Rename
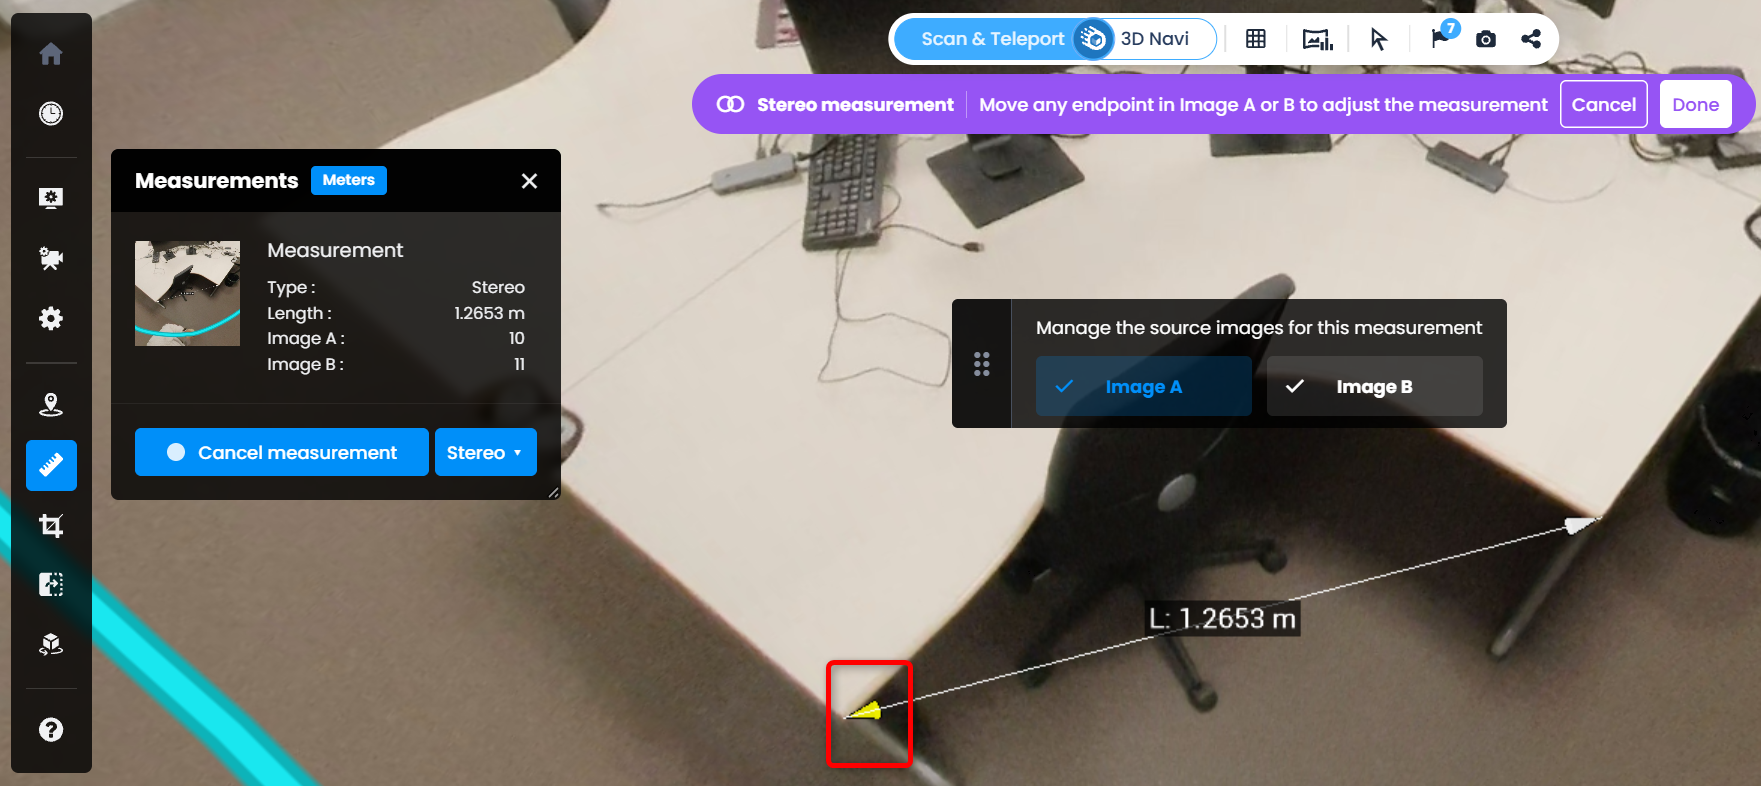
- To adjust a saved stereo measurement, click its measurement sprite in 3D View, move any of its four endpoints and click Done.
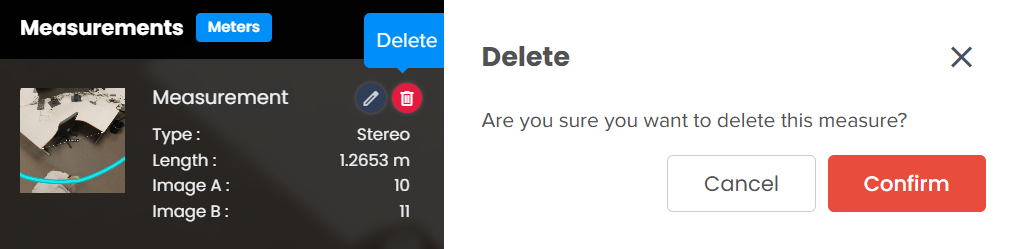
- Deleting a measurement can be done with Delete button corresponding to each measurement
Exporting List of Measurements
- Go to Report tab
- Make sure that Measurements is selected as part of Activities that are displayed and exported

- Each measurement is listed in the tab. When clicking on one of them, see the thumbnail and it's possible to open the measurement in 3D View by clicking on 3D View button
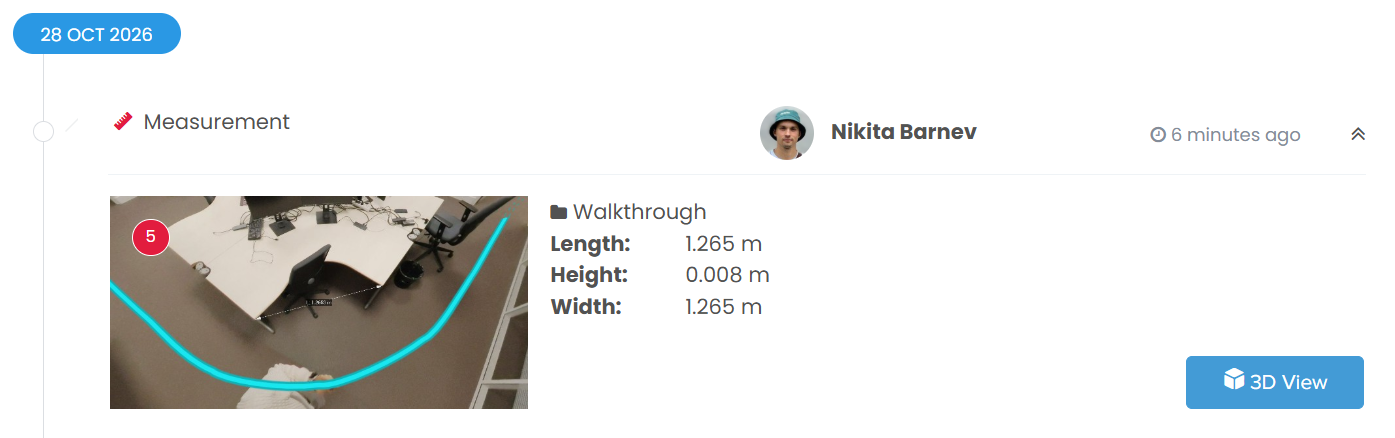
- To export click Export as PDF. In PDF report, stereo measurements show their Type, Length and, when available, names of Image A and Image B.

- Generating a report file usually takes a few seconds. It may take longer if there is a lot of data to be published
Was this article helpful?
That’s Great!
Thank you for your feedback
Sorry! We couldn't be helpful
Thank you for your feedback
Feedback sent
We appreciate your effort and will try to fix the article